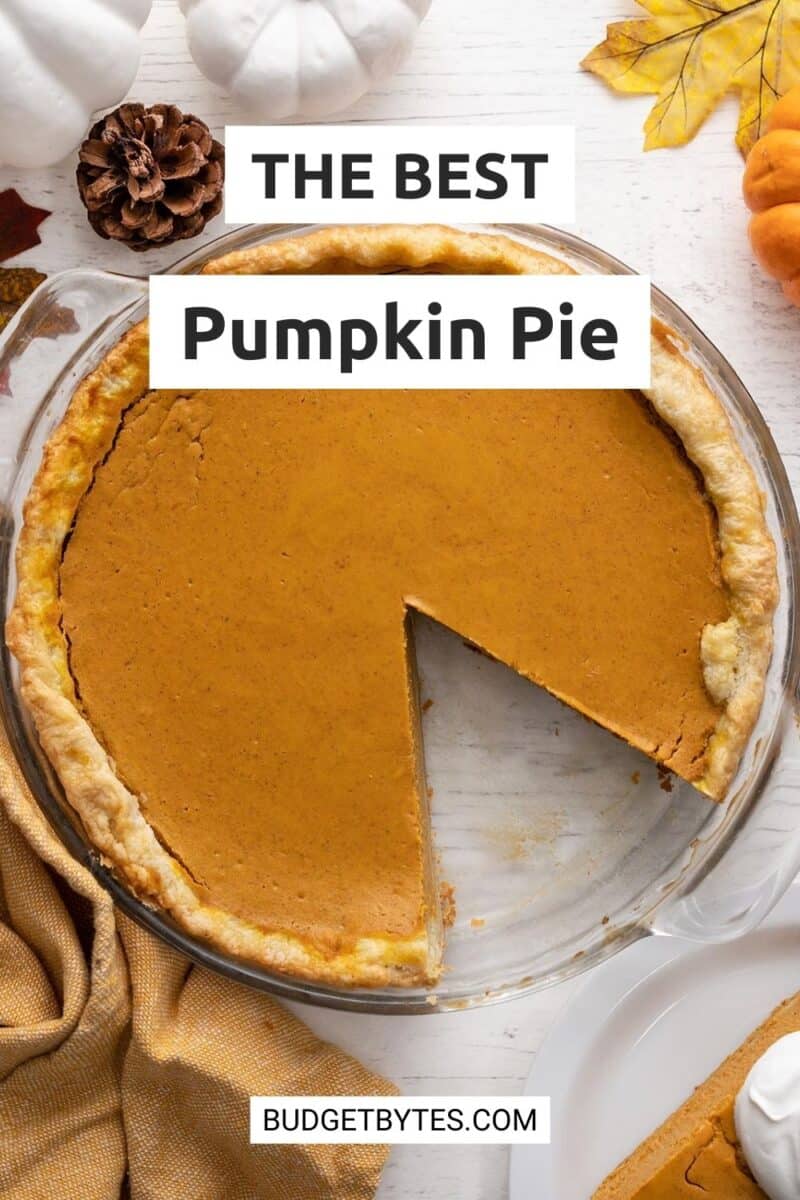

If you’re thinking about making pumpkin pie for Thanksgiving this year, I have a recipe for you that’s simple but decadent. With a few of my favorite tricks, you can produce the silkiest pumpkin pie ever with ridiculously bold flavors. This pumpkin pie recipe is so much better than store-bought! P.S. I even convinced Beth that the extra steps I take are worth it, and you know how no-nonsense she is!
All recipes are rigorously tested in our Nashville Test Kitchen to ensure they are easy, affordable, and delicious.
Ingredients for Pumpkin Pie
This pumpkin pie recipe doesn’t require fancy ingredients to create bold flavor. Here’s what you’ll need to create the most amazing homemade pumpkin pie ever:
- Pie Crust: If making a homemade pie crust intimidates you or you just don’t have time with all of the holiday chaos, you can use a store-bought pie shell for this recipe. OR you can go all-out and make our 3-Ingredient Pie Crust from scratch.
- Pumpkin Purée: Canned puréed pumpkin is the base for this pie. For the best results, we recommend Libby’s pumpkin purée because it has a lower moisture content and uses 100% pumpkin, rather than a mix of pumpkin and other squashes like some other brands. But if you have to go the budget route, this recipe can make even lower quality pumpkin taste amazing!
- Brown Sugar: Brown sugar sweetens the pie with a rich, warm flavor.
- Spices: A simple mix of cinnamon, ginger, nutmeg, and salt give this pumpkin pie its classic fall flavor. We cook the spices in the pumpkin purée first to make sure their flavor is extra bold!
- Vanilla Extract: A hint of vanilla adds to the custard’s creamy flavor.
- Sour Cream & Whole Milk: These two dairy products give the pie a rich and creamy flavor.
- Eggs: Eggs combine with the diary to create the classic soft, custardy texture of the pumpkin pie.
How to Keep Pie Crust From Getting Soggy
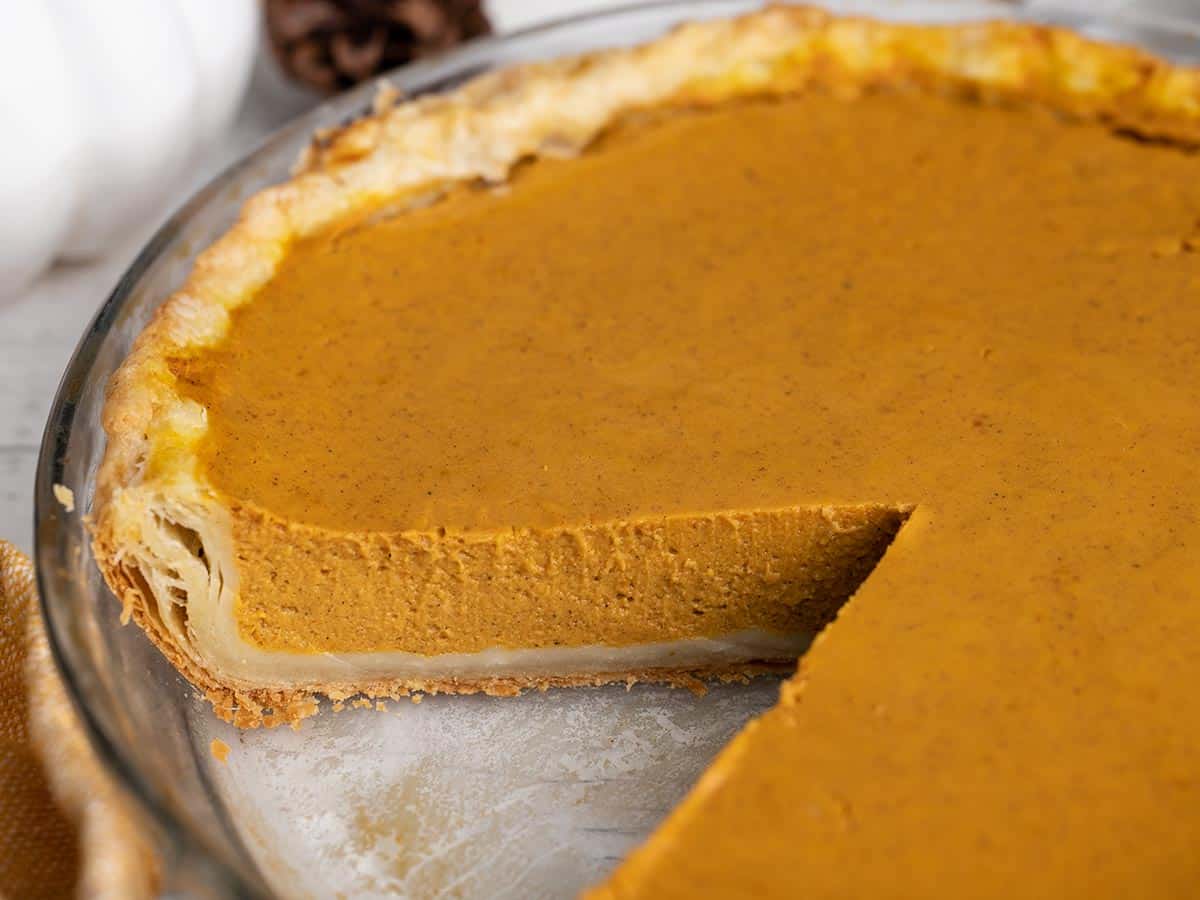
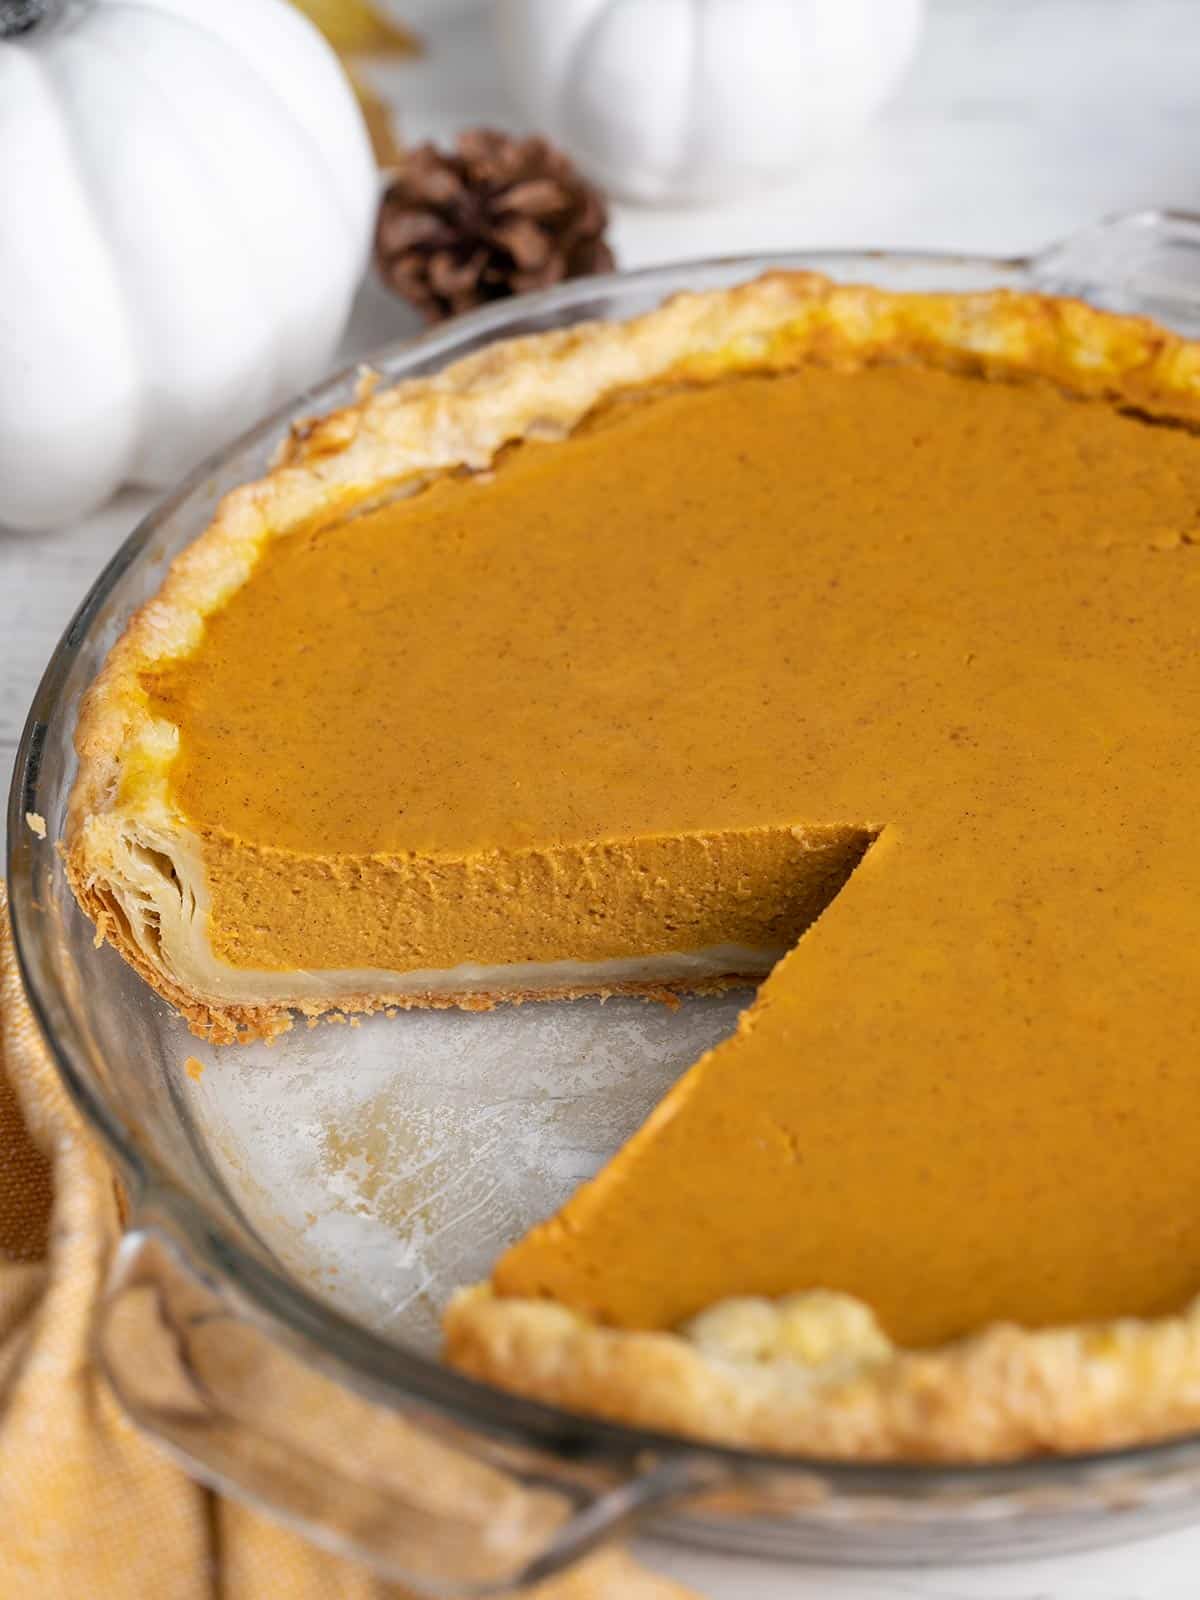
Loads of folks will tell you that you must blind-bake or pre-bake your pie crust so it stays crispy when filling it with pumpkin puree. Feel free to do that if you wish, but I never do, and as you can see from the picture of the crispy, golden, flaky bottom crust above, I get great results.
My trick is to place a rack on the lowest part of the oven. Then I put a sheet pan on the rack and place a cast iron pan in it, bottom side up. (If your cast iron pan does not lay flat, just bake the pie in the pan.) I preheat for an hour. The bottom heating element supercharges the cast iron pan, which holds on to heat like you did your first hundred-dollar bill. Then I bake the pie on top of the over-turned cast iron. That heat focuses on the bottom of the pie, creating the crispiest of crusts. In addition, the sheet pan will collect any run-off juices so the oven doesn’t start to smoke.
Tips for the Best Pumpkin Pie
A few extra small steps can take your pumpkin pie to the next level. Here are a few tricks to make sure your homemade pumpkin pie is the best pumpkin pie you’ve ever had:
- Use high-quality pumpkin, which has less water and does not use other squashes as filler, creating the best pumpkin flavor.
- Cook the spices, pumpkin purée, and sugar before making the pie filling to bloom the spices and intensify their flavor, and caramelize the sugars for a deep caramel-like flavor.
- Blend the pie filling instead of just whisking together to create a silky smooth texture.
- If the pie crust begins to brown too much, simply loosely cover with foil to prevent further browning.
- Avoid opening the oven door too much, which can lead to uneven temperatures and cracking on the surface of the pie.
- Don’t overcook the pie, which can also lead to cracks in the surface. Pull the pie out when the center still looks slightly jiggly. The pie will continue to cook through via carryover cooking after it is removed from the oven.
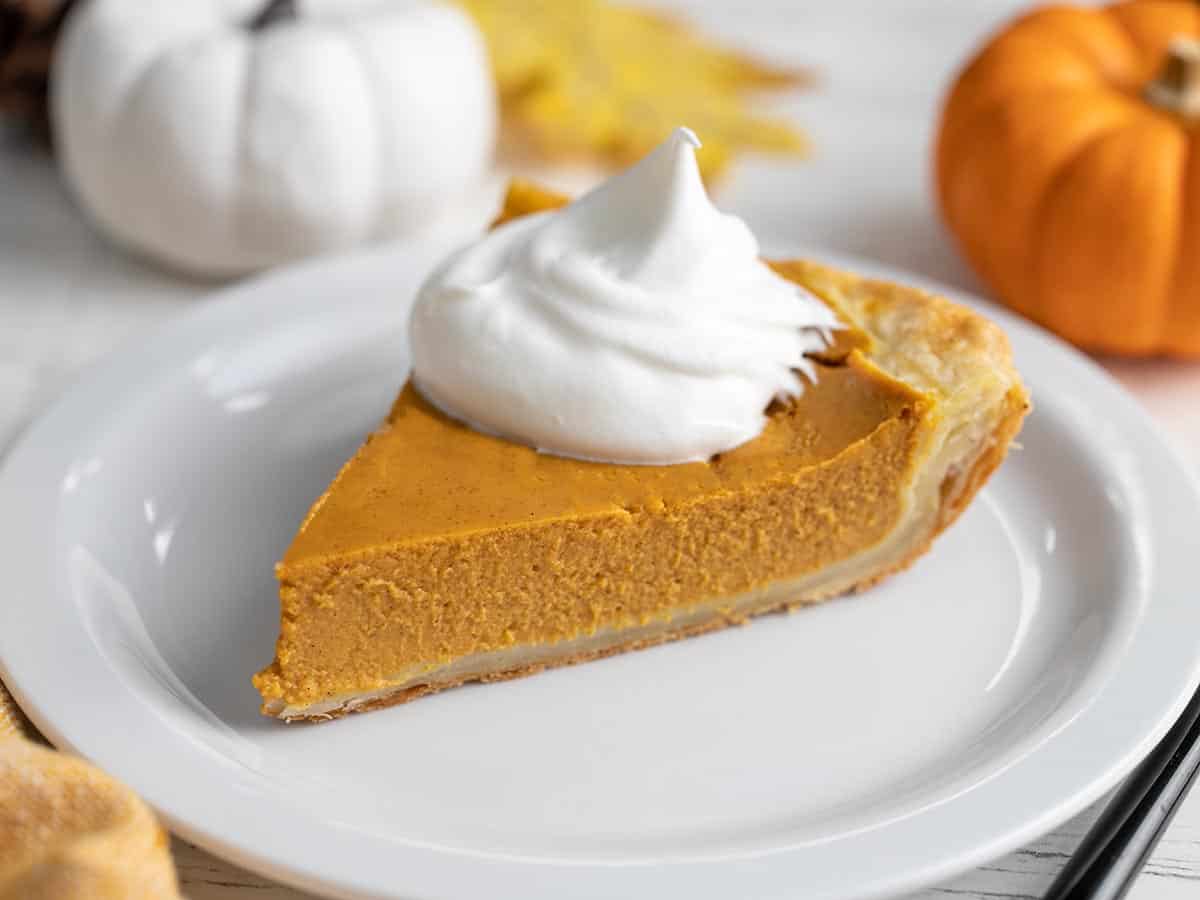
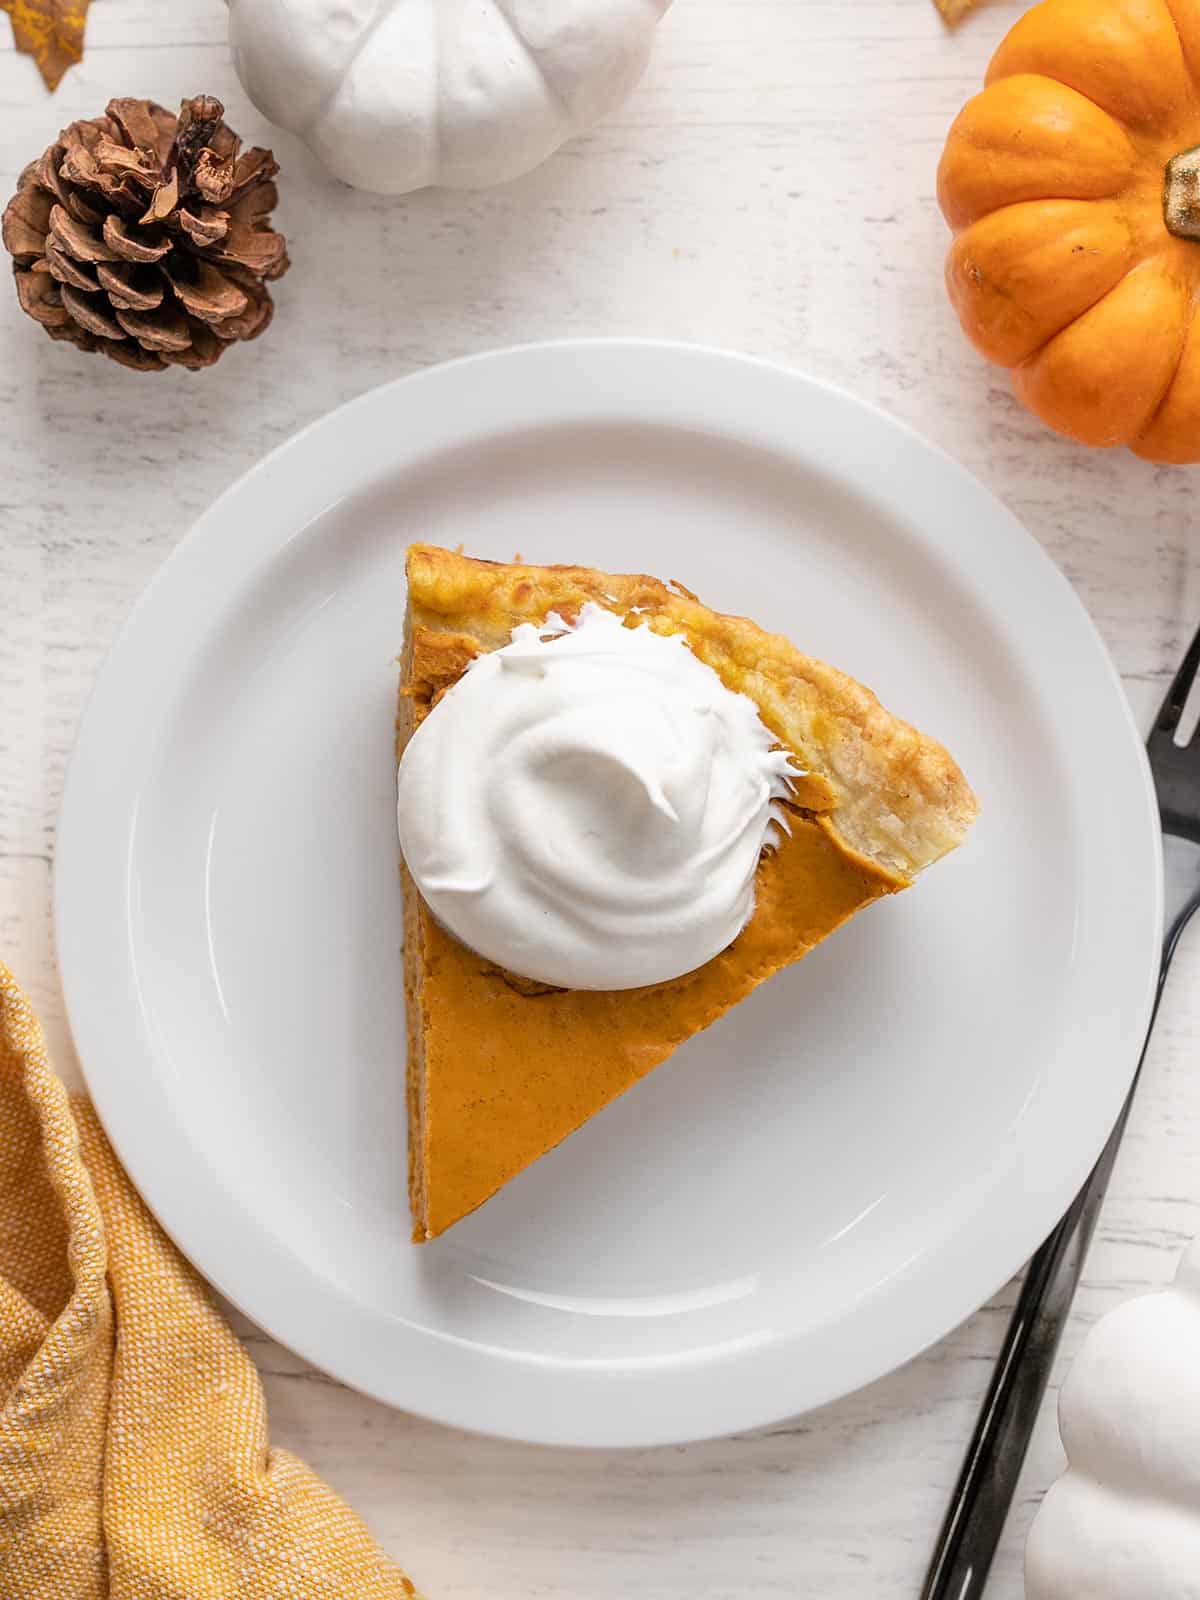
How to Serve Pumpkin Pie
Pumpkin pie can be served at room temperature or chilled, it’s simply a matter of personal preference. Just make sure not to leave the pumpkin pie at room temperature for more than two hours as the egg and dairy-rich custard can become a food safety hazard. Pumpkin pie is often served with a dollop of fresh whipped cream on top, which provides the perfect airy contrast to the rich pumpkin custard.
How to Store Pumpkin Pie
Because pumpkin pie contains a large amount of eggs and dairy, it does need to be refrigerated. Be sure to let the pie cool and set at room temperature for about an hour (no longer than two hours) before transferring to the refrigerator. This will prevent condensation and preserve the texture of the pie. The pie will stay good in the refrigerator for three to four days.
How to Make Pumpkin Pie Ahead of Time
Pumpkin pie is a great candidate for preparing in the days before Thanksgiving. You can make it a day or two ahead of time and keep it refrigerated until the big day. It can be served chilled or you can allow it to warm slightly at room temperature for about an hour (no longer than two hours) before serving.
Pumpkin pie can also be frozen! After baking the pumpkin pie, let it cool at room temperature for an hour, then transfer to the refrigerator to chill completely. Once chilled, wrap the pie in several layers of plastic to prevent air exposure and freezer burn, then freeze for up to three months. The pie can be thawed in the refrigerator overnight before serving.
Pumpkin Pie
Cost $7.49 recipe / $0.62 serving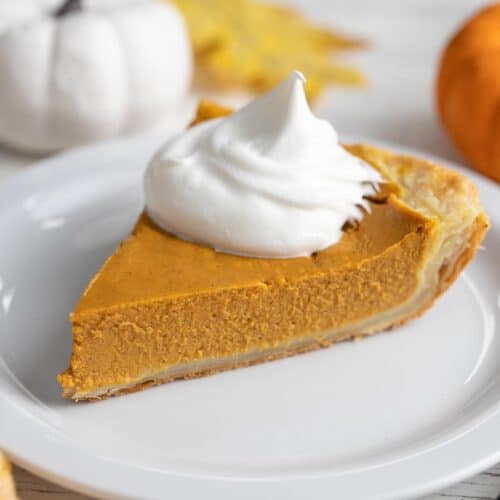
Ingredients
- 1/2 recipe 3-Ingredient Pie Crust* ($1.17)
- 1 15oz. can pumpkin purée ($2.79)
- 1/2 cup brown sugar ($0.22)
- 1 1/2 tsp cinnamon ($0.12)
- 1/2 tsp nutmeg ($0.04)
- 1 1/2 tsp ground ginger ($0.03)
- 1/2 tsp salt ($0.04)
- 1 cup sour cream ($1.25)
- 1/2 cup whole milk ($0.25)
- 1 tsp vanilla ($0.58)
- 3 large eggs, room temperature ($0.87)
- 1/4 tsp butter, for greasing ($0.04)
- 1/4 tsp flour for dusting ($0.06)
- 1 tsp heavy cream ($0.03)
Instructions
- Place a rack on the lowest part of your oven. Top it with a sheet pan. Place a cast iron pan, bottom side up, in the sheet pan. Preheat your oven to 400°F. Grease a pie dish with butter, dust it with flour, and place it in your freezer. Dust your work surface and roll your pie dough into a 9 x 3-inch rectangle about 1 1/2 inches thick.
- Place the long side of the rectangle vertically on your work surface. Fold the top short side towards the center of the rectangle so that the short edge touches the center point. Fold the bottom short side over the center so that it touches the outer edge of the top short side. Roll the dough into a 9×3 rectangle and repeat the folding process a second and a third time. Then chill your pie dough.
- Set a medium heavy-bottomed pot over medium heat. Add the pumpkin puree, brown sugar, cinnamon, nutmeg, ground ginger, and salt to the pot.
- Stir the puree constantly until it begins to thicken and sputter and becomes glossy. Remove from the heat and cool for about 10 minutes.
- Once the filling has cooled, add it to a blender with the sour cream and milk. Process until it has lightened.
- Add the vanilla and the eggs to the blender. Mix until the puree is velvety.
- Dust your work surface with flour and roll out the pie dough into a circle that is 16 inches in diameter. Press the crust into the pie plate. Fold the overhanging edges of the dough under to create a thick lip. Dock the pie crust with a fork by puncturing it about 9 to 10 times. Chill the dough for 10 minutes in the freezer.
- Crimp the edges of the pie. Add the pumpkin pie filling. Lightly brush the edges of the crust with cream.
- Place the pie in the preheated 400° oven on top of the overturned cast iron pan—lower the temperature to 350°F. Bake until the outer edges have solidified, but the middle of the pie still has some jiggle, about 50 minutes. Remove the pie from the oven and allow it to cool in a warm spot for at least two hours before serving, so it has time to set.
See how we calculate recipe costs here.
Notes
Nutrition Information
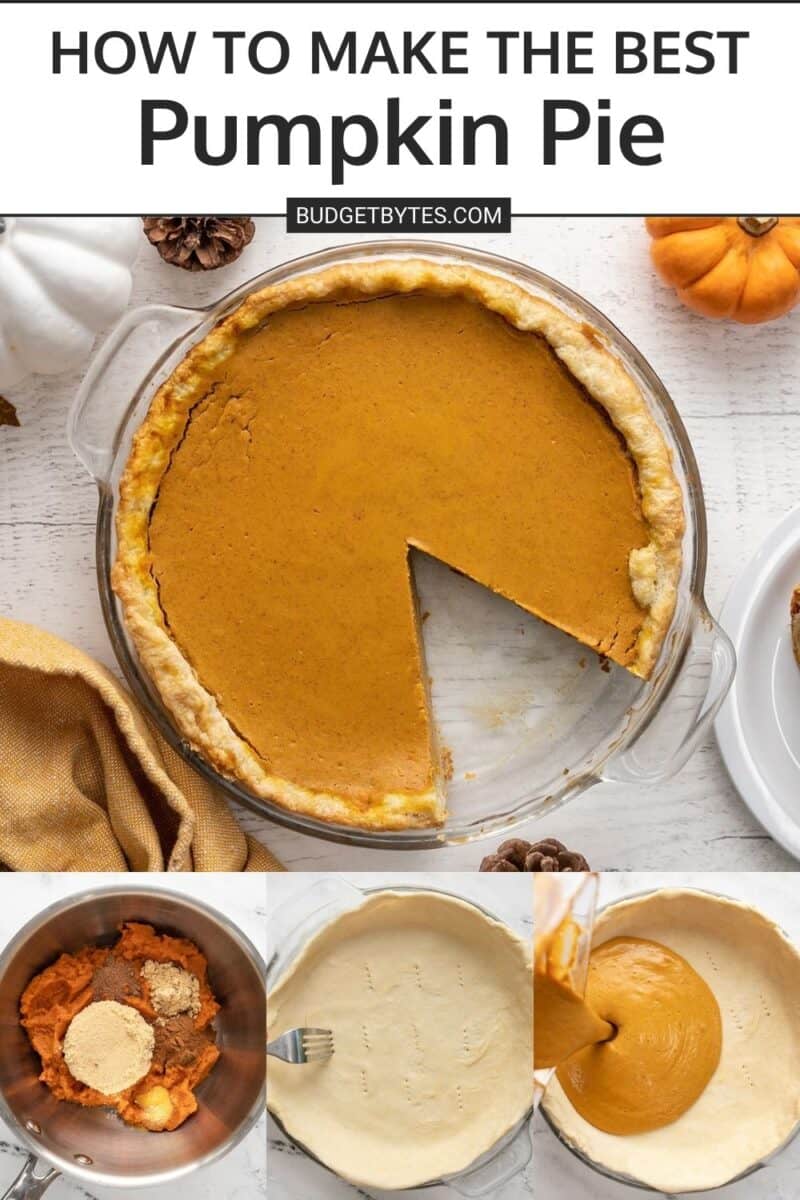
How to Make Pumpkin Pie – Step by Step Photos
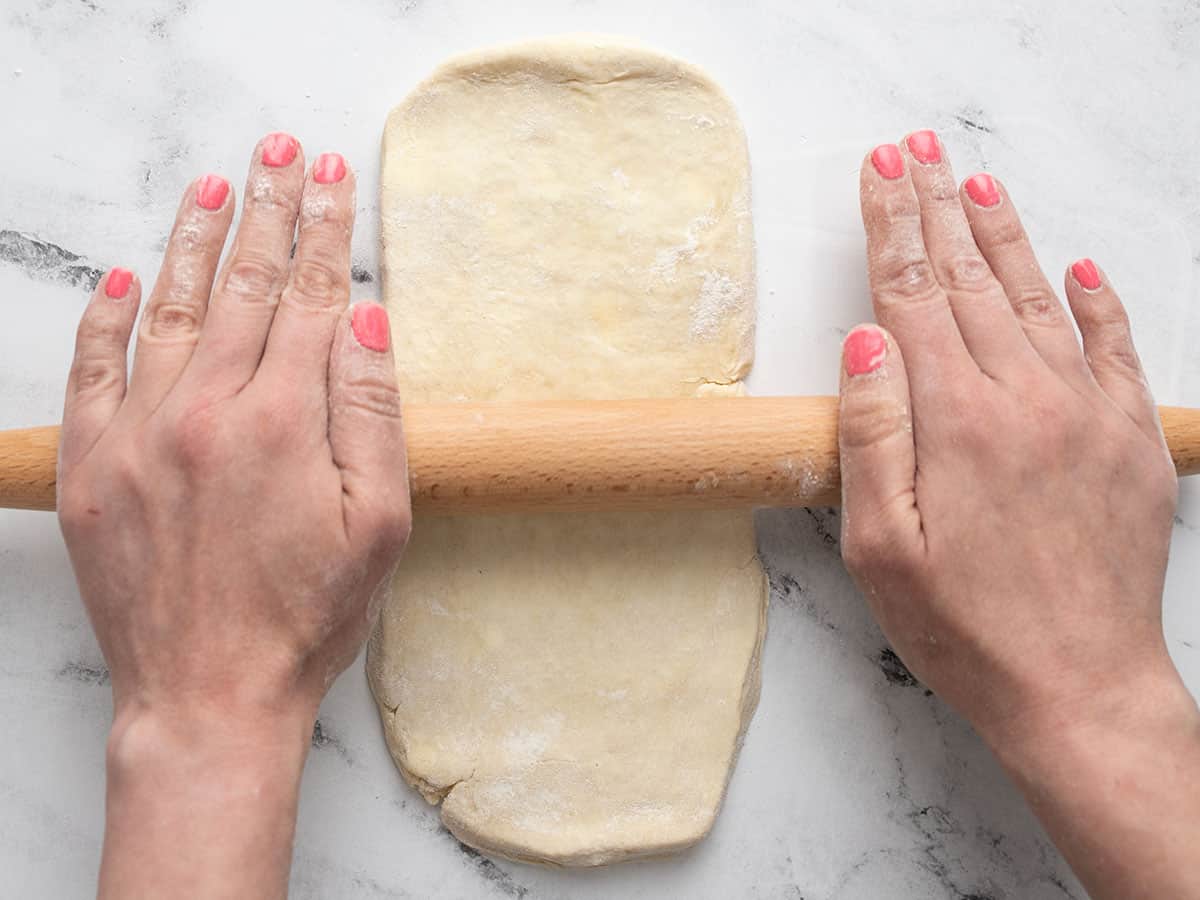
Place a rack on the lowest part of your oven. Top it with a sheet pan. Place a cast iron pan, bottom side up, in the sheet pan. Preheat your oven to 400°F. Grease a pie dish with 1/4 tsp butter, dust it with 1/4 tsp flour, and place it in your freezer. Dust your work surface and roll your 1/2 portion of 3-Ingredient Pie Crust into a 9 x 3-inch rectangle about 1 1/2 inches thick. If you are using a store-bought crust, use a single crust, and mash it into a 9×3-inch rectangle.
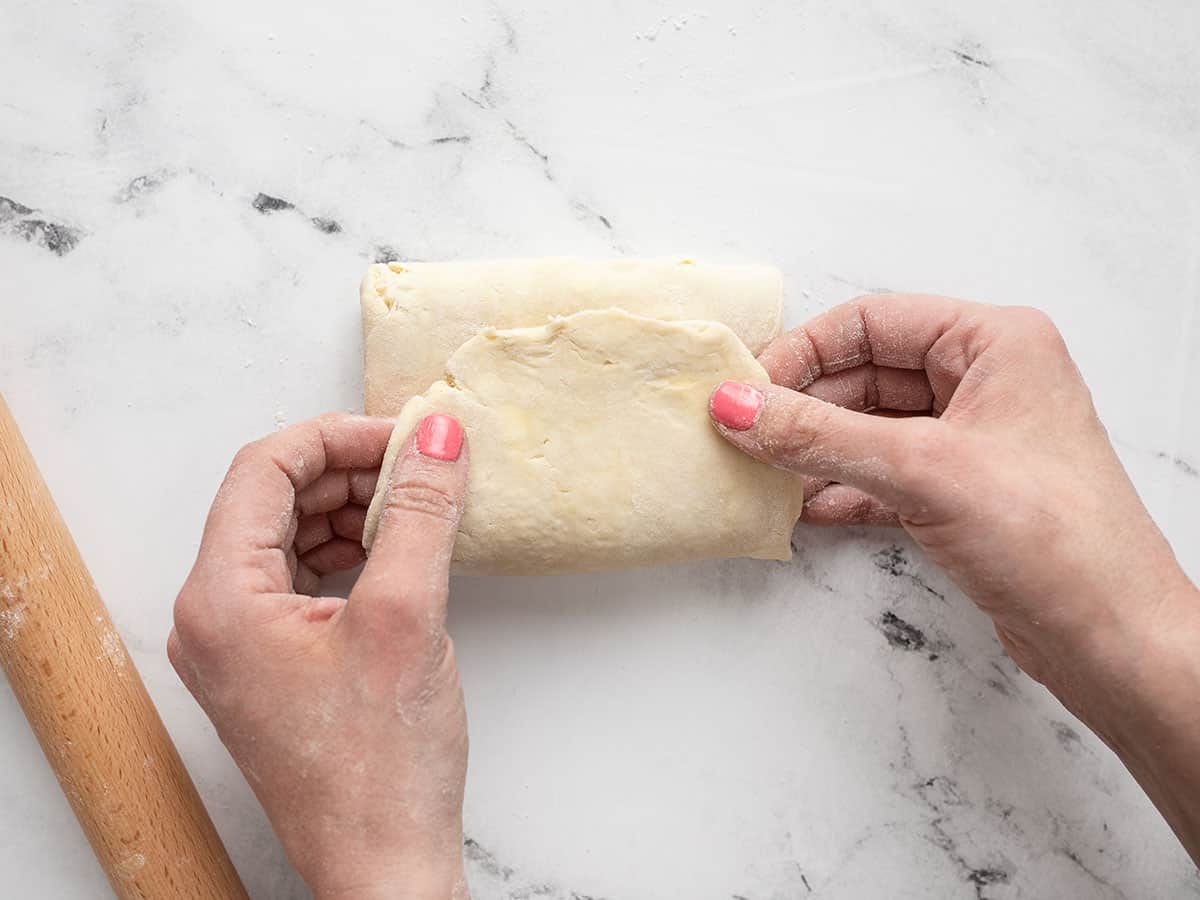
Place the long side of the rectangle vertically on your work surface. Fold the top short side towards the center of the rectangle so that the short edge touches the center point. Fold the bottom short side over the center so that it touches the outer edge of the top short side. Roll the dough into a 9×3 rectangle and repeat the folding process a second and a third time. Then chill your pie dough.
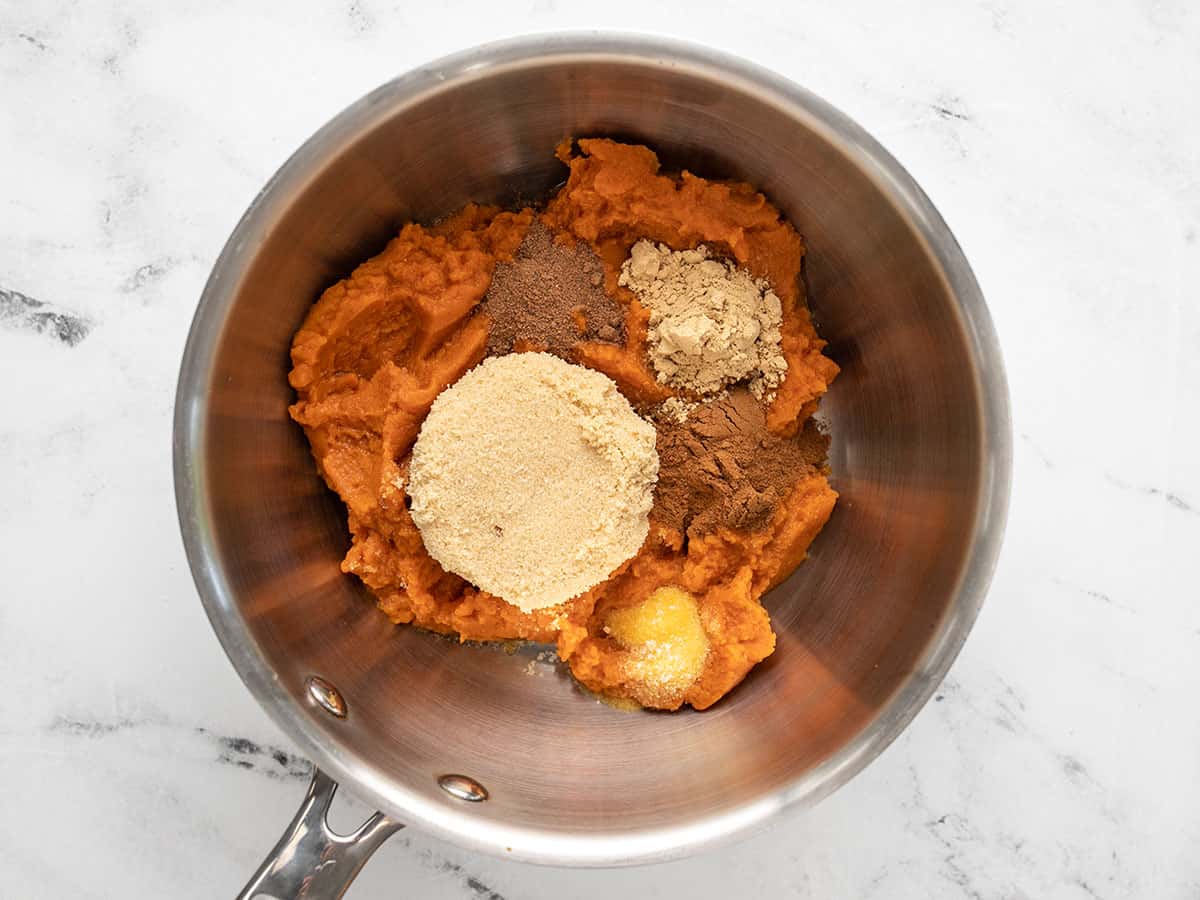
Set a medium heavy-bottomed pot over medium heat. Add 1 3/4 cups of pumpkin puree, 1/2 cup brown sugar, 1 1/2 tsp cinnamon, 1/2 tsp nutmeg, 1 1/2 tsp ground ginger, and 1/2 tsp salt to the pot.
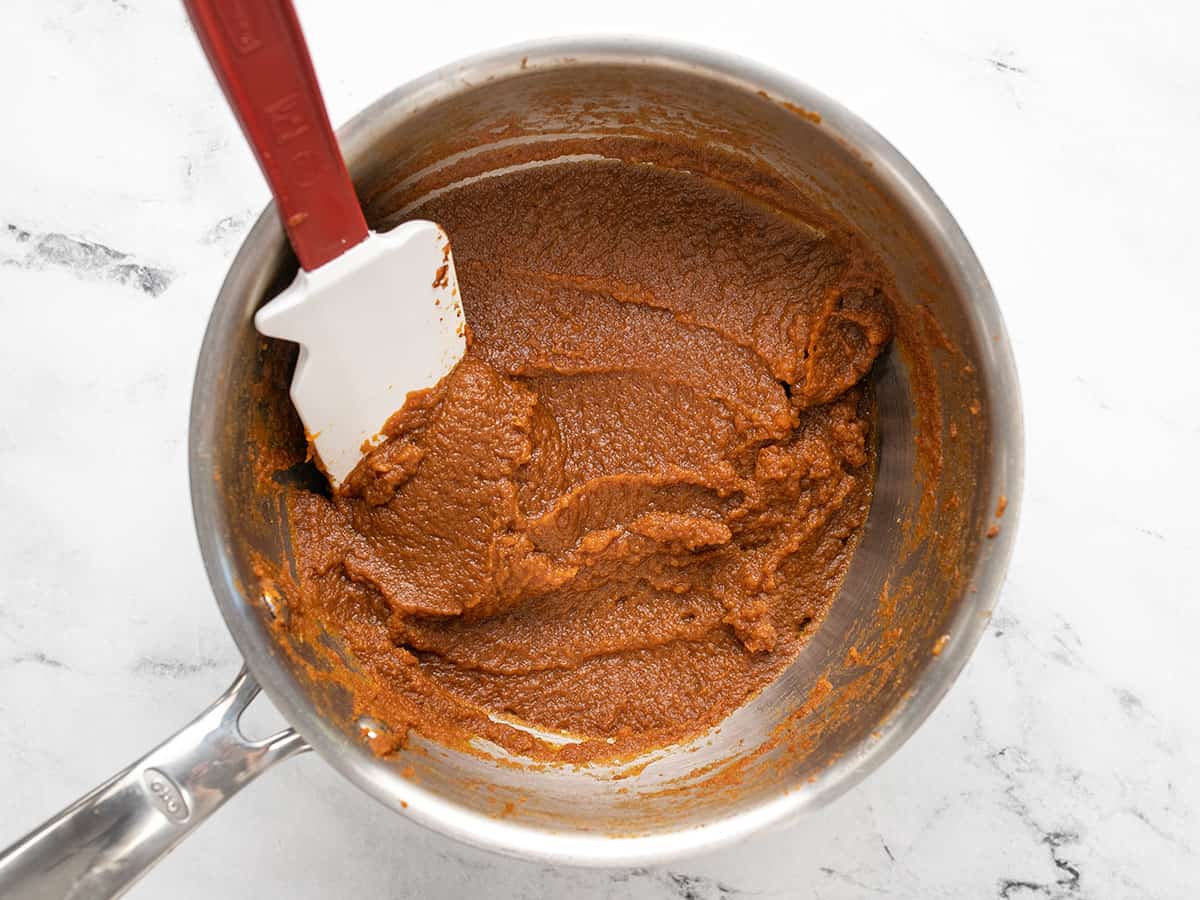
Stir the puree constantly until it begins to thicken and sputter and becomes glossy. Remove from the heat and cool for about 10 minutes.
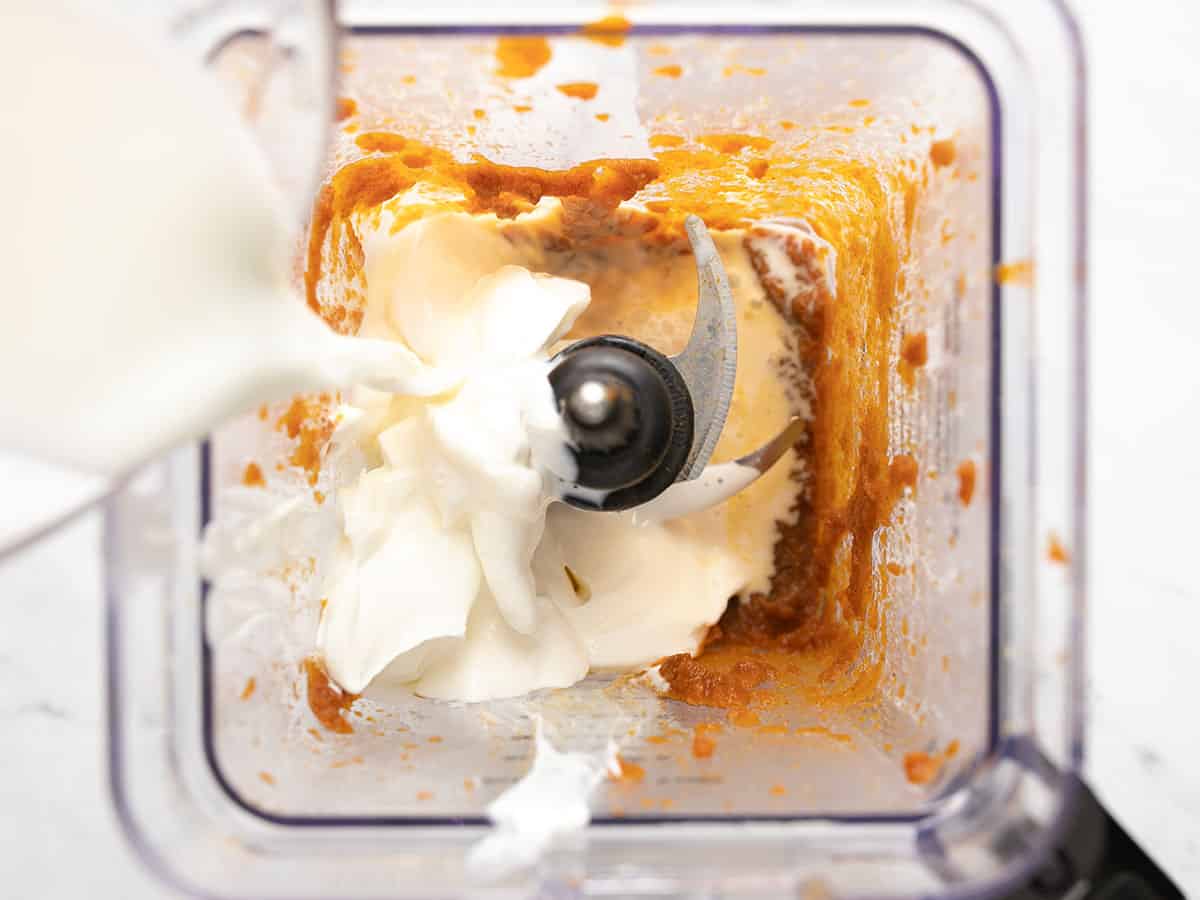
Once the filling has cooled, add it to a blender with the 1 cup sour cream and 1/2 cup milk. Process until it has lightened.
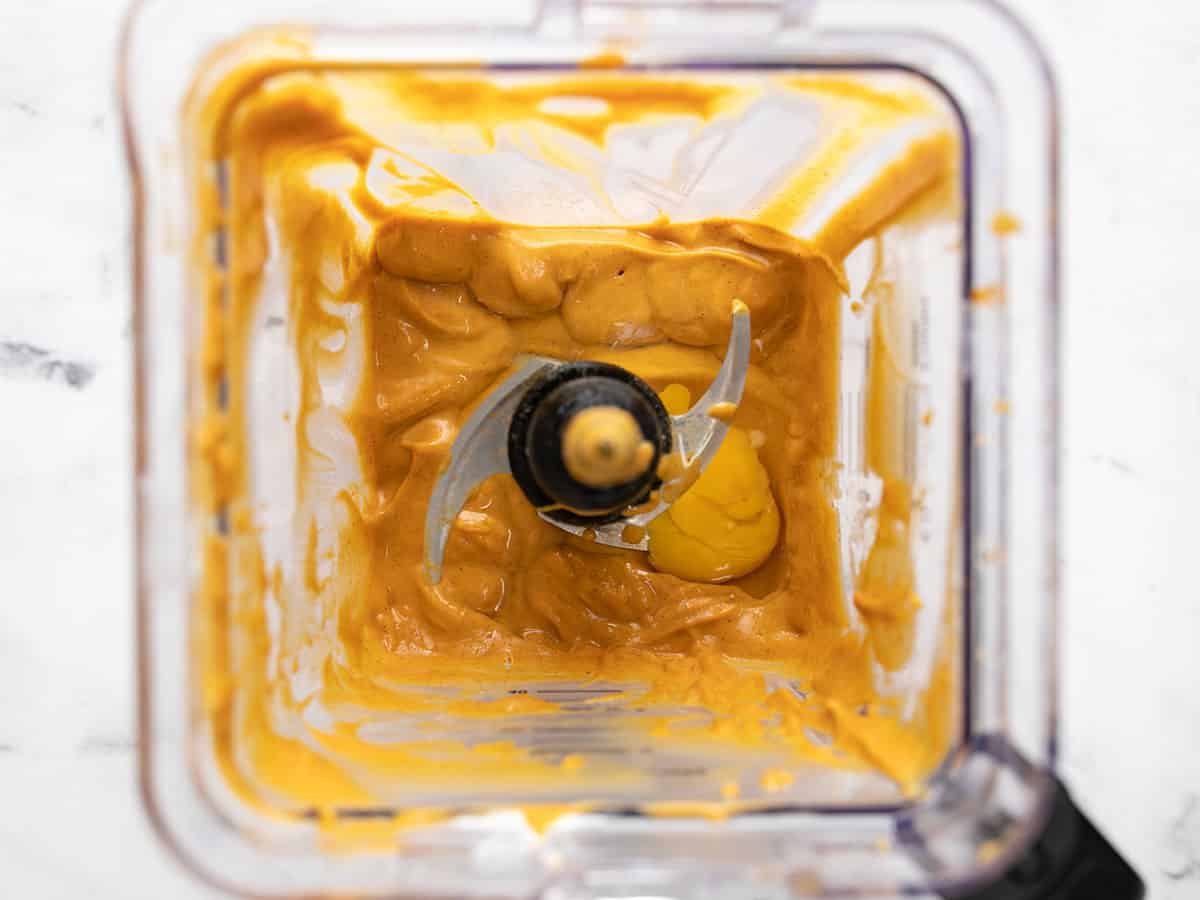
Add the 1 tsp vanilla and the 3 large eggs to the blender. Mix until the puree is velvety.
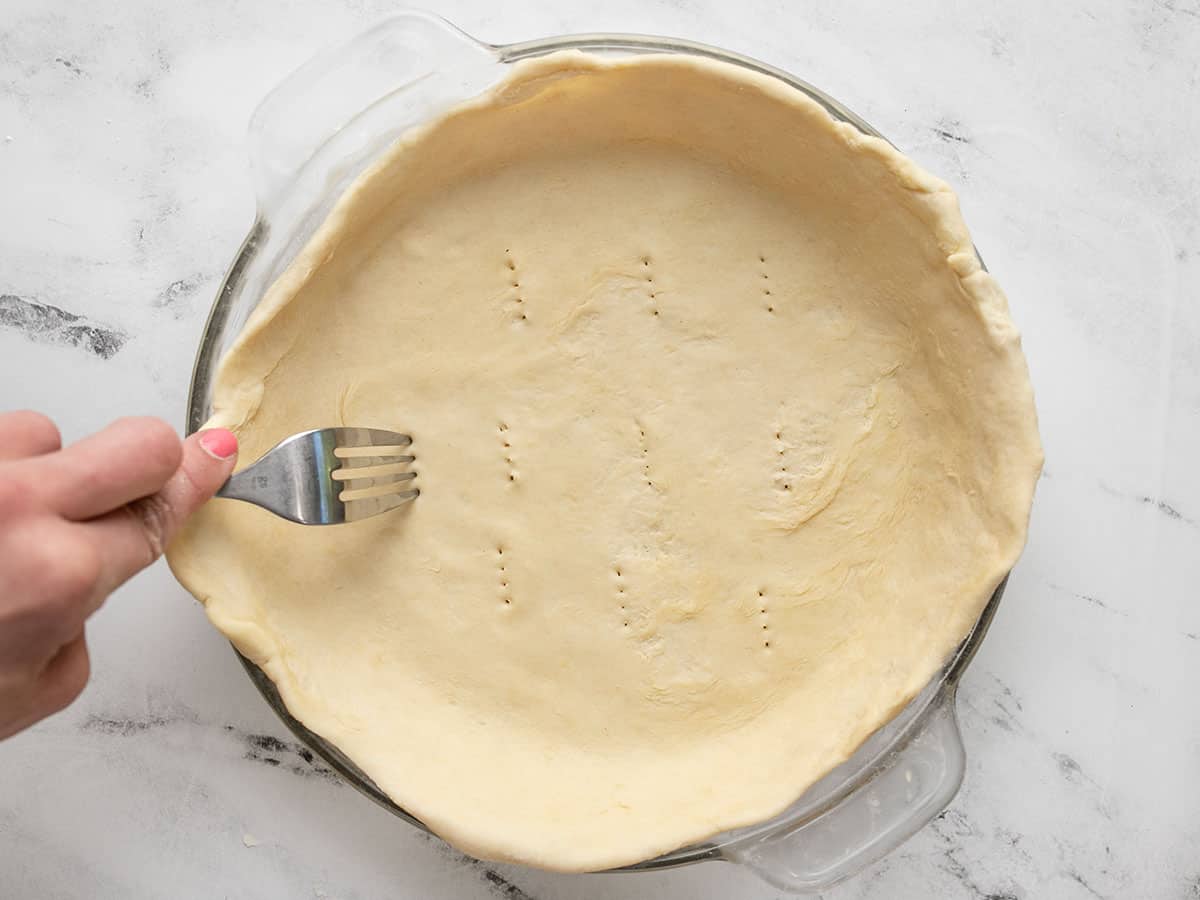
Dust your work surface with flour and roll out the pie dough into a circle that is 16 inches in diameter. Roll the dough circle onto your rolling pin and unfurl it into the greased and floured pie plate. Press the dough into the pie plate. Fold the overhanging edges of the dough under to create a thick lip. Dock the pie crust with a fork by puncturing it about 9 to 10 times. Chill the dough for 10 minutes in the freezer.
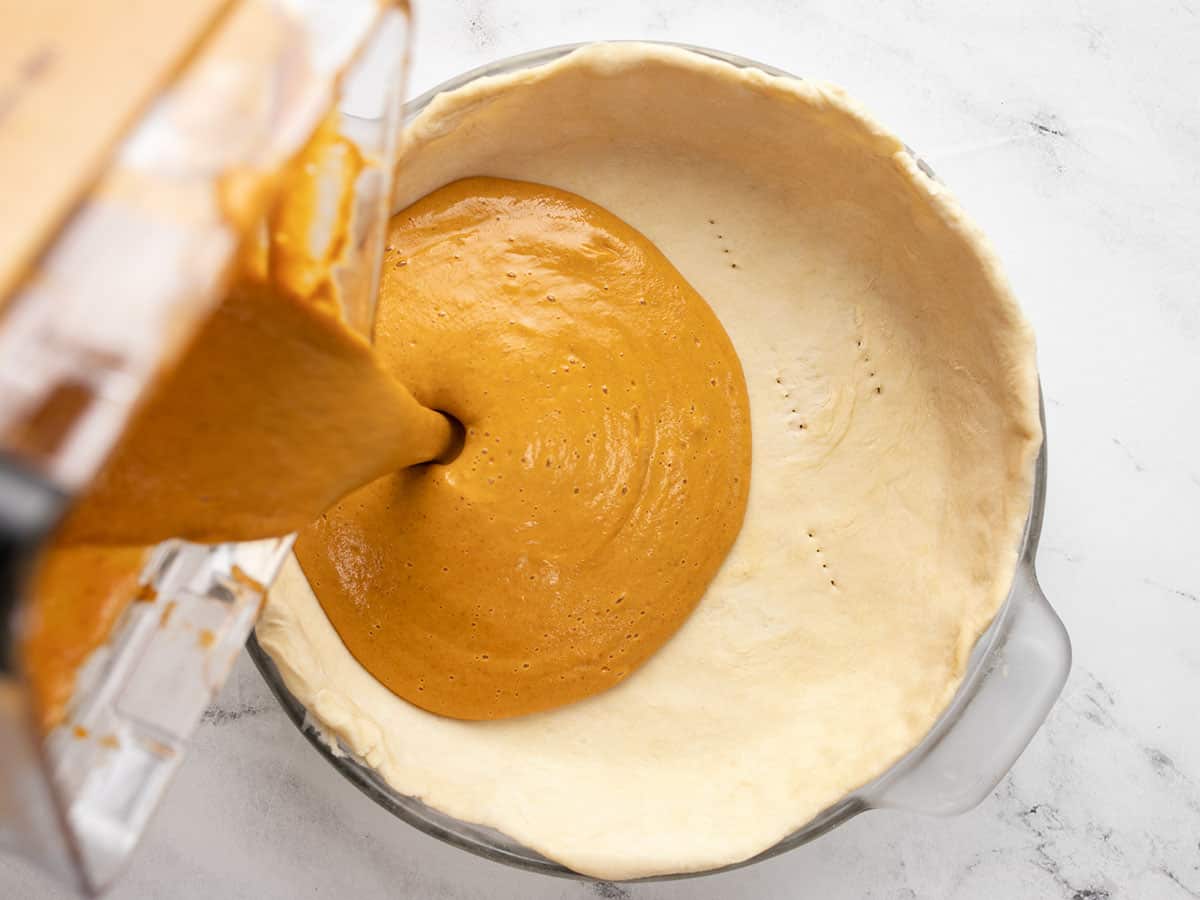
Pour the filling into the pie crust. To ensure there are no bubbles in the puree, allow it to settle for a minute, and then gently pick the pie plate about an inch off the counter and drop it. Continue picking it up and dropping it gently until no more air bubbles come to the surface of the puree.
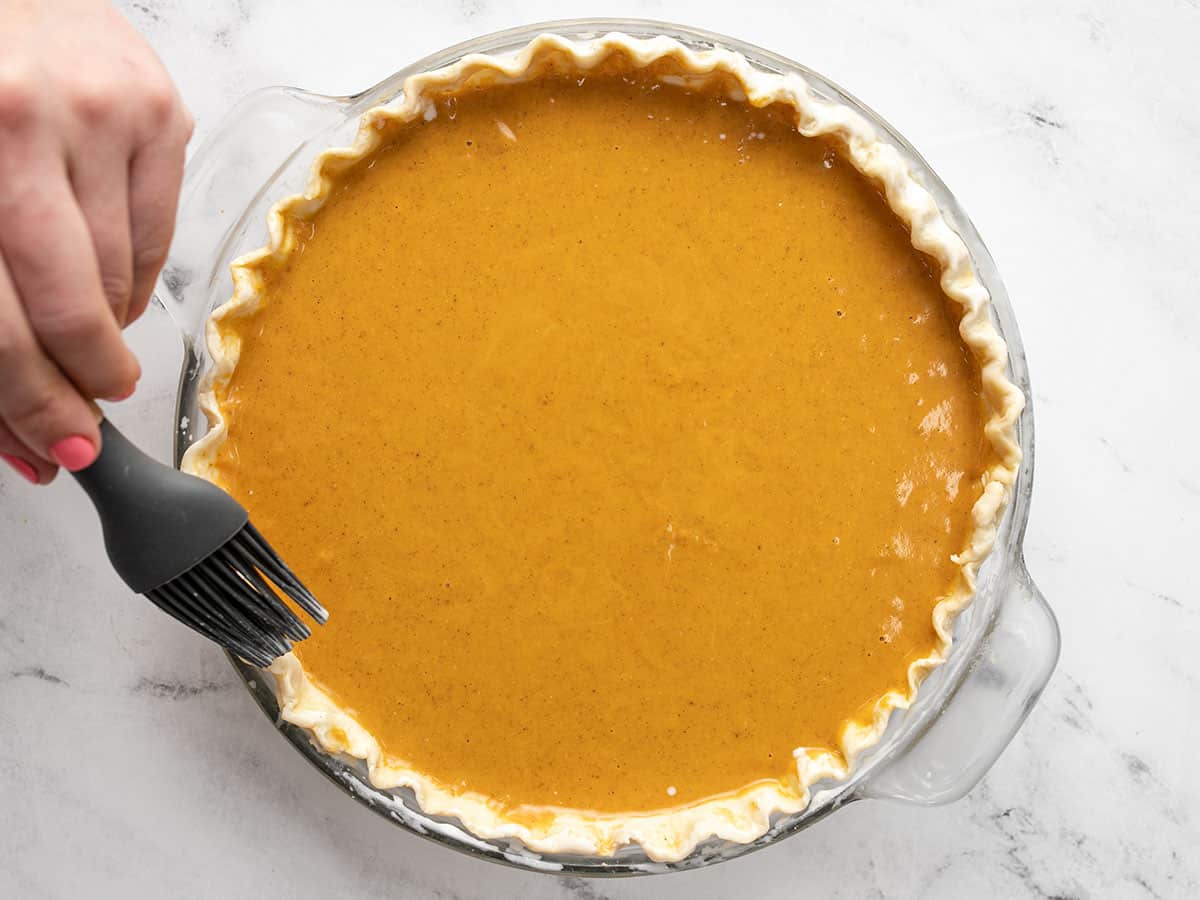
Crimp the edges of the pie. Add the pumpkin pie filling. Lightly brush the edges of the crust with 1 tsp cream.
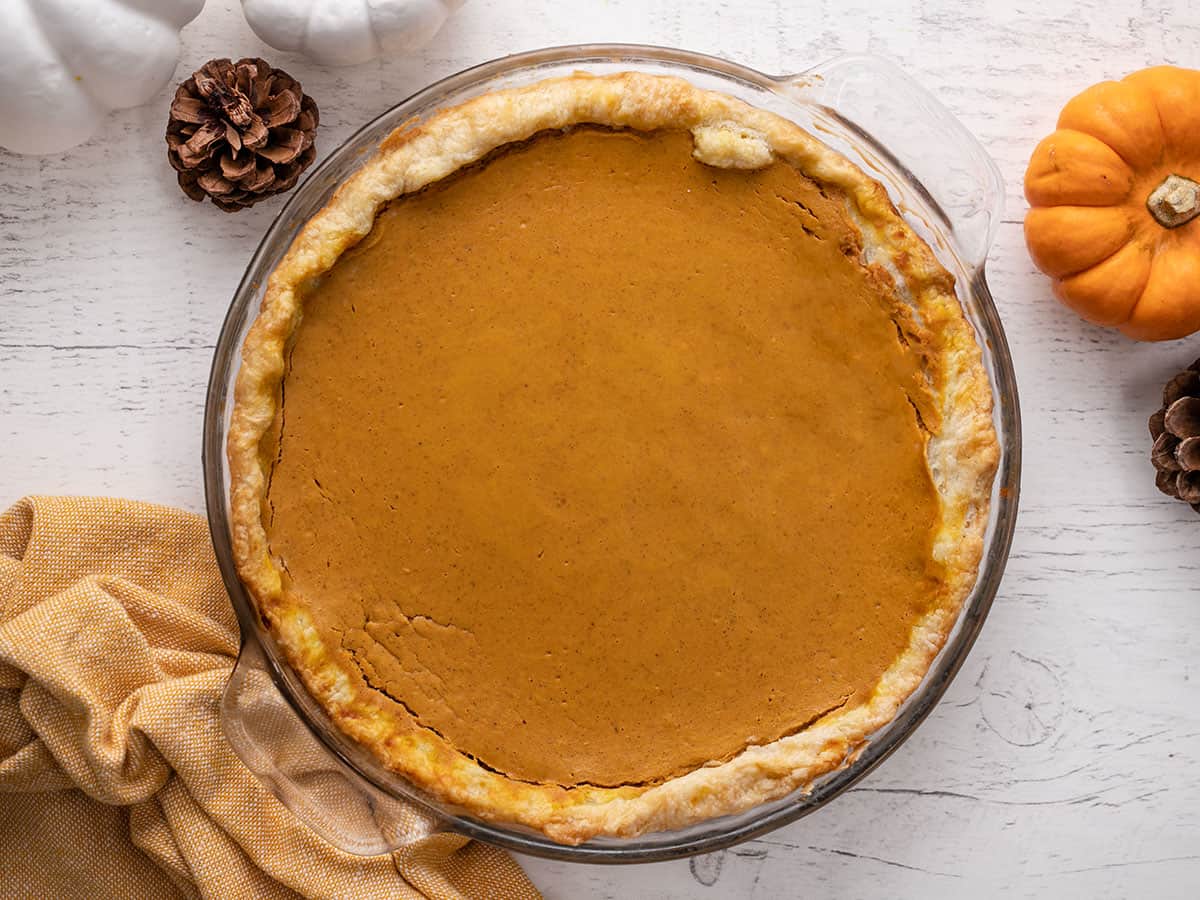
Place the pie in the preheated 400° oven on top of the overturned cast iron pan—lower the temperature to 350°F. Bake until the outer edges have solidified, but the middle of the pie still has some jiggle, about 50 minutes. Remove the pie from the oven and allow it to cool in a warm spot for at least two hours before serving, so it has time to set. Slice it up, and enjoy!


The frosting texture looks perfect! It’s always interesting to see how different bakers approach decoration techniques. I use N20 canisters for whipped cream preparation and they help create a smooth, stable finish for desserts.
First time pie baker here! I followed your recipe to a T and it was amazing! My husband is an avid pumpkin pie lover & judge and he loved the taste of it! The only issue is the crust didn’t seem cooked all the way, I may try pre baking it along with doing your cast iron trick again. Not sure how I messed up there! But I’ve never made a pie before so thank you so much for this helpful recipe!!!
I made this for Thanksgiving last year. Unanimous opinion on Thanksgiving Day was that it was just okay…BUT leftover pie the next day was amazing. I plan to make this the day before this year. Not sure what changed overnight but really made a difference.
Followed directions as provided. Made with the 3 ingredient pie crust recipe. Pie crust turned out soggy and the filling was on the spicy side which my kids didn’t like. Not a fan and will not be making again.
Thanks Monti! You saved my Thanksgiving and I’ll need to double it, Because my family loved it and asked me to bring it again!
P.S. to all the bakers If you have any leftover filling it makes delicious pancakes.
So excited it worked for you, Joy. It hasn’t worked for everyone and I’m out of my mind about it. I hate it when a recipe doesn’t work out and it kills me that some people have been disappointed. If I had it my way we could have cooking videos for every recipe, but we just don’t have the people power or the budget. Hopefully one day! Hope you had a great holiday and thank you for this.
I’m going to make this pie but I’m wondering if putting it on my pizza stone instead of the cast iron pan would work.
It would absolutely work! I use a pizza stone when my cast iron is in use for a different preparation. Happy cooking! XOXO -Monti
I tried the pizza stone, preheating at 400° for 1 hour. My crust was not done as well as if i just baked the pie baking on the rack. I can’t think of why this didn’t work for me. I did use my own recipe for pie crust. Could that have changed things?
I am completely flummoxed! A pizza stone retains a little less heat than cast iron, but not that much. Did your separate oven thermometer read at 400? Though I have no idea how even a temperature difference of 50 degrees would make a difference after an hour of pre-heating. It should have been scorched at 400. I wish I could be more of a help.
How do you recommend baking it if you don’t have a cast iron skillet? Just do the whole thing at 350? Or still preheat to 400 before turning it down?
If you don’t have a cast iron skillet, you can use a dutch oven made of cast iron. If you have no cast iron at all in your collection, you will need to par-bake the crust so it does not soak up the filling. Line the pie plate with the crust then top the crust with parchment. Fill the pie plate with dry beans and bake at 350 for 15 minutes. Remove the parchment with the beans, dock the crust with a fork, and bake for another 10 to 15 minutes, until the bottom of the crust is golden. Cool, add the puree, and bake. XOXO -Monti
Could I make this crustless? How long would I cook it?
Yes, though it would need to be baked as a custard, which requires a water bath. As we have not made our pie without a crust, we have no guidance. XOXO -Monti
I don’t see where the one teaspoon of heavy cream gets added. I plan to make this recipe for Thanksgiving – sounds delish!
Hi Barbara! You use it as a wash and brush it on the crust. Thank you for making it! I recommend you do it the day before. It’s wonderful once it has set overnight. XOXO -Monti
Thanks for the quick reply – I re-read the recipe, now I see where I missed it
Good evening Monti:
What about storage? How long will the pumpkin pie last in the refrigerator? Will the pie freeze well? TYIA
Hi KGB! It will stay fresh up to three days in the fridge. It’s best to freeze individual slices for freezing (as you should only thaw once). They will keep up to 6 months. XOXO -Monti
This looks amazing and sounds delicious! I cannot wait to make it next week.
Will this recipe hold up in a large spring form pan over a thick graham cracker crust? Or does it need to be in a pie dish?
Will the recipe need to be doubled if in a large spring form pan? (I think mine is 14″).
This recipe makes about 6 cups of filling. I recommend filling the pan with water to the desired level and measuring the amount of cups. Then multiply etc.
You can do a graham cracker crust but make sure to press it well or it will just float into the filling. XOXO -Monti
Intriguing- blooming makes sense! I can’t wait to try it!
Could plain greek yogurt be subbed for sour cream?
Thanks for a great idea! Happy all the holidays.
I don’t see why not! Let us know the results! And thanks for trying my recipe. Happy holidays. XOXO -Monti