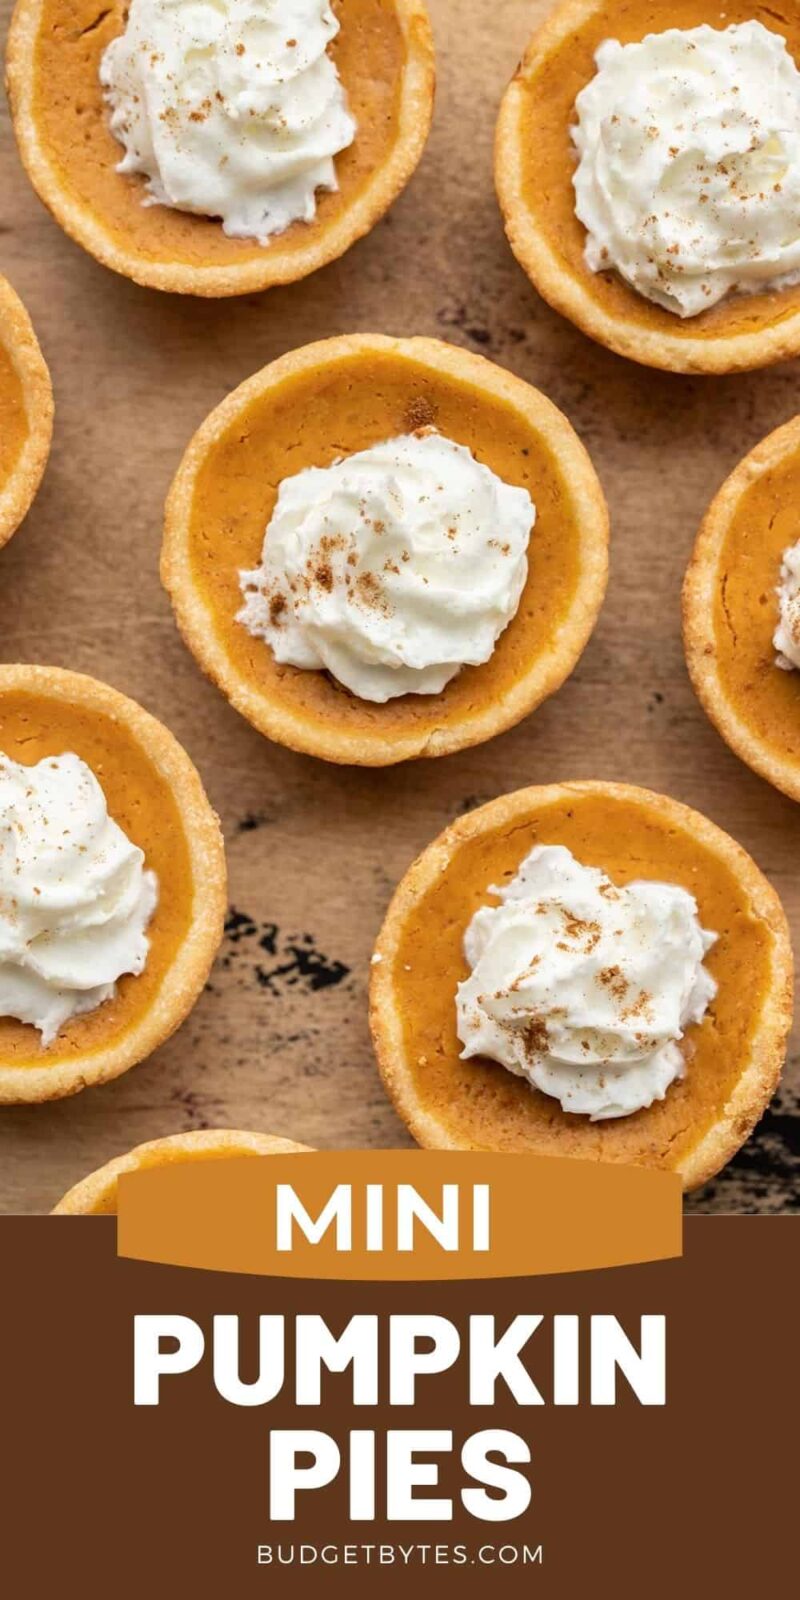
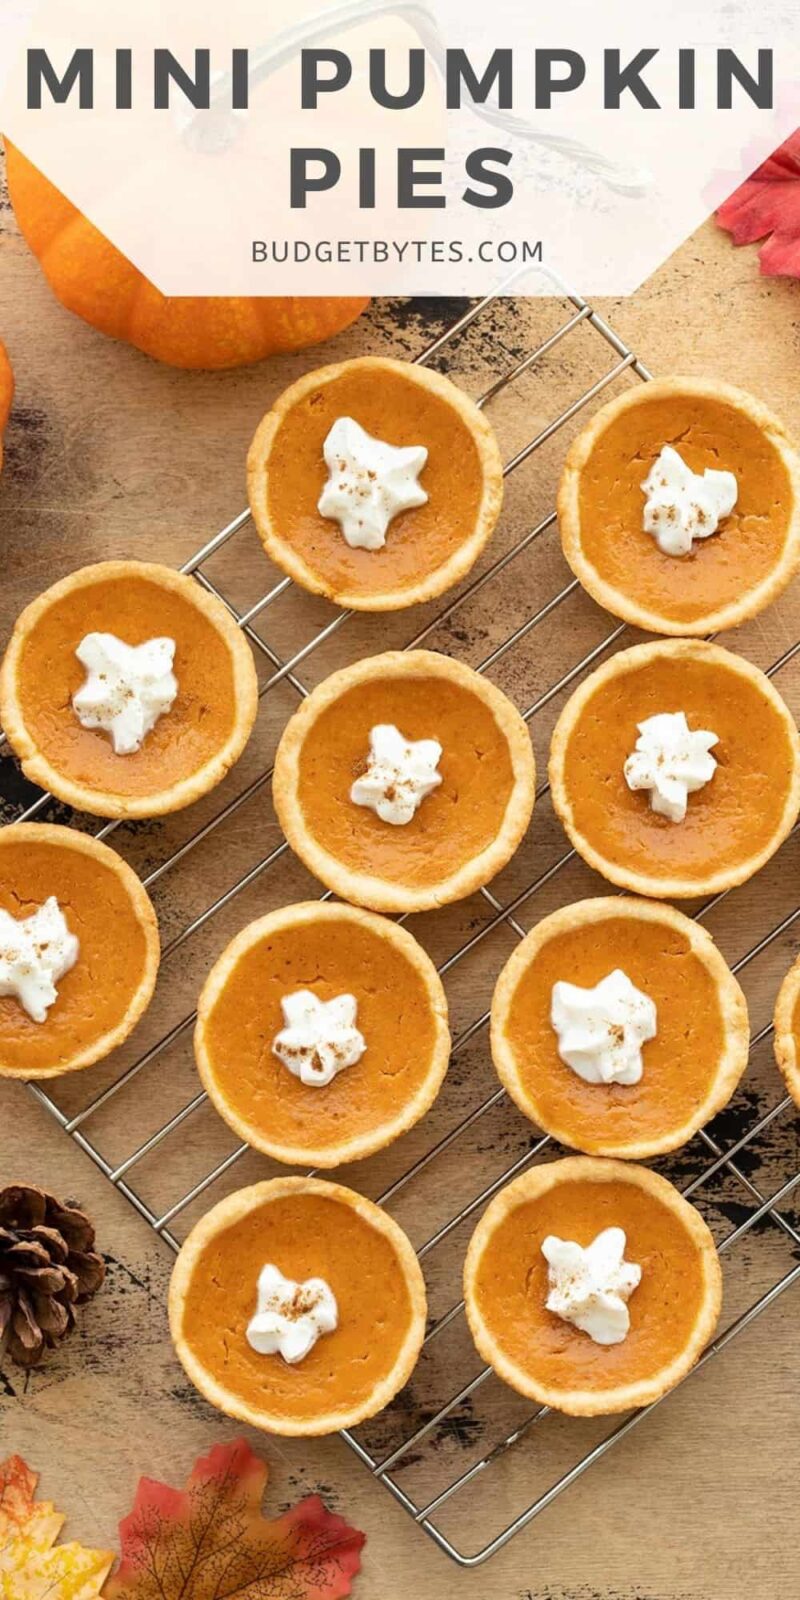
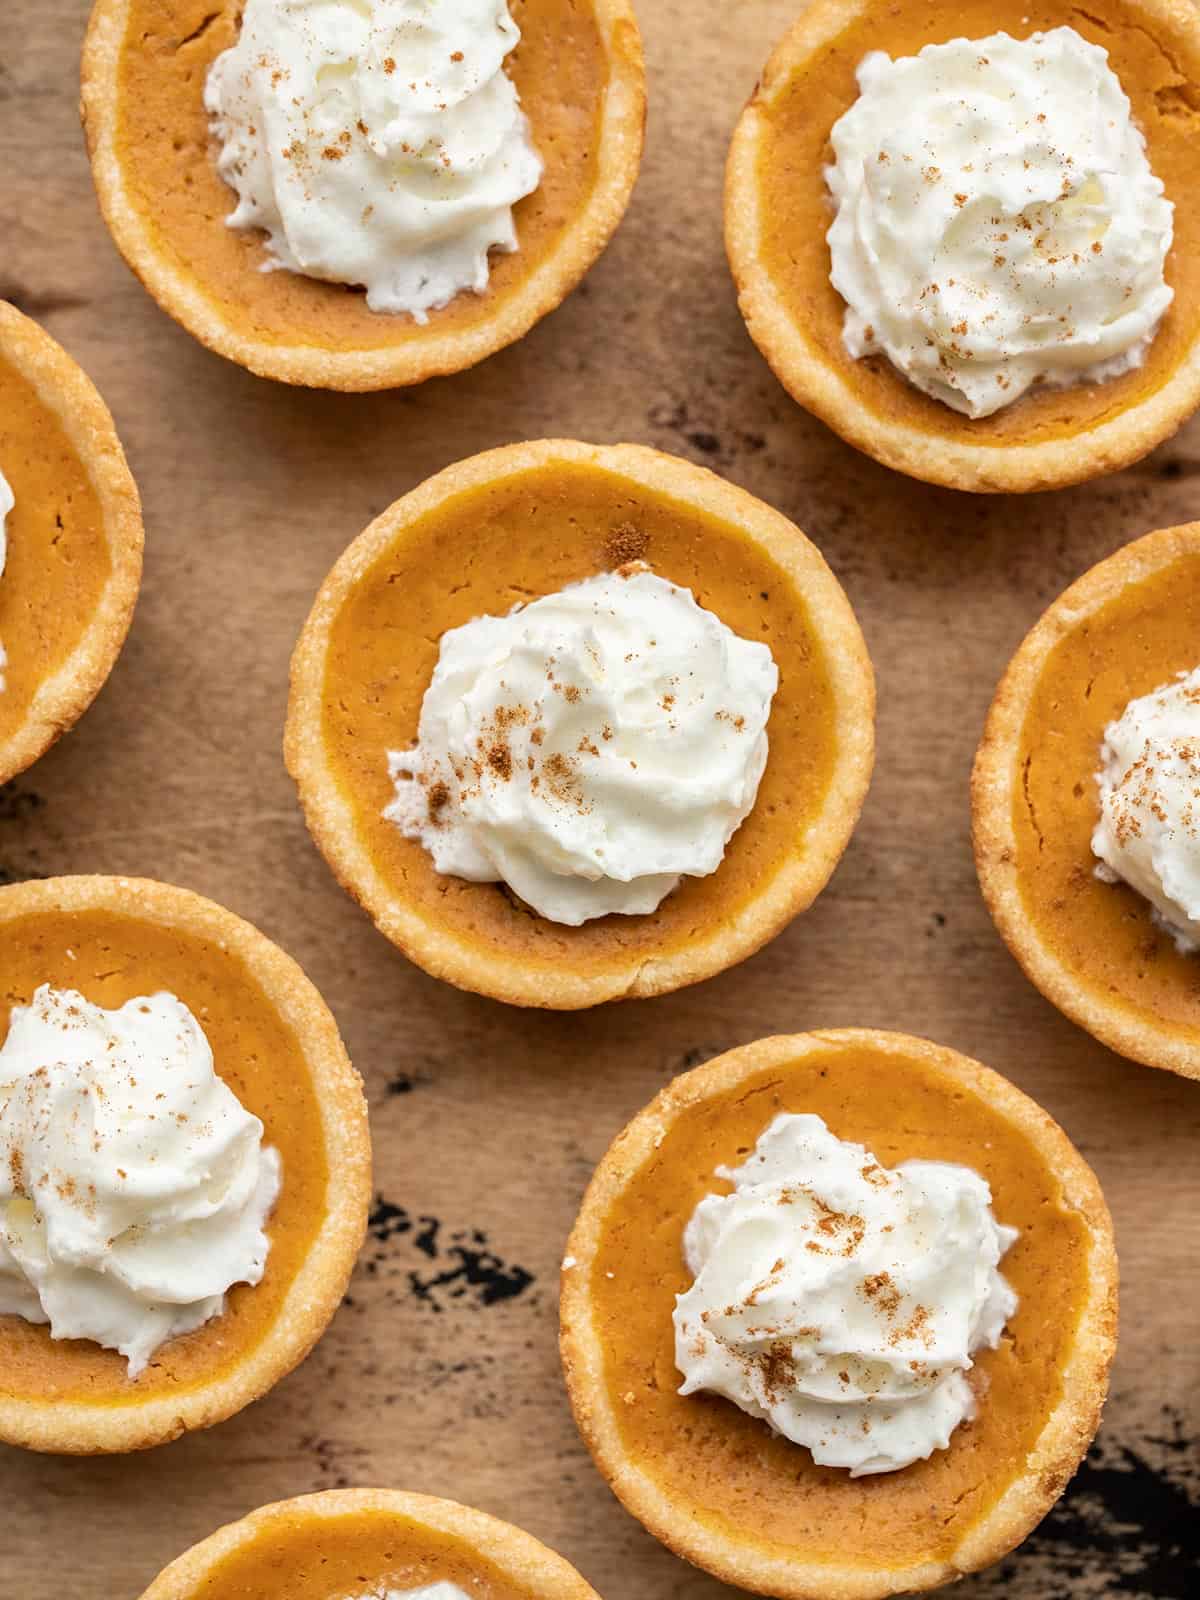
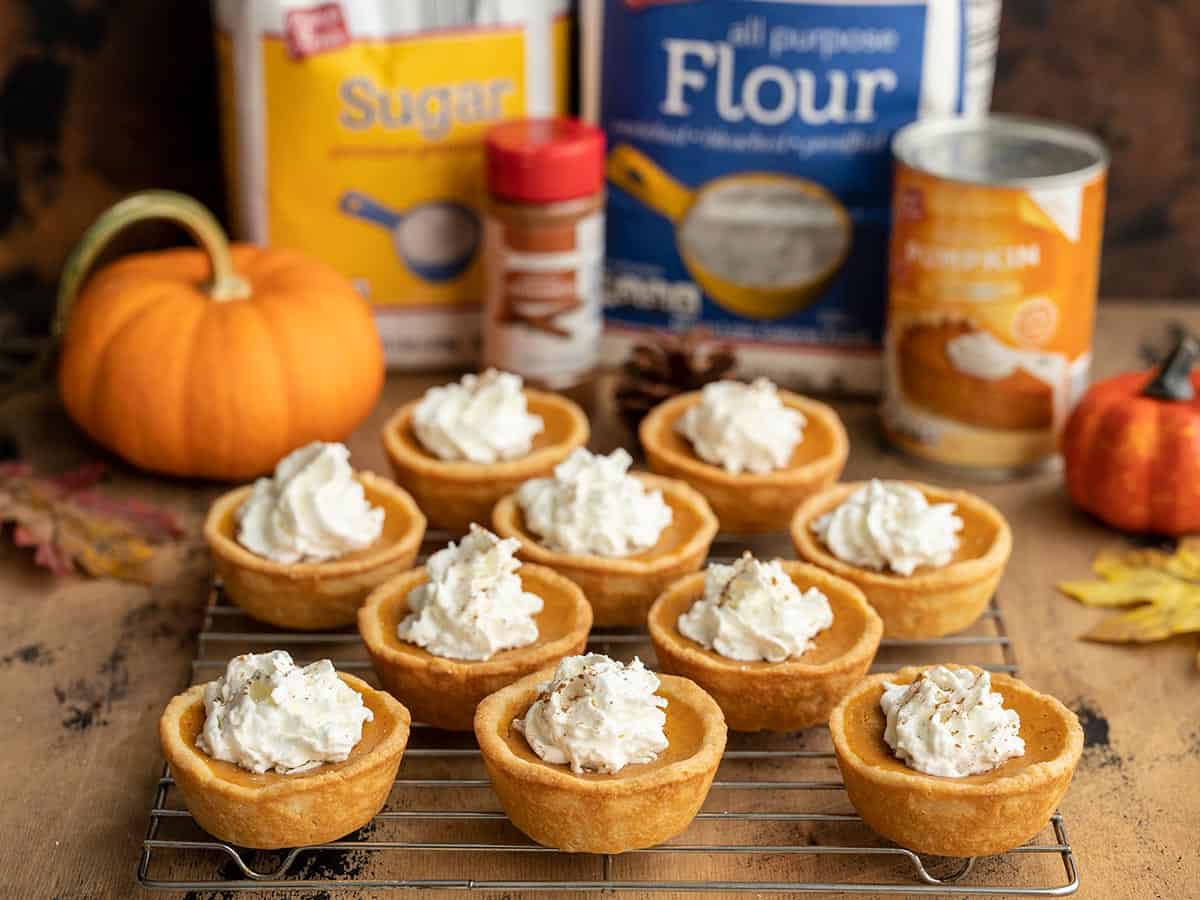
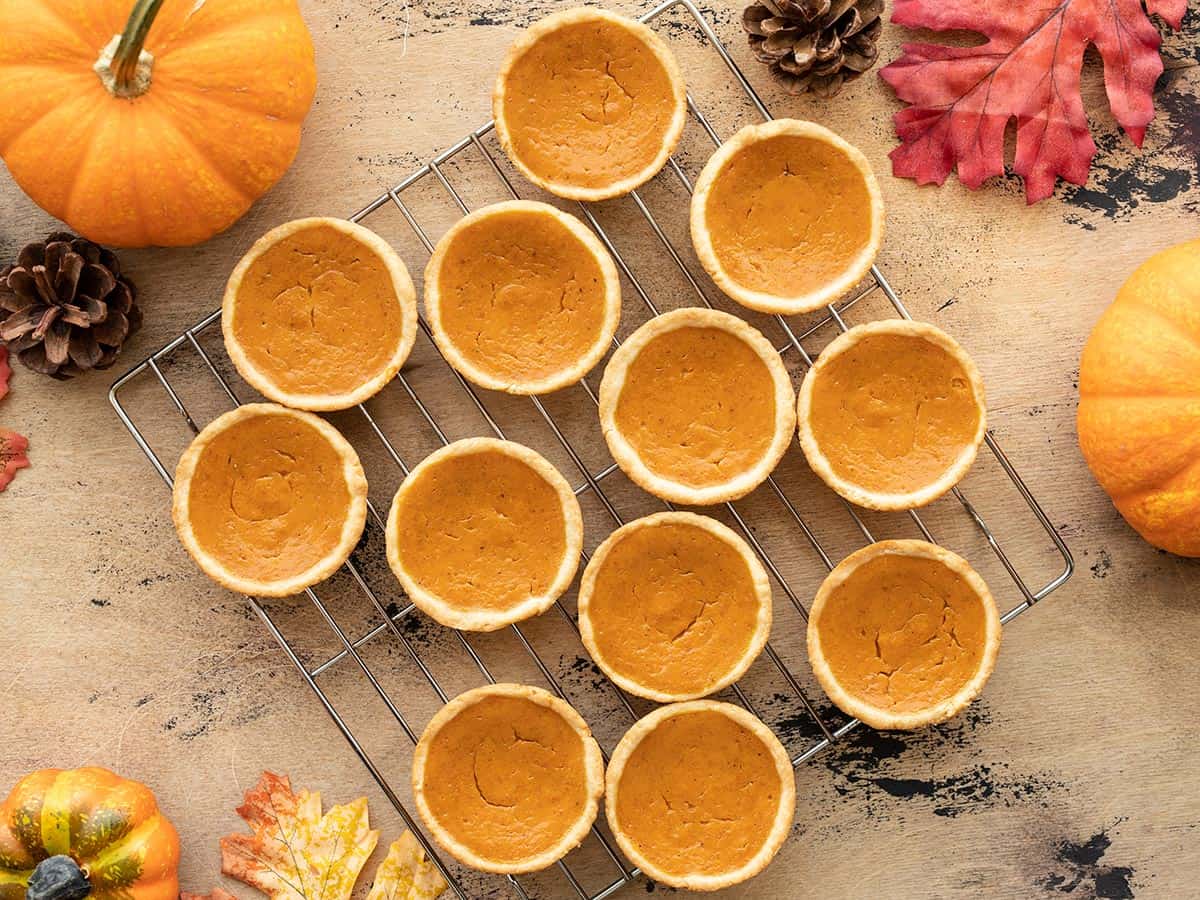
Everyone loves Thanksgiving, but let’s be honest, it can get expensive, especially when you have several guests to feed. But I’ve got a great little Thanksgiving hack for you. Well okay, maybe two. Thanksgiving hack number one: make these Mini Pumpkin Pies. You get twelve servings with half the amount of ingredients used for a regular-sized pumpkin pie. So instead of trying to slice one pie into razor-thin slices so that everyone gets a bite, be the star of the show with these adorable little Mini Pumpkin Pies. Everyone will die over their cuteness and you’ll be smiling with satisfaction because you just fed more people with fewer ingredients.
All recipes are rigorously tested in our Nashville Test Kitchen to ensure they are easy, affordable, and delicious.
No-Fuss Crust
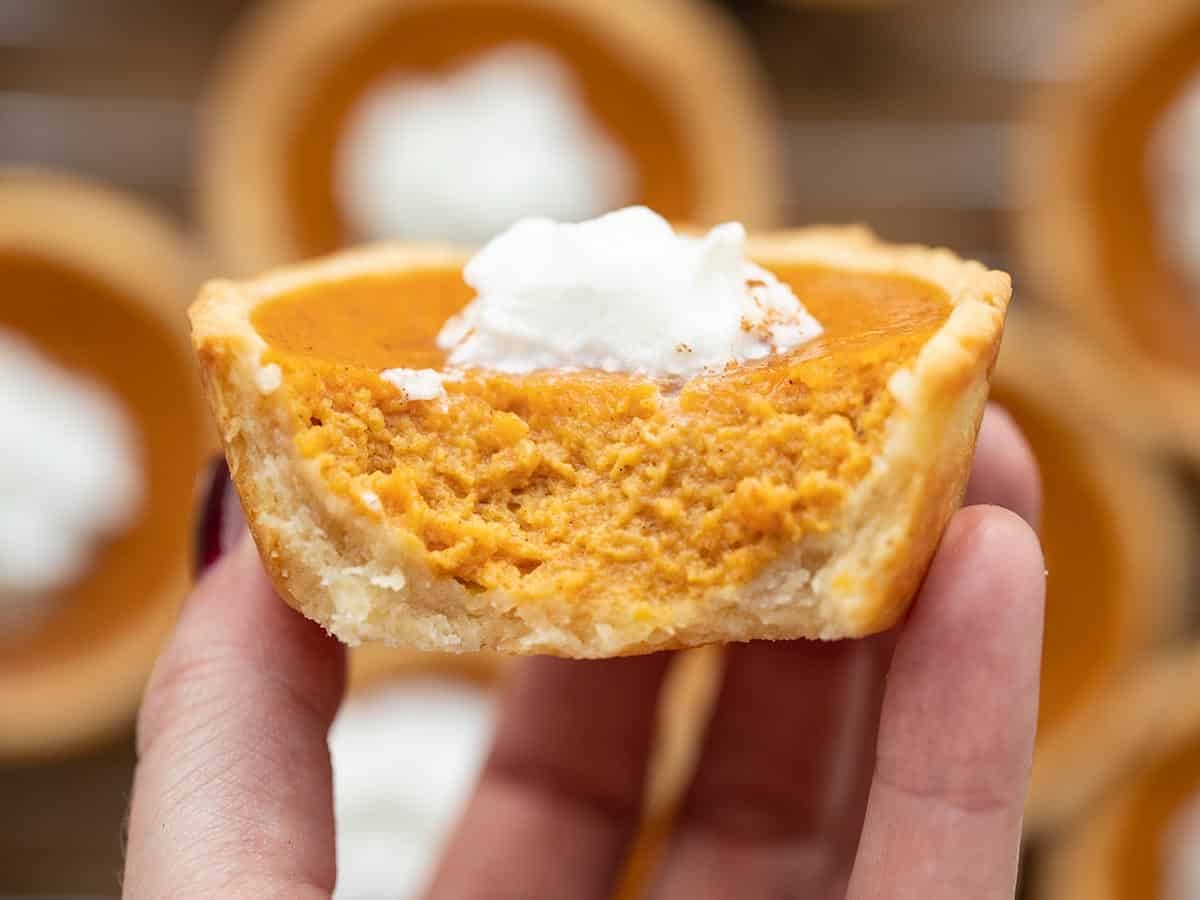
As much as I love a classic pumpkin pie, I especially love these mini pumpkin pies because they don’t use a traditional pie crust. Pie crust can be tricky to work with, especially for new cooks, but these pies use a really unique dough made with butter, flour, and cream cheese. It has a soft moldable texture that is super forgiving and easy to work with. …Because the last thing you need to worry about on Thanksgiving is cracked pie dough.
Make A Double Batch of Mini Pumpkin Pies
As I mentioned above, this recipe basically uses half of the “filling” for a regular-sized pumpkin pie. So you can use your favorite pumpkin pie filling recipe, or even the pumpkin pie recipe on the label of your can of pumpkin purée and just divide it by two to fill 12 of these mini pumpkin pies. Or use the whole recipe and make 24 mini pumpkin pies!
Can I Make them Ahead?
Yes, you can make these mini pumpkin pies one day ahead of time. When preparing them in advance, allow the pies to cool completely to room temperature before covering and refrigerating. You can also freeze the pumpkin pies, but the quality is much better when fresh or refrigerated. So freezing is a great way to enjoy the leftovers for longer, but I wouldn’t freeze before serving to guests.
Pumpkin Pie Topping Options
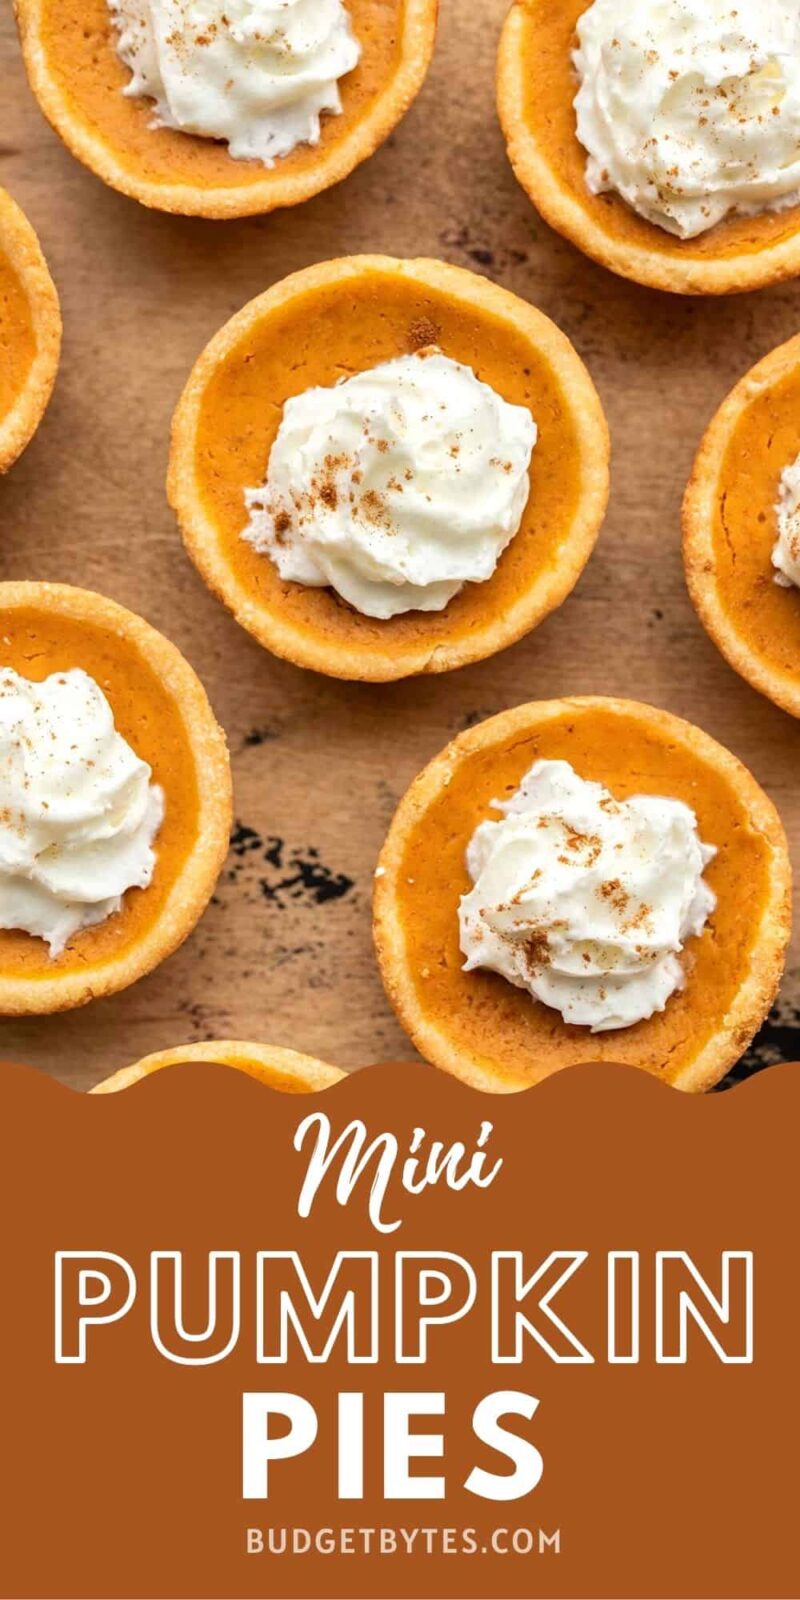
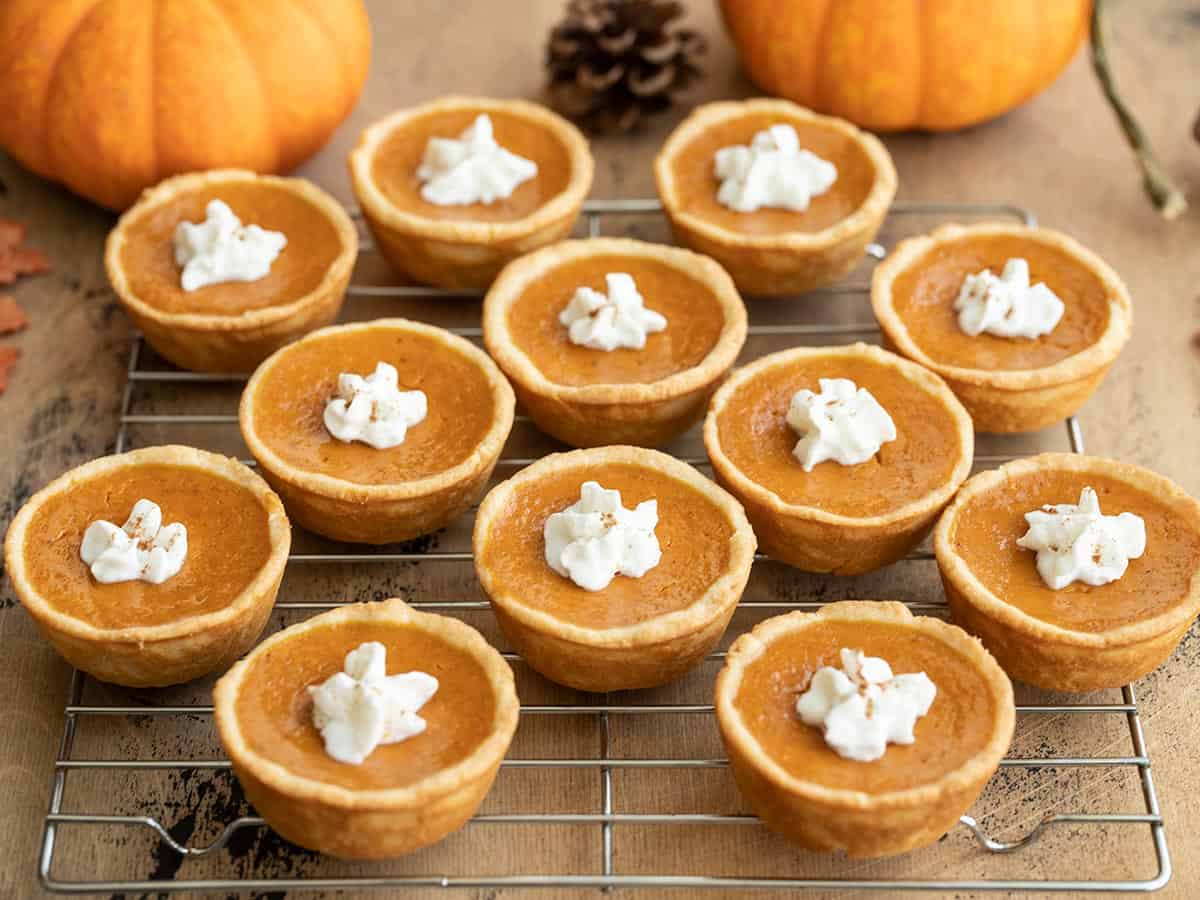
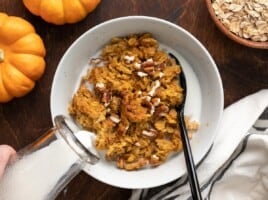
You can leave the pumpkin pies bare (I love the color they add to a Thanksgiving spread), or you can top them with whipped cream and a little sprinkle of cinnamon (use any leftover cinnamon to make snickerdoodles!). If you plan to let the pumpkin pies sit out for a while, like as part of a Friendsgiving buffet, you may want to use a stabilized whipped cream to make sure the whipped cream doesn’t collapse as it sits (whip 1 Tbsp cornstarch into every cup of homemade whipped cream to stabilize).
Mini Pumpkin Pies
Cost $2.78 recipe / $0.23 each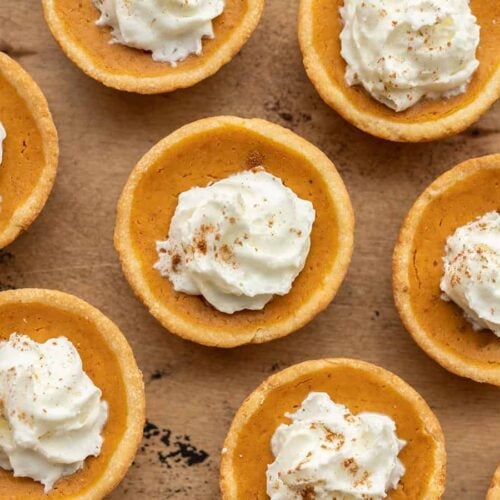
Ingredients
Crust
- 8 Tbsp salted butter, room temperature ($0.80)
- 4 oz. cream cheese, room temperature ($0.58)
- 1 cup + 2 Tbsp all-purpose flour ($0.07)
- 1 Tbsp granulated sugar ($0.01)
Filling
- 1/2 15oz. can pumpkin purée ($0.48)
- 3/4 cup evaporated milk ($0.40)
- 1 large eggs ($0.29)
- 1/4 cup granulated sugar ($0.04)
- 2 Tbsp brown sugar ($0.08)
- 1/2 tsp cinnamon ($0.05)
- 1/4 tsp ground ginger ($0.02)
- 1/4 tsp ground nutmeg ($0.02)
- 1/4 tsp salt ($0.02)
Instructions
- Preheat the oven to 350ºF. Make the pie crust first. Add the butter and cream cheese to a bowl and use a mixer to beat them together until light and fluffy.
- Beat 1 Tbsp sugar into the butter and cream cheese, then begin to beat in the flour, about ¼ cup at a time, until all of it has been incorporated. The result will be a very soft dough.
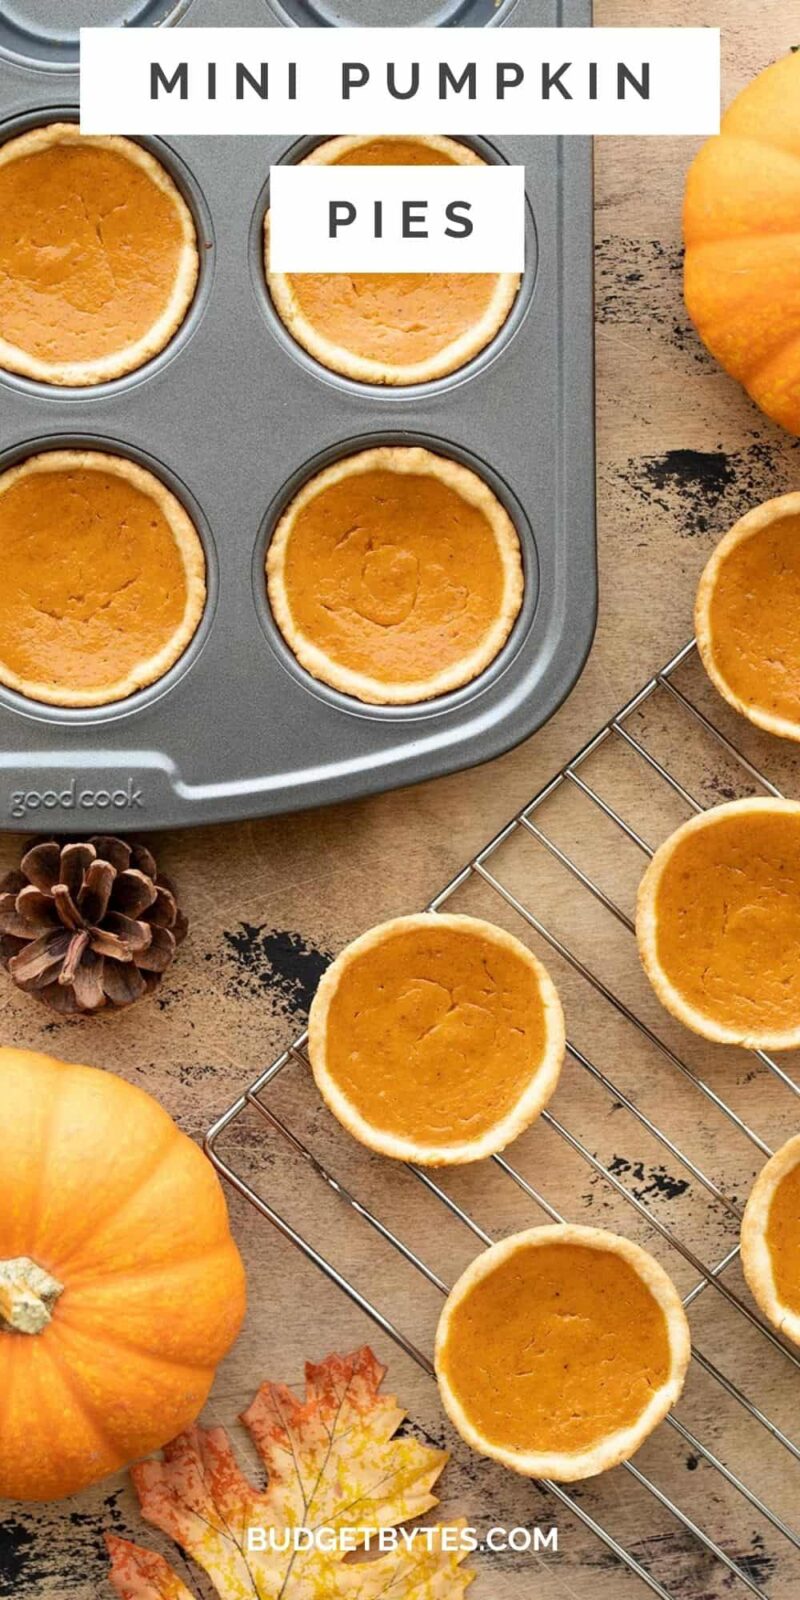
- Divide the dough into four equal pieces, then divide each piece into three so you have 12 equal-sized pieces total. Roll each piece of dough into a ball, then drop each one into the well of a muffin tin. Use your fingers to press the dough down into the center and up the sides of the wells (see step by step photos below for more help).
- Next, make the pie filling. In a large bowl, whisk together the pumpkin purée, evaporated milk, egg, sugar, brown sugar, cinnamon, ginger, nutmeg, and salt.
- Divide the filling between the twelve pie shells (about 3 Tbsp each).
- Bake the pies for 35 minutes, or until the edges of the pie crusts are golden and the filling is slightly cracked on top.
- Remove the muffin tin from the oven and allow the pies to cool in the tin for about 10 minutes. After about 10 minutes they should be solid enough to safely remove. Slide a knife around the outer edge of each one until they pop out. Finish cooling the pies on a wire rack.
- Serve the pies at room temperature, or transfer them to the refrigerator once cooled for longer storage (up to four days).
See how we calculate recipe costs here.
Nutrition Information
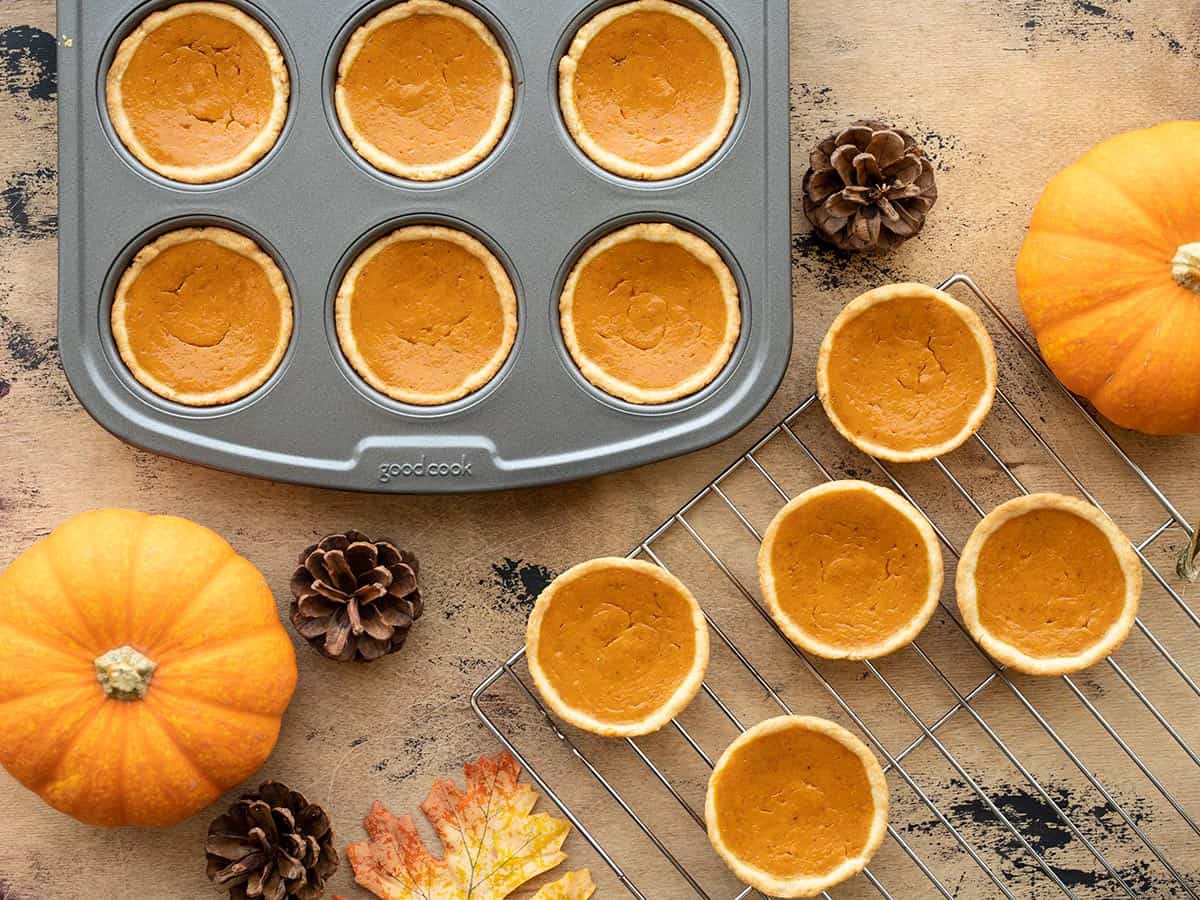
How to Make Mini Pumpkin Pies – Step by Step Photos
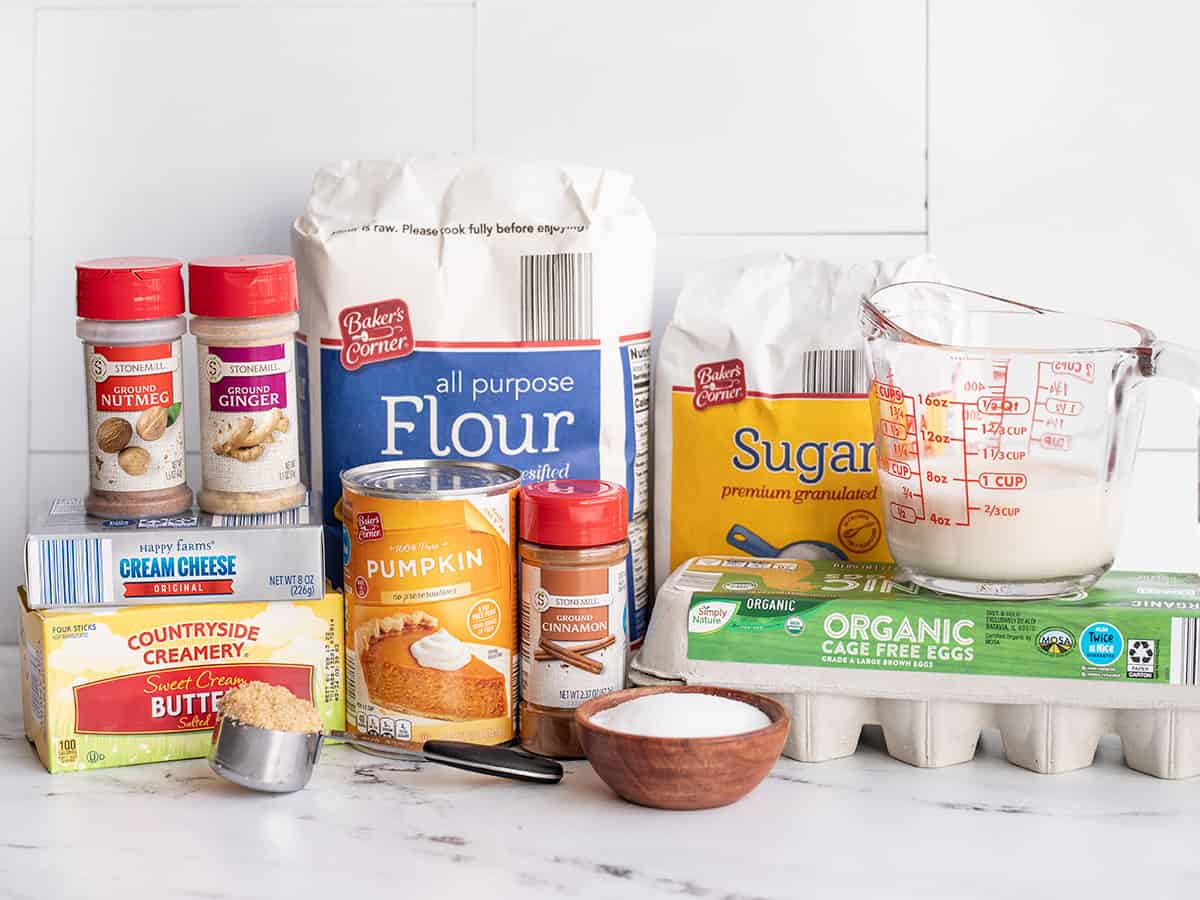
Here are all of the ingredients you’ll need for these mini pumpkin pies. The ingredients are all super simple pantry staples: flour, sugar, eggs, butter, cream cheese, evaporated milk, brown sugar, salt, pumpkin purée, cinnamon, ginger, and nutmeg.
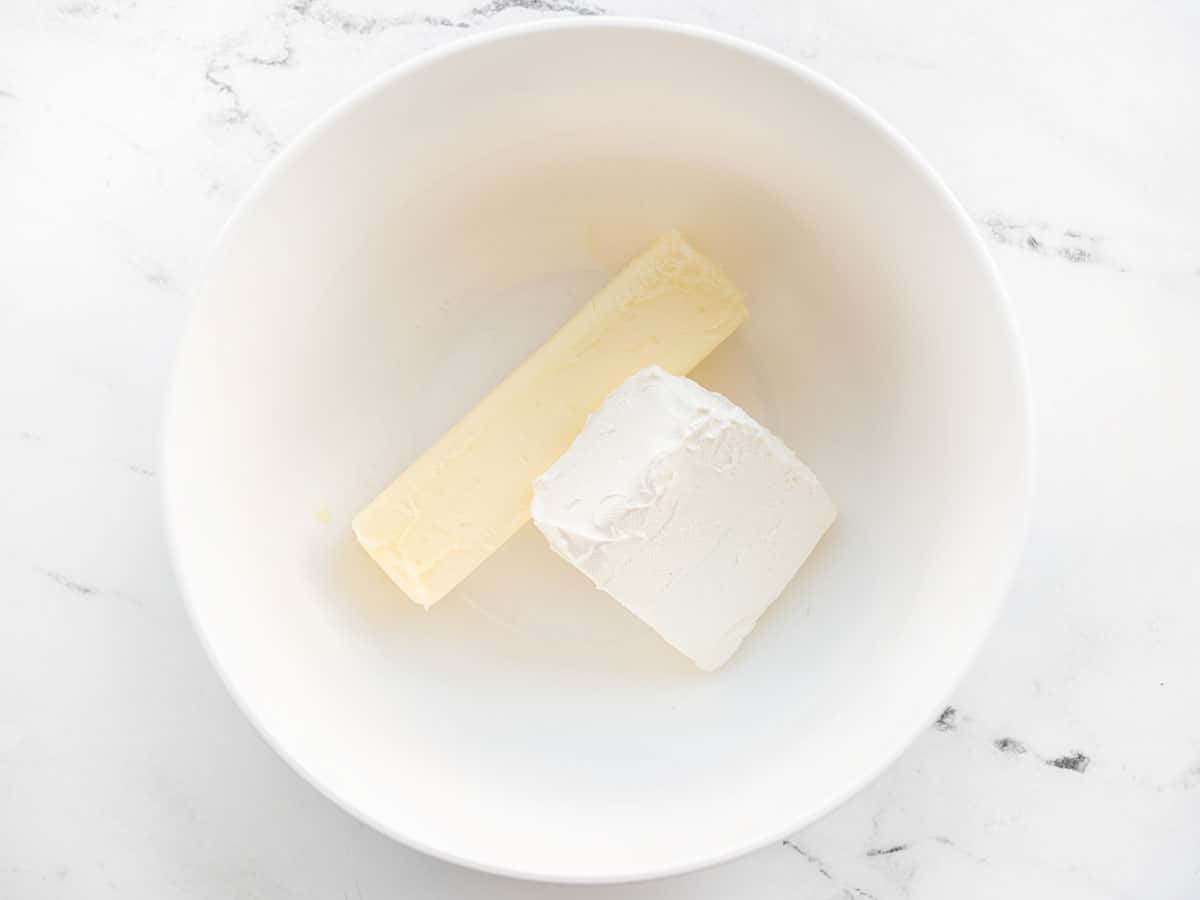
Start by preheating the oven to 350ºF. Next, add 8 Tbsp room temperature butter and 4 oz. room temperature cream cheese to a bowl.
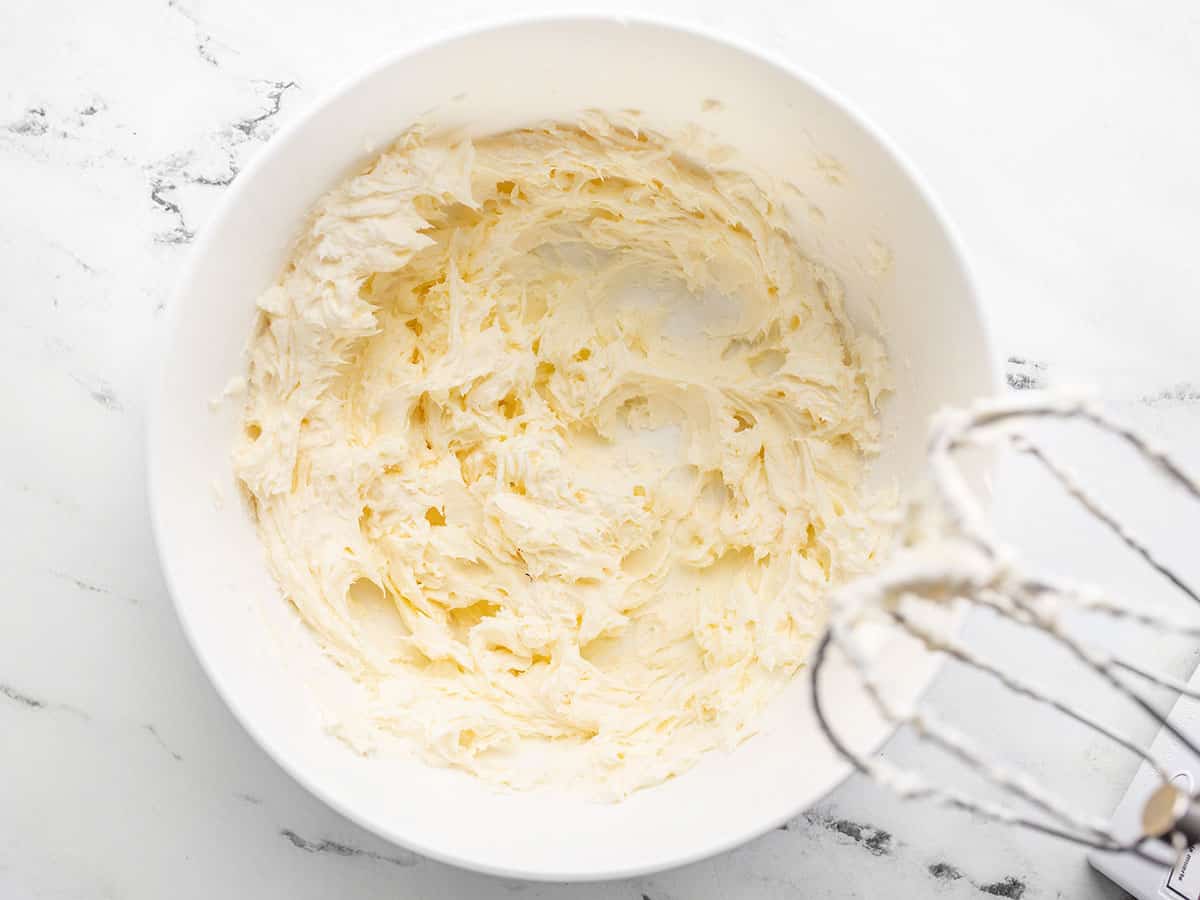
Beat the butter and cream cheese together until they’re evenly combined and fluffy.
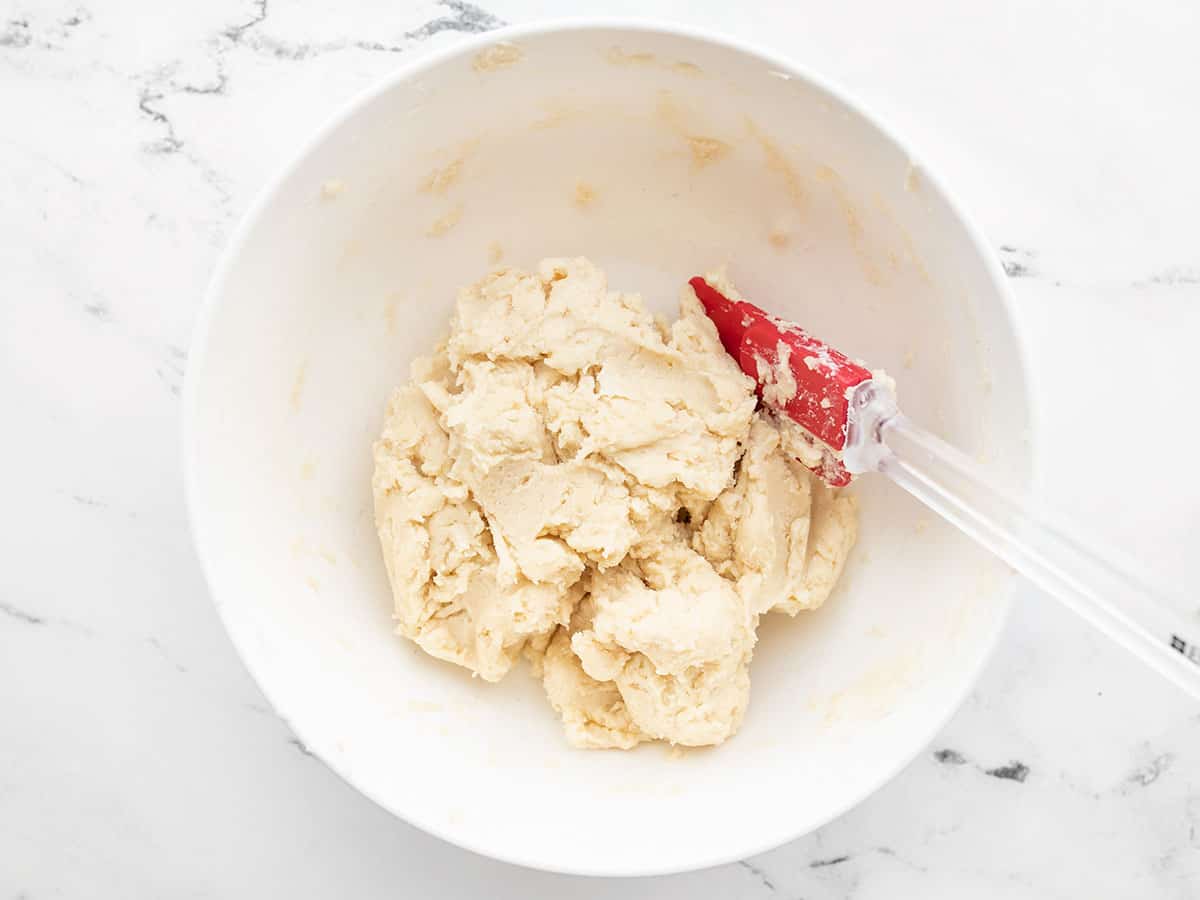
Beat 1 Tbsp sugar into the butter and cream cheese, then start adding the flour, about ¼ cup at a time, beating until it is incorporated (1 cup + 2 Tbsp flour total). The end result will be a very soft dough. No dry flour should remain on the bottom of the bowl.

Divide the dough into 12 equal-sized pieces. To do this, divide the dough into four equal-sized pieces. From there, divide each piece into three equal-sized pieces. Roll each piece into a ball and place them into the wells of a muffin tin. Use your fingers to press the dough down and up the sides of the muffin tin wells. Make sure to get down into the corners of the well where a lot of the dough can accumulate and get too thick.
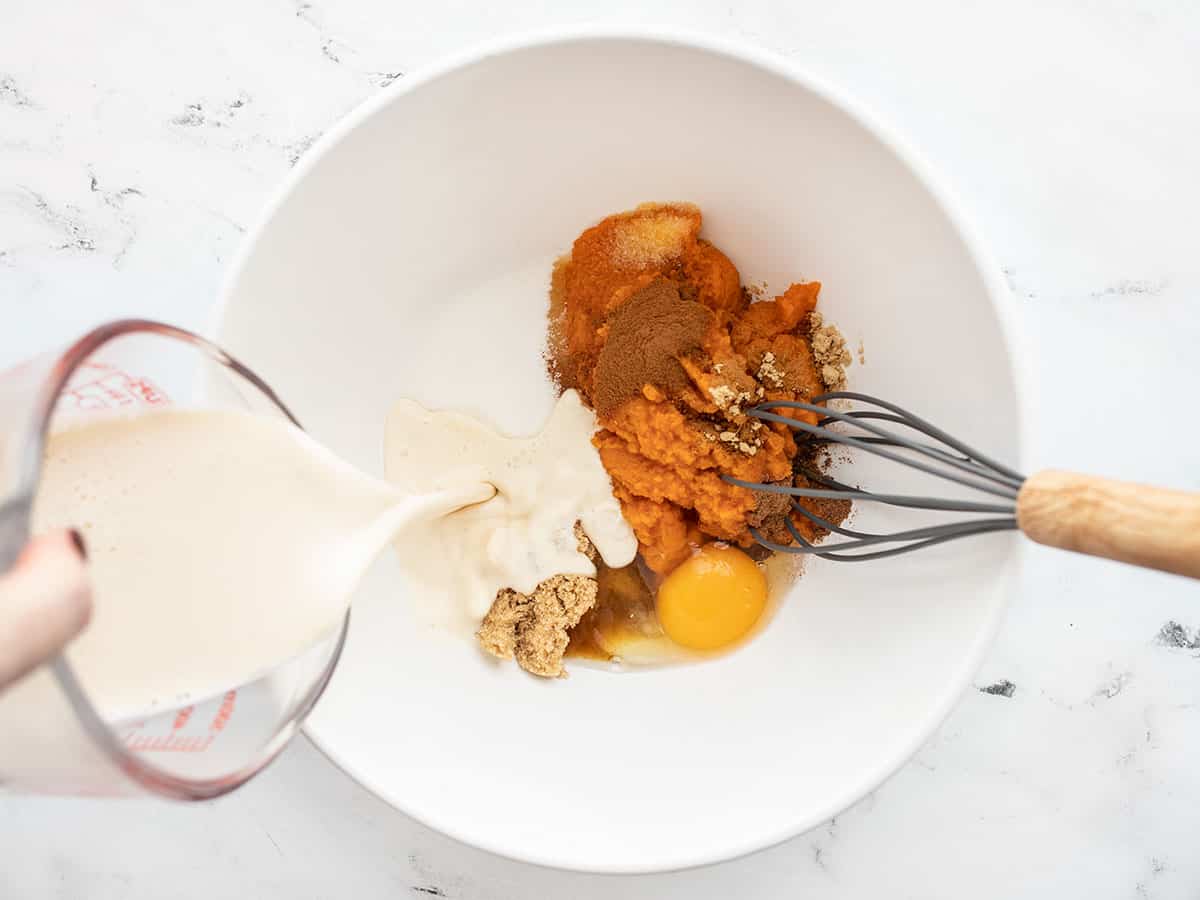
Next, it’s time to make the pumpkin pie filling. Whisk together ½ of a 15oz. can of pumpkin purée (about ⅞ of a cup), 1 large egg, ¾ cup evaporated milk, ¼ cup sugar, 2 Tbsp brown sugar, ½ tsp cinnamon, ¼ tsp ground ginger, ¼ tsp ground nutmeg, and ¼ tsp salt.
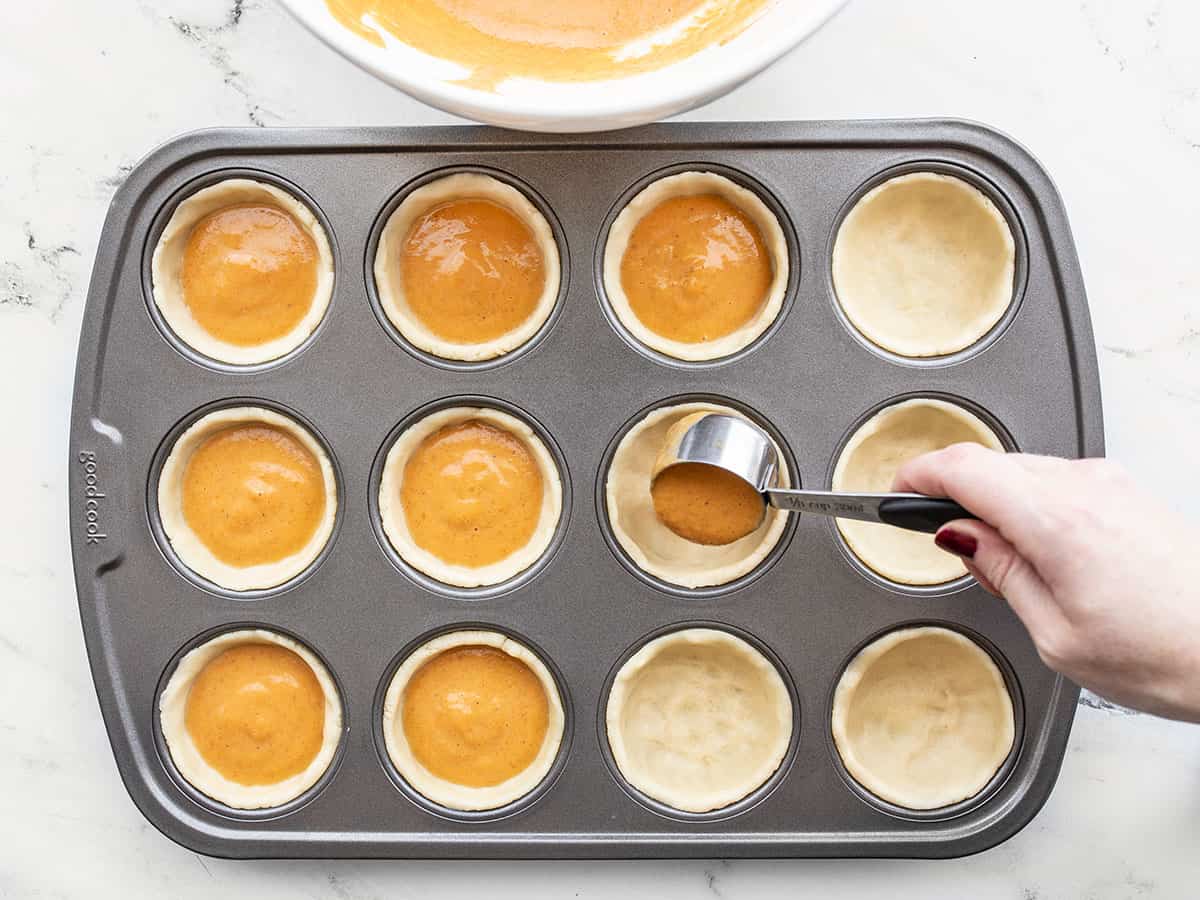
Divide the pumpkin filling among the 12 pie shells. The easiest way to do this is to use a 2 Tbsp scoop or measuring cup and add 2 Tbsp to each one first, then go back and add a bit more to each one until the filling is used up. It ends up being about 3 Tbsp filling per pie.
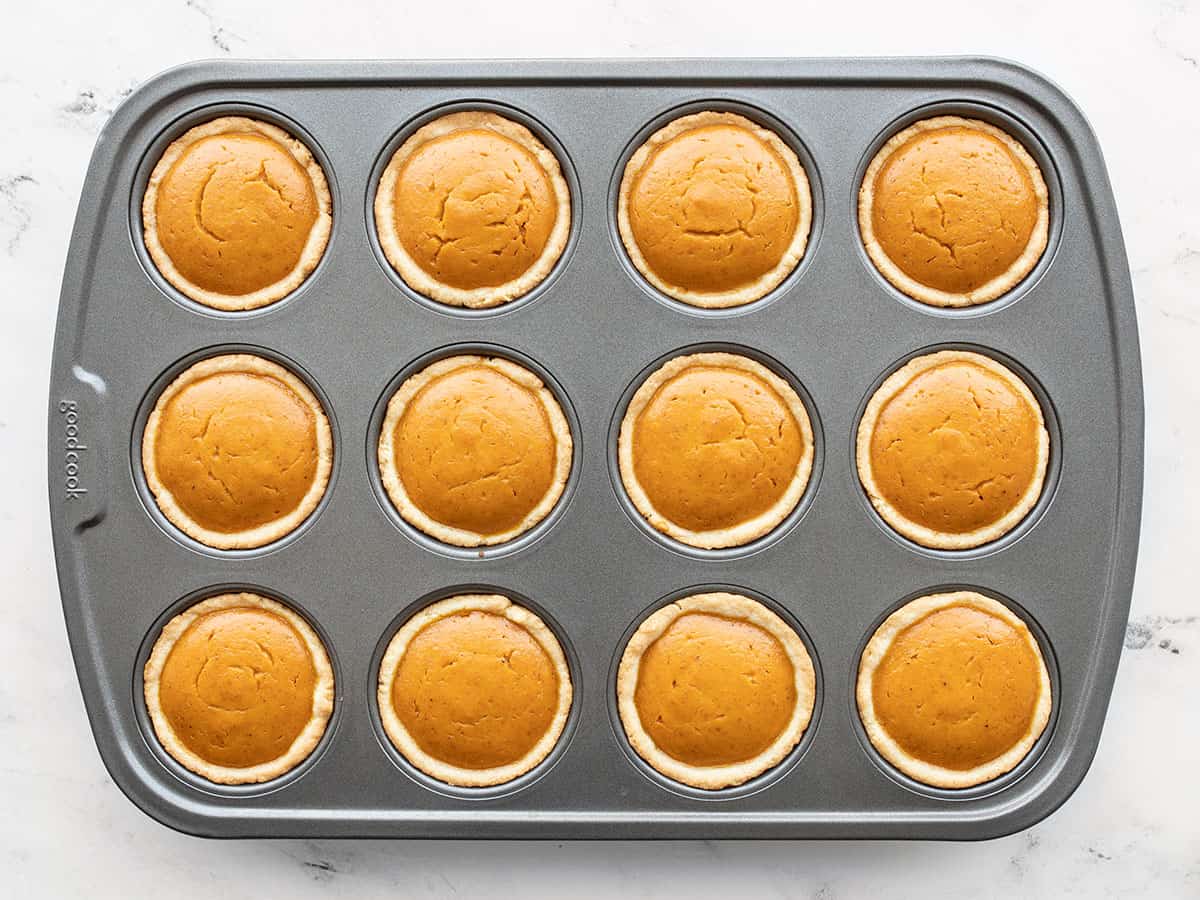
Bake the pumpkin pies in the fully preheated 350ºF oven for 35 minutes or until the crusts are golden brown and the filling is slightly cracked on top. Allow the pies to cool in the muffin tin for about 10 minutes so they can solidify a bit before attempting removal. Once they’re slightly cooled, run a knife around the edge of each one and they will pop right out!
Allow the pies to finish cooling on a cooling rack. Remember, make sure they are fully cooled to room temperature before refrigeration to prevent condensation. Refrigerated pumpkin pies will stay good in the refrigerator for four days.


The frosting texture looks perfect! It’s always interesting to see how different bakers approach decoration techniques. I use N20 canisters for whipped cream preparation and they help create a smooth, stable finish for desserts.
I make this every year for Thanksgiving and it is amazing! No changes to the recipe and I double it to make 24.
Did you use regular sized muffin tins or the mini size? I can’t tell from the photos. I’d like to make these for a baby shower and want to make them bite sized in a mini muffin tin. Will that work?
They’re regular muffin tins! I’m sure it would work for mini muffin tins, but they definitely wouldn’t cook as long, we haven’t tried it with minis so I can’t give you an exact time, unfortunately.
These came out great! I used silicone muffin liners/molds on a baking sheet and it worked well.
My pumpkin pie mixture is really runny, like has no thickness to it at all.
I doubled it, used organic pumpkin purée and evaporated milk. But I didn’t change anything about the recipe. In the pics it looks thick. Is this even going to set when it cooks!? 😢 I hope it will still turn out…
Hmmm, I wonder if one of the ingredient amounts was accidentally off when you doubled it. The pumpkin mixture will be a liquid before baking, but it should be slightly thick. It does set when baking, thanks to the egg.
Cute little pumpkin pies! Pictures are great. But you lost me in your repetitive dialogue about how much you love Aldi, and what great products they sell. I realize it is your blog and you can post anything within reason on it. I have been to Aldis once and since I am 81 yrs old was put off by the fact that they have no handicap mobility scooters. I have 6 artificial joints so a scooter would have been nice. Then I try to get a grocery cart but find I have to pay a quarter just to use it. Not having a quarter, I decide to just look inside the store and maybe buy a few things. Luckily it is a small store with mostly lawn furniture and accessories. Very limited groceries. None and I mean NONE of the brands are any that I have ever heard of. I did pick out a couple of things but learned at check out that you need to bring your own carry out bags. I left my items there and will most likely not shop there again. I am glad you like Aldis and like their brands of food items and the prices. I have followed your blog for the recipes but you went over board on using the word Aldis in my opinion.
Sorry about your poor experience. Using Aldi brands for this recipe will cost no more than half what it would purchasing from most supermarkets!@
To use an Aldi’s shopping cart, you use a quarter to check out the cart and get it back when you return the cart. I’ll just bet another customer would have helped you with that. Never hesitate to ask for help, either from the staff or other customers. Once in the check out lane, you can buy grocery bags for $.05 apiece if you forgot to bring your own.
You are absolutely right that you’ve never heard of any of the brands–they are Aldi’s own, but I can assure you that the quality of those items is just fine and equal to major commercial brands here in the US, although branded items show up from time to time. Additionally Aldi imports a lot of fun items from Europe and sells them very reasonably.
I’m 80 and the small size of the store is an advantage IMO–no electric carts, but no need to walk 1/4 mile to the back of the store, either. You can also arrange to order groceries online at most locations and they will be delivered for a modest charge.
I would suggest enlisting a friend or relative to help you explore another time. Try this economical little chain and you may change your mind.
But don’t let one bad shopping experience discourage you from this delicious little recipe!
Can you freeze these mini pumpkin pies and thaw later?
Yes. Double wrap with plastic and then foil. Then place in an airtight freezer-safe container! XOXO -Monti
I was a little short on evaporated milk, so I added a couple tablespoons of almond milk (I know, I know, baking is a science). I ended up having to bake them for an extra 20 min (until the tops were poofy and started to crack) but they still turned out great!
Also wanted to join the other commentors in saying I don’t mind the sponsored post. Thank you for bolding things and making it easy to read. This blog has taught me SO much and made me love cooking!
Quick question – you mention that they can be made one day ahead of time, but stored for 4? Do you forsee any issues if made 2 days ahead of time? Want maximum freshness, but trying to get ahead of schedule as much as possible
It’s really kind of subjective, I suppose. The freshness declines over time and personally, I’d probably only do them one day ahead of time if I were serving them to guests. :)
Made these for Friendsgiving this weekend and they were perfect! My daughter helped with the pie crusts and I can attest that the crust IS very forgiving and easily comes out of an ungreased muffin tin…have you tried this pie dough with any other fillings or is pumpkin the best since it’s so sturdy? Super yummy and perfect to bring to a potluck style celebration
I’m so glad you enjoyed them! I do have one other version, chocolate pecan mini pies. :)
All of the recipes on this site are provided to us for free and every one that I’ve tried has been awesome! I come here first when looking for inspiration or particular recipes. Beth is not the first to have sponsored posts. She has to pay the bills too. I made these cute little pies using the brands I always buy. I didn’t feel pressured to shop at Aldi. The pies are cute and tasty and budget friendly.
Question- can I use unsalted butter? I seem to remember my mom always telling me to only bake with unsalted butter. Thank you for your help!
I used salted butter, but you could use unsalted if you prefer. You may want to add a little salt to the dough to compensate, but I’d need to test it to see how much would be needed, if any, to keep it from being too bland.
There’s nothing like a great grocery store! I have my own grocery store favorites, but we don’t have any Aldi’s in our state. :( It sounds like a really good chain. Honestly, I’d be more thrilled checking out an Aldi’s than going to a high end department store. I guess I just love good food and bargains.
Thanks for this fantastic recipe, Beth! Rugelach uses the same forgiving cream cheese dough for delicate and delicious rolled cookies. You should try them for the holiday season!
These pies are so good! Pumpkin pie always tests my patience because I like to eat it after it has chilled, and it takes forever for a hot pumpkin pie to get cold. I was able to make these pies around 3 and they were cold enough to eat after dinner the same day! The only thing I would do differently next time is make a double batch.