

Say the sweetest “I love you!” with these soft, buttery, chocolate-dipped Valentine’s Cookies! (Cookies > Cards 🥰 #Trust) This recipe is so easy and so budget-friendly. Have you seen what people are charging for a dozen cookies lately? Highway robbery!! PS when I tell you this is such an easy recipe, I mean it. You can even make the sugar cookie dough ahead of time, so all you have to do on the big day is cut, bake, and dip.

All recipes are rigorously tested in our Nashville Test Kitchen to ensure they are easy, affordable, and delicious.
What You’ll need
You’re just seven ingredients away from the most magnificent, luscious, unforgettable Valentine’s Day gift!
- Softened Butter helps create texture and mouth feel. You’ll know your butter is soft enough when you press your finger on it and it leaves an indentation.
- Sugar helps sweeten the cookie and creates a crisper texture, so the cookies keep their shape. It also creates air pockets in the softened butter that lighten the dough.
- Vanilla flavors and scents the cookie.
- Egg binds the ingredients together and creates texture. It also adds moisture to the dough.
- All-purpose flour creates a cookie that holds its shape. Bread flour yields a chewier texture with more spread. Pastry or cake flour yields crisper and more crumbly results.
- Baking powder lightens the dough by creating air pockets that help it rise.
- Melting chocolate dissolves easily and dries quickly with a satiny finish. Use white, dark, or milk chocolate. You can also use chocolate chips, but they dry with a dull, foggy finish.
make THE Dough Ahead of Time
It’s a genius move to make your cookie dough ahead of time and not just for convenience’s sake. Chilling the dough hardens the butter and helps prevent the spread of your cookies, so they hold their shape better. Resting your dough for multiple days also evaporates moisture, which concentrates flavors and creates a crisper cookie. You can refrigerate cookie dough up to 5 days in advance.
Make Cookies Without A Cutter
You don’t need to buy a special cookie cutter to create the loveliest heart-shaped cookies. Instead, draw or print a heart shape, cut it out, and use it as a guide. Then, all you have to do is trace your knife along the cookie dough to create perfect heart-shaped cookies.

How To Fix Cookie Shapes
If you open your oven to find that your cookies have lost their shape, it can be an easy fix. First, allow the cookies to cool on the sheet pan for a minute, then reshape them by pressing the cookie cutter into them or tracing a knife around the paper cutout. Work quickly; the more the cookie cools, the more likely it is to shatter.
How To Melt Chocolate
You can easily melt chocolate on a stovetop or in a microwave as long as you follow these three golden rules:
- Chop the chocolate into small pieces so it melts faster
- Create a gentle heat so it doesn’t burn
- Keep water out of it so it doesn’t seize
How To Melt Chocolate in A Microwave
Place the chocolate in a microwave-safe bowl. Microwave in short 20-second bursts, stirring thoroughly after each burst until the chocolate has a syrupy consistency.
How To Melt Chocolate on The Stove
Add your chocolate to a heat-proof bowl and place it in a pan filled a third of the way with water. Bring the water to a boil over medium heat, then turn off the stove and let the chocolate melt until syrupy.
You can use these methods for any chocolate-dipped cookie recipe, like our homemade biscotti!
Storing Valentine’s Day Cookies
You can store these sugar cookies in an air-tight container for up to a week at room temperature. So feel free to make them a few days ahead. You can also freeze them in a freezer-safe container, separated with layers of parchment or wax paper, for up to 3 months. Don’t refrigerate sugar cookies, as it can dry them out and dull their flavor.

Valentine’s Day Cookies
Cost $7.37 recipe / $0.61 serving
Ingredients
- 12 Tbsp salted butter, softened* ($1.78)
- 1 cup sugar ($0.32)
- 1 tsp vanilla ($0.57)
- 1 large egg ($0.42)
- 2 cups all-purpose flour ($0.24)
- 3/4 tsp baking powder ($0.05)
- 1 lb melting chocolate* ($3.99)
Instructions
- In a large bowl, use a hand mixer to whip the softened butter & cup of sugar until fluffy.
- Add the beaten egg and vanilla to the creamed butter and mix to incorporate.
- In a separate bowl, mix the all-purpose flour and the baking powder.
- Add half the flour to the creamed butter and mix just until a wet dough forms. Add the second half of the flour and mix gently until a stiffer dough forms. Roll the dough into a ball.
- Place the dough between two sheets of parchment paper and roll the dough ¼ inch thick. Cool for thirty minutes in the fridge. Preheat your oven to 350°F.
- Once the dough has hardened, cut out the cookies, remove the scraps from the cookie sheet, and leave the cookies behind. Roll any scraps out on a separate piece of parchment, and chill before cutting them into cookies.
- Place the sheet of parchment paper with the cookies on a baking sheet. Bake the cookies at 350°F for 3 minutes. Next, rotate the pan, so the front faces the back—then bake for 3 to 4 minutes until they slightly lighten in color.
- Cool the cookies in the baking sheet for a few minutes before transferring them to a cooling rack. Decorate when cookies have cooled.
To Melt the Chocolate in the Microwave: Melt the chocolate in a bowl wide enough to dip the cookies into but small enough to create a deep pool of chocolate. If using a microwave, melt in 20-second increments, stirring after each.
To Melt the Chocolate on the Stove Top: If using the stove, place a small wide-mouthed bowl in a pan filled a third of the way with water. Bring the water to a boil, then turn off the heat. Leave the bowl in the water and stir until the chocolate melts.
- Dip half of the cookie in the chocolate and garnish if you'd like to. Then place back on the cooling rack, allowing the chocolate to harden.
See how we calculate recipe costs here.
Notes
Nutrition Information
How to Make Valentine’s Day Cookies – Step by Step Photos
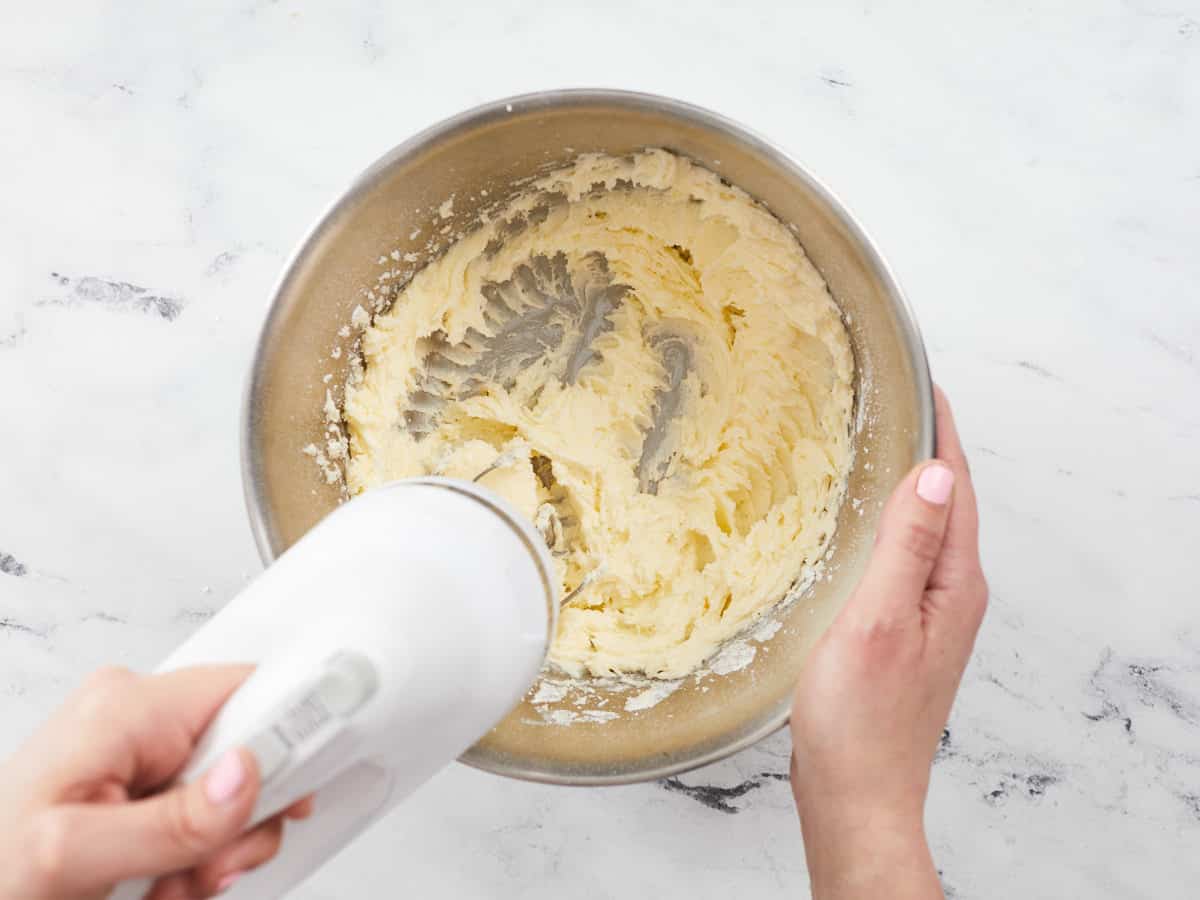
In a large bowl, use a hand mixer to whip the 12 tablespoons of softened butter & cup of sugar until fluffy.
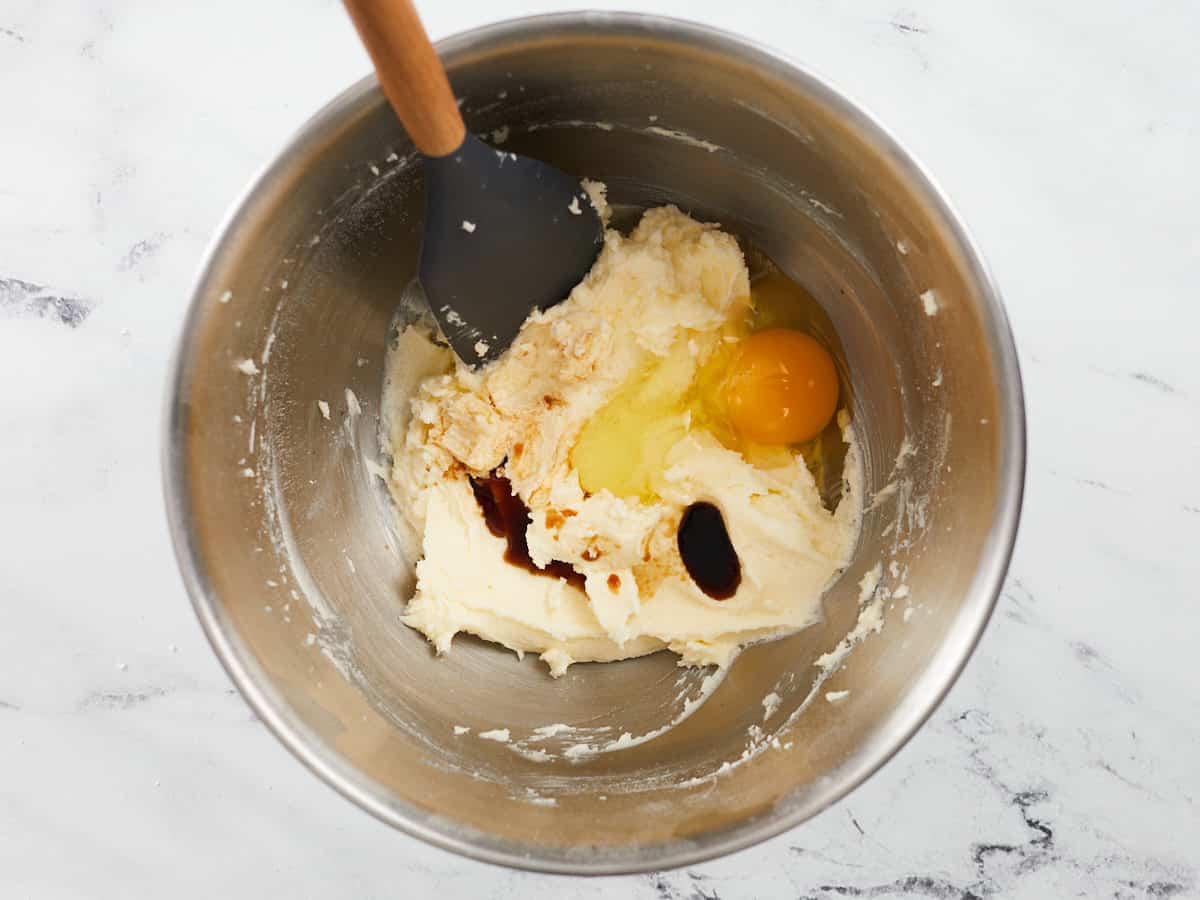
Add the beaten egg and the teaspoon of vanilla to the creamed butter and mix to incorporate.
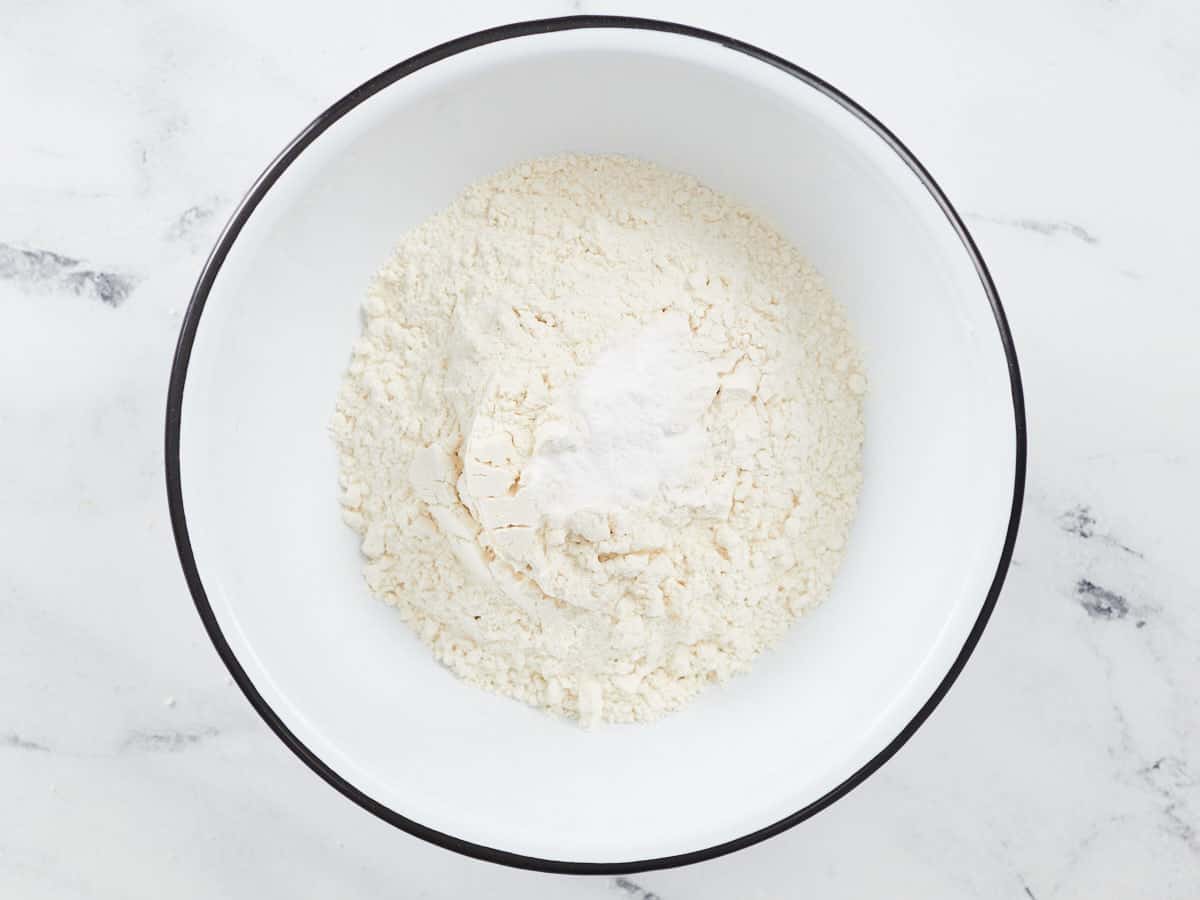
In a separate bowl, mix the 2 cups of all-purpose flour and the 3/4 teaspoon of baking powder.
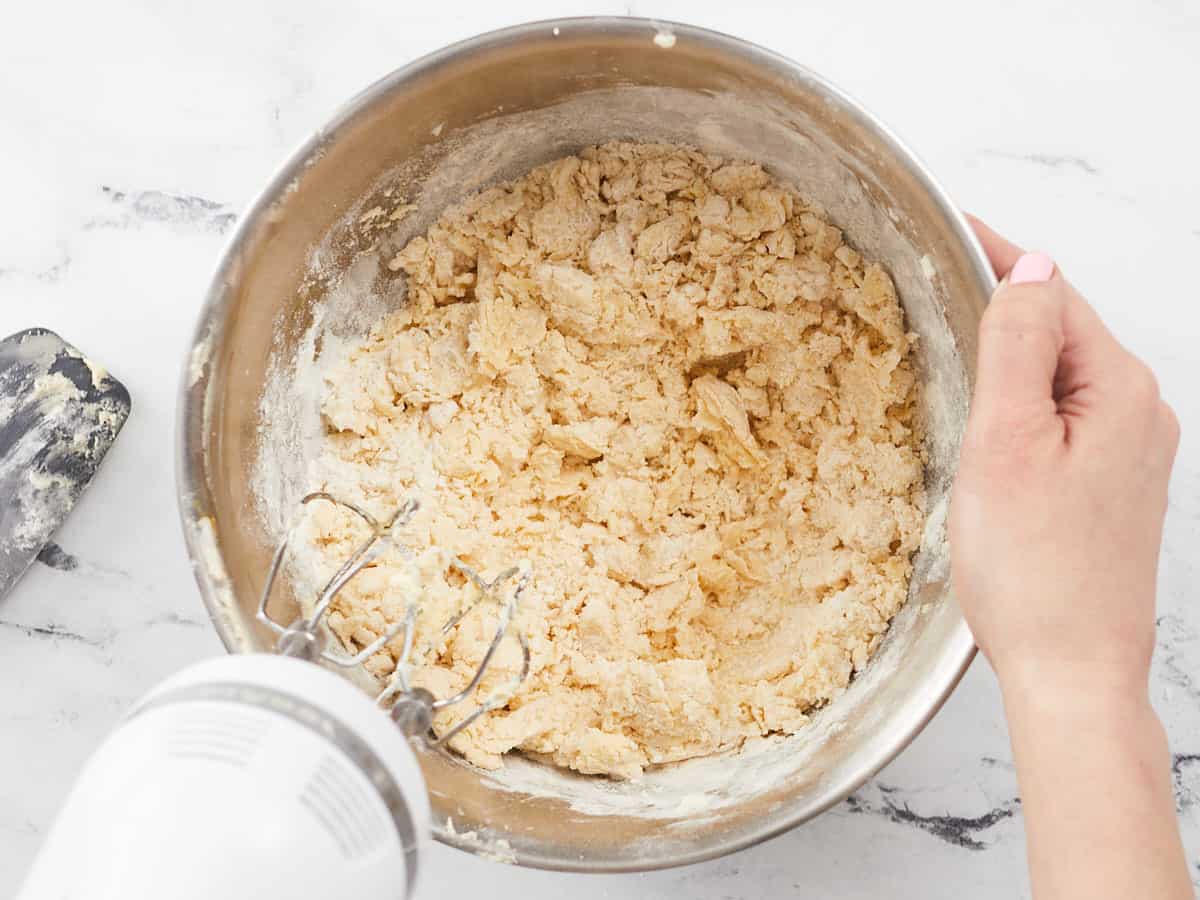
Add half the flour to the creamed butter and mix just until a wet dough forms. Add the second half of the flour and mix gently until a stiffer dough forms.
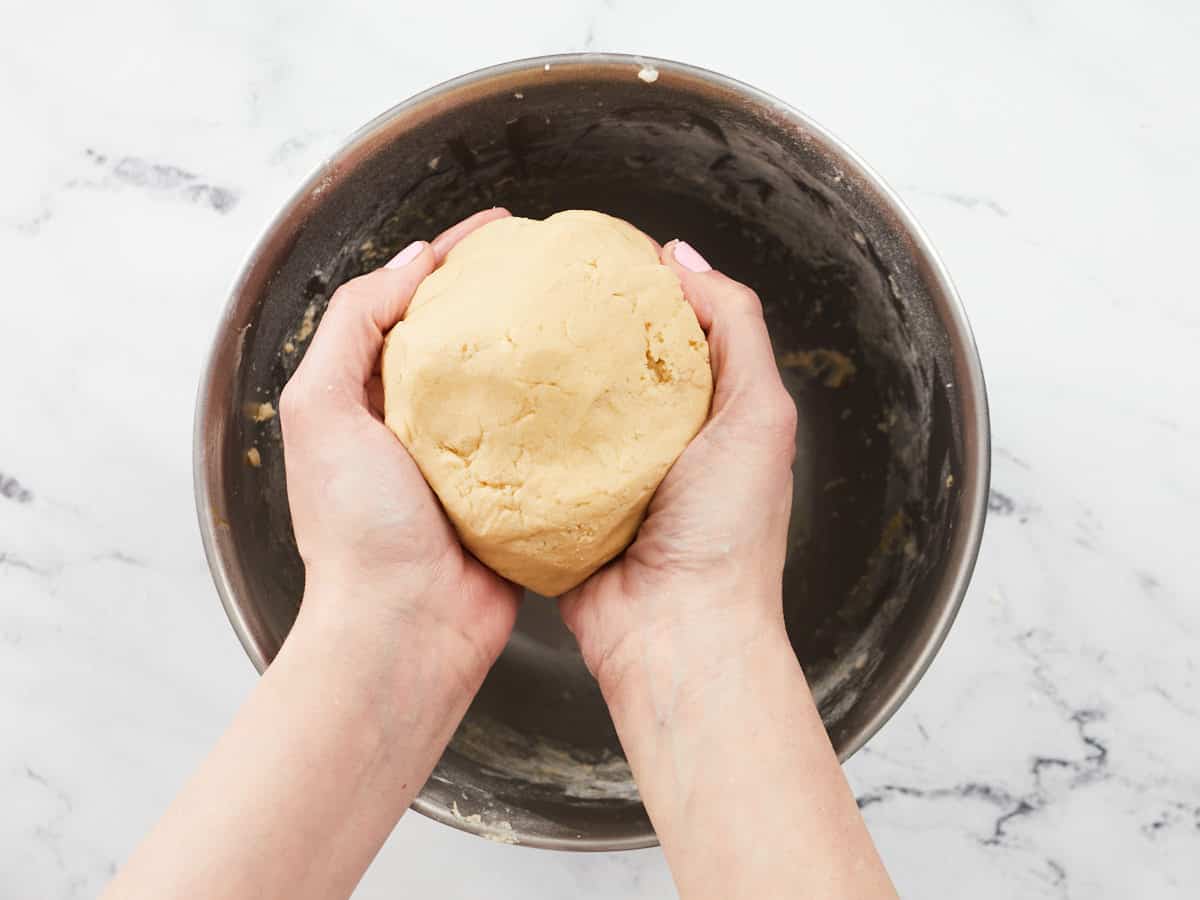
Roll the dough into a ball, but do so quickly. You don’t want to overwork the dough, as it will create a tough texture.
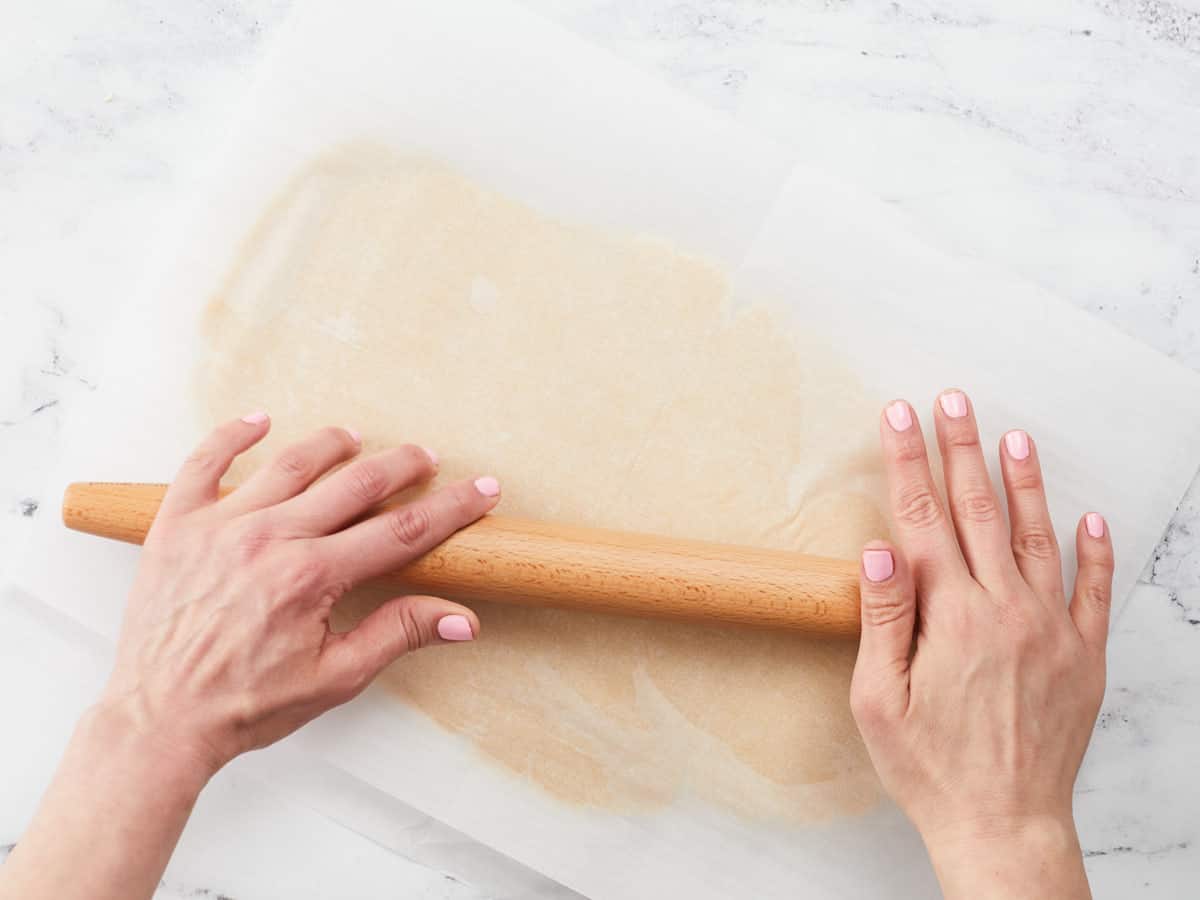
Place the dough between two sheets of parchment paper and roll the dough ¼ inch thick, or about the thickness of an ear lobe. Cool for thirty minutes in the fridge. Place a rack in the center of your oven and preheat it to 350°F.
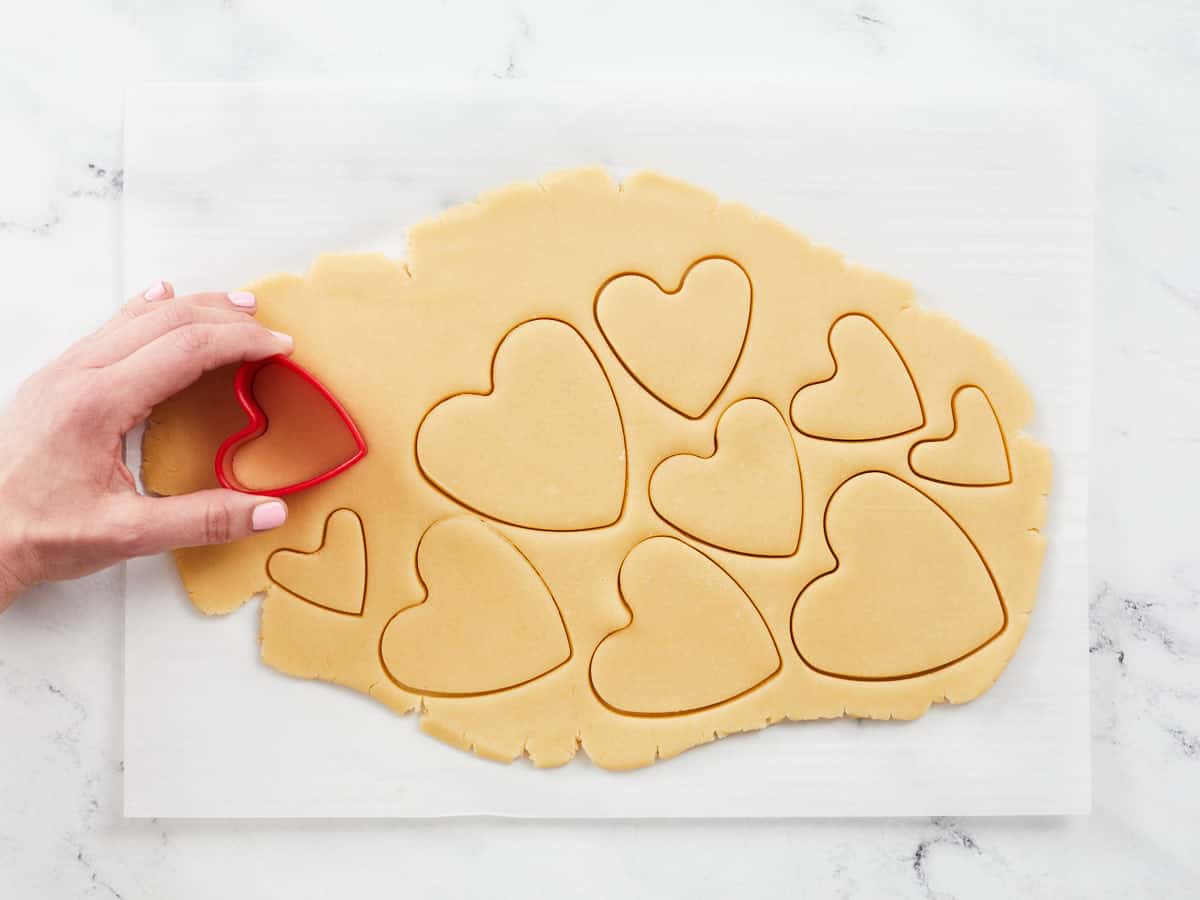
Once the dough has hardened, cut out the cookies, remove the scraps from the cookie sheet, and leave the cookies behind. Roll any scraps out on a separate piece of parchment, and chill before cutting them into cookies.
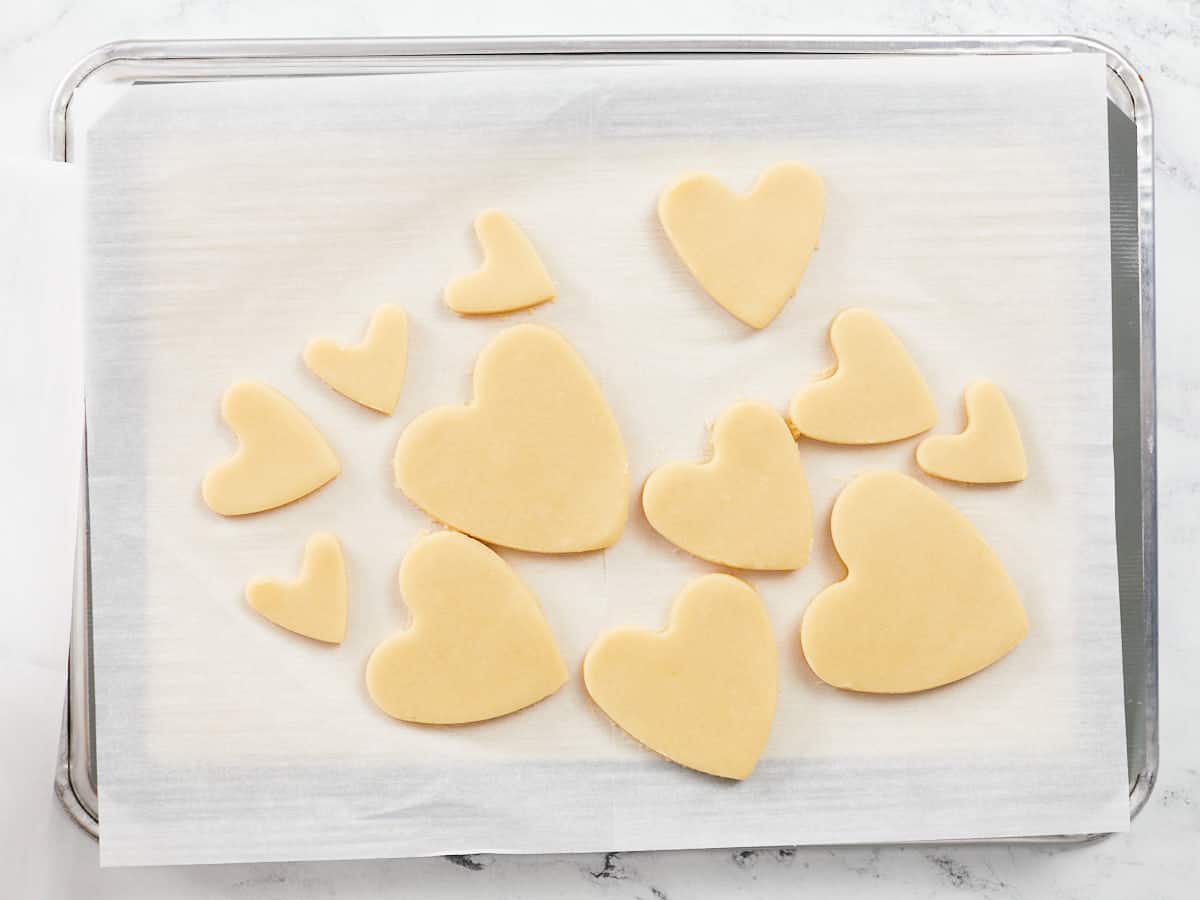
Place the sheet of parchment paper with the cookies on a cookie sheet or sheet pan. Bake the cookies at 350°F for 3 minutes. Next, rotate the sheet pan so the front faces the back—then bake for 3 to 4 minutes until they slightly lighten in color.
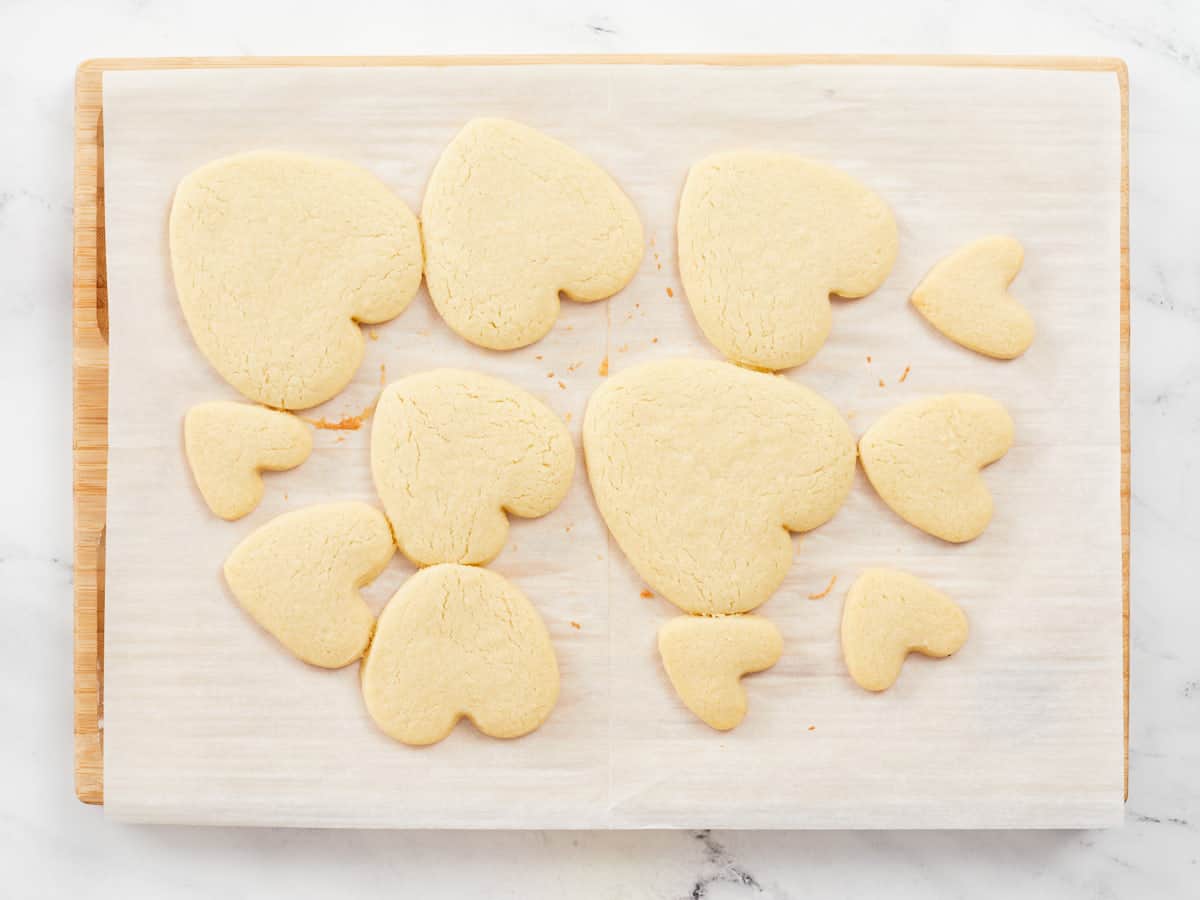
Cool the cookies in the sheet pan for a few minutes before transferring them to a cooling rack. Decorate when cookies have cooled.
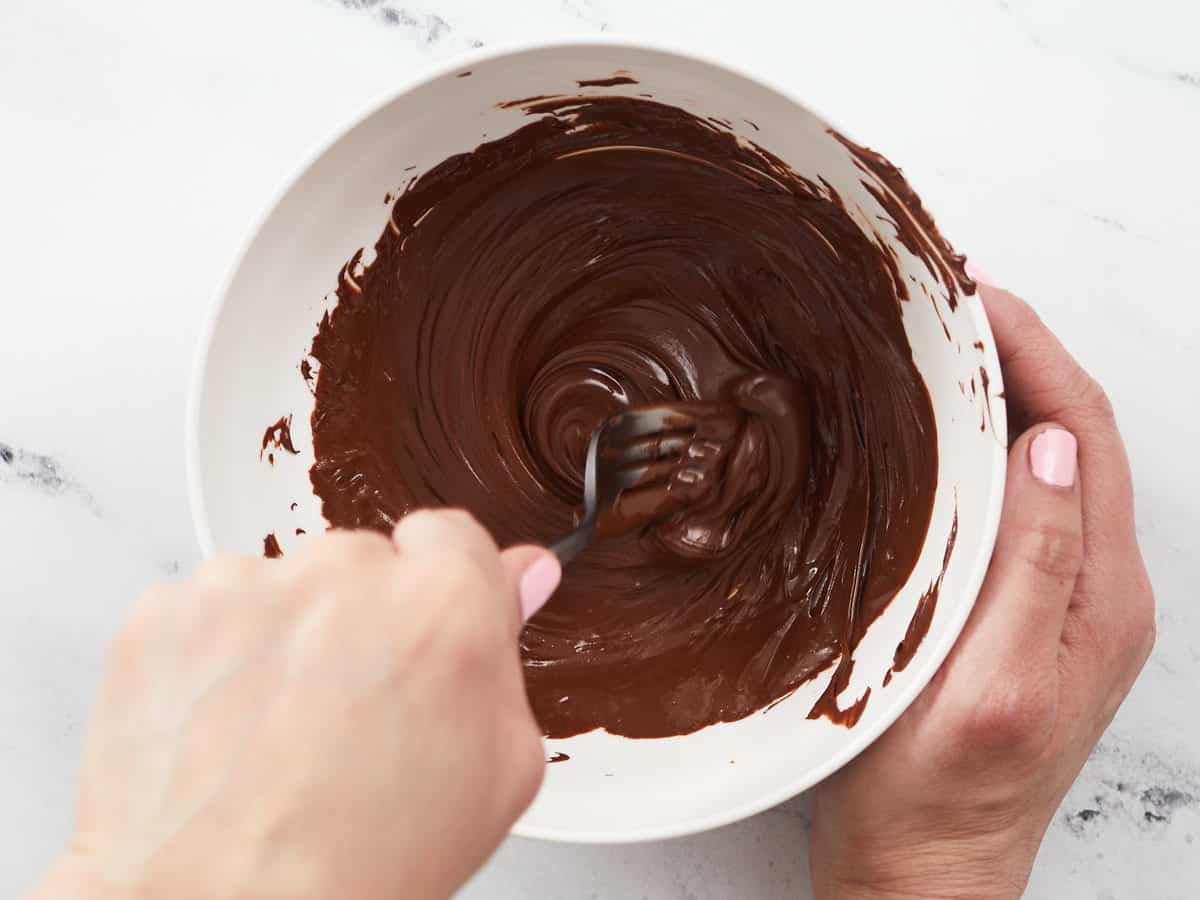
Melt the chocolate in a bowl wide enough for to dip the cookies into but small enough to create a deep pool of chocolate. If using a microwave, melt in 20-second increments, stirring after each. If using the stove, place the bowl in a pan filled a third of the way with water. Bring the water to a boil, then turn off the heat. Leave the bowl in the water and stir until the chocolate melts.

Dip half of the cookie in the chocolate and garnish if you’d like to. Then place it back on the cooling rack, allowing the chocolate to harden. Give these amazingly cute Valentine’s Day cookies out to your loved ones, but make sure to save some for yourself!!


I had no issues with this recipe, but I could see where a few could come up if you were not mindful.
For me, the dough was a bit crumbly when I mixed it together, so parchment paper on either side is a must. Chilling cut out cookies is required if you want the best texture and for the cookies to not become deformed, no matter the recipe (trust me, I have skipped the chilling many times and regret it frequently). I work quickly enough that I did not feel the need to refrigerate the scraps to make sure they stay cold.
My oven runs hot, so I cooked for 2, turned, then cooked for 3. After cooling, they turned out just right.
I got compliments from all who ate them.
Katie, thank you for your kind reply. This is such a curious thing that could happen to a cookie. I’m grateful for your explanation.
I wanted to leave a second comment because I noticed some disgruntled bakers’ reviews. This recipe might be a bit advanced in terms of the rolling of the dough and baking time.
I used parchment on both the top and bottom of the dough (as in picture here), and put it on a towel to keep it from sliding. Otherwise, it may have stuck to my roller.
The baking is also not one size fits all cookies. If you had a tool that the roller sat on to make sure the dough was all level, that would be the only way to ensure that all of your cookies are the same thickness and thus need around the same bake time. I needed to carefully take some out earlier than the others. I figured this out by looking at the bottom edges of the cookies – they start to get golden at that edge when they are finishing. Also for the larger hearts, you need to look at or very gently touch the middle of the cookie. Is it set yet? If not, keep it in a bit longer. My bake times were closer to 10 mins for thicker small hearts and 12 for thicker large hearts.
Hope this helps!
These were a huge hit as gifts for my single lady friends! I have never been able to make my baked goods look so polished on the first try. Thanks so much for these – I hope to make this a tradition going forward!
I read through this recipe but it looked too fiddly. Then I read this:
rotate the sheet pan so the front faces the back—then bake for 3 to 4 minutes until they slightly lighten in color.
How could these lighten in the oven? It can hardly be a typo, so it feels as if no care was put into writing this recipe. There isn’t anything in this recipe to make we want these cookies.
Hey Judith, if you look at the photos themselves, the cookies do lighten in the oven. This was also what I noticed when I made them myself. The dough is quite yellow and the baking process makes them more white. Some cookies brown in the oven, and at the very bottoms, these may get golden, but overall these are light cookies. I found the recipe to be detailed accurately after making a batch for myself.
This is not a good recipe. Why are you using parchment and then chilling and then taking the scraps and then rolling out again and then chilling? Who has this much room in their fridge, or this much time for sugar cookies? There are way easier recipes that I would do before this again. 3 minutes and then 4 minutes cooking time? They were way undercooked. I would not make these again. I’m disappointed because I have always loved Budget Bytes, but this is a failure. Going to need to reconsider following this site so much.
So I had extremely high hopes for these but the dough was a sticky mess even after letting it chill for the indicated time. I tried to ball it back up and chill again but couldn’t get it to and I ended up having to throw it all away. So much wasted butter.