
Our original 5-Minute Nacho Cheese Sauce has been a reader favorite for years, but the traditional cheese sauce method using a flour and butter roux can be a bit tricky for new cooks. But everyone deserves to have a ooey-gooey cheese sauce, even if you’re new in the kitchen. 😉 So here’s a super simple no-roux nacho cheese sauce that only requires a few simple ingredients and is guaranteed to bee smooth and delicious every time. Promise!

All recipes are rigorously tested in our Nashville Test Kitchen to ensure they are easy, affordable, and delicious.
The Science of Cheese Sauces
Cheese sauces can be tricky for new cooks because the fat in cheese and the water in milk tend to repel each other, making it difficult for them to melt together into a smooth sauce. To get around this oil and water conundrum you can do two things: use an emulsifier (a molecule that attracts both water and oil) or use a milk product with very little water content so the fat isn’t repelled.
Traditional cheese sauces use a mix of flour and butter that act as the emulsifier, but this technique can be a little tricky. For this nacho cheese sauce recipe, we just eliminate most of the water to begin with by using evaporated milk instead of whole milk. The fat and proteins in the evaporated milk combine seamlessly with the fat in the cheese, making a smooth and creamy sauce with no special tricks needed!
Do I Have to Use Evaporated Milk?
The low water content of the evaporated milk is what allows the cheese to melt into the sauce smoothly without using an emulsifier. Another low-water option to use in place of the evaporated milk is heavy cream, although that will create an extremely rich cheese sauce. Regular milk is far too watery and will not work for the method presented below. Instead, in order to make nacho cheese with milk you’ll need to use the technique used in our 5-Minute Nacho Cheese Sauce.
What Kind of Cheese Is Best for Nacho Cheese
Sharp cheddar gets my vote for nacho cheese. It melts smoothly without being stringy, while having a nice flavorful punch. You can use mild or medium cheddar if you prefer, but the flavor will be a bit blander. Monterey jack and pepper jack also melt really well into sauces and make a great white nacho cheese sauce.
And ALWAYS buy block cheese and shred it yourself for cheese sauces rather than buying pre-shredded cheese, which is coated in anti-caking agents and will not melt as smoothly.
How to Serve Nacho Cheese
On nachos, of course! But you can also use this thick and smooth cheese sauce on many other dishes. Dry pouring it over vegetables (like broccoli or asparagus), bowl meals, mashed, roasted, or baked potatoes, or even pasta for a quick mac and cheese dupe!
Can It Be Reheated?
One of the other benefits of using evaporated milk is that it makes this cheese sauce very stable. This sauce reheats well over low heat without separating (just don’t over heat it or the cheese will break!). You can also keep it warm for parties using the low setting on a slow cooker.

Easy Nacho Cheese

Ingredients
- 8 oz. sharp cheddar ($2.49)
- 1 cup evaporated milk ($1.00)
- 1/4 tsp chili powder ($0.02)
- 1 Tbsp pickled jalapeño brine (optional) ($0.10)
- 1/8 tsp salt ($0.01)
Instructions
- Shred the cheddar cheese.
- Add the evaporated milk and chili powder to a sauce pot and heat over medium. Allow the evaporated milk to come up to a simmer.
- Reduce the heat to low and start adding the shredded cheese, one handful at a time, stirring it in until fully melted before adding another handful. Continue until all of the cheese has been melted into the sauce.
- Add the pickled jalapeño brine and stir to combine. Give the nacho cheese a taste and add a pinch of salt, if needed. Enjoy the cheese poured over your favorite foods!
See how we calculate recipe costs here.
Nutrition Information

How to Make Nacho Cheese – Step by Step Photos
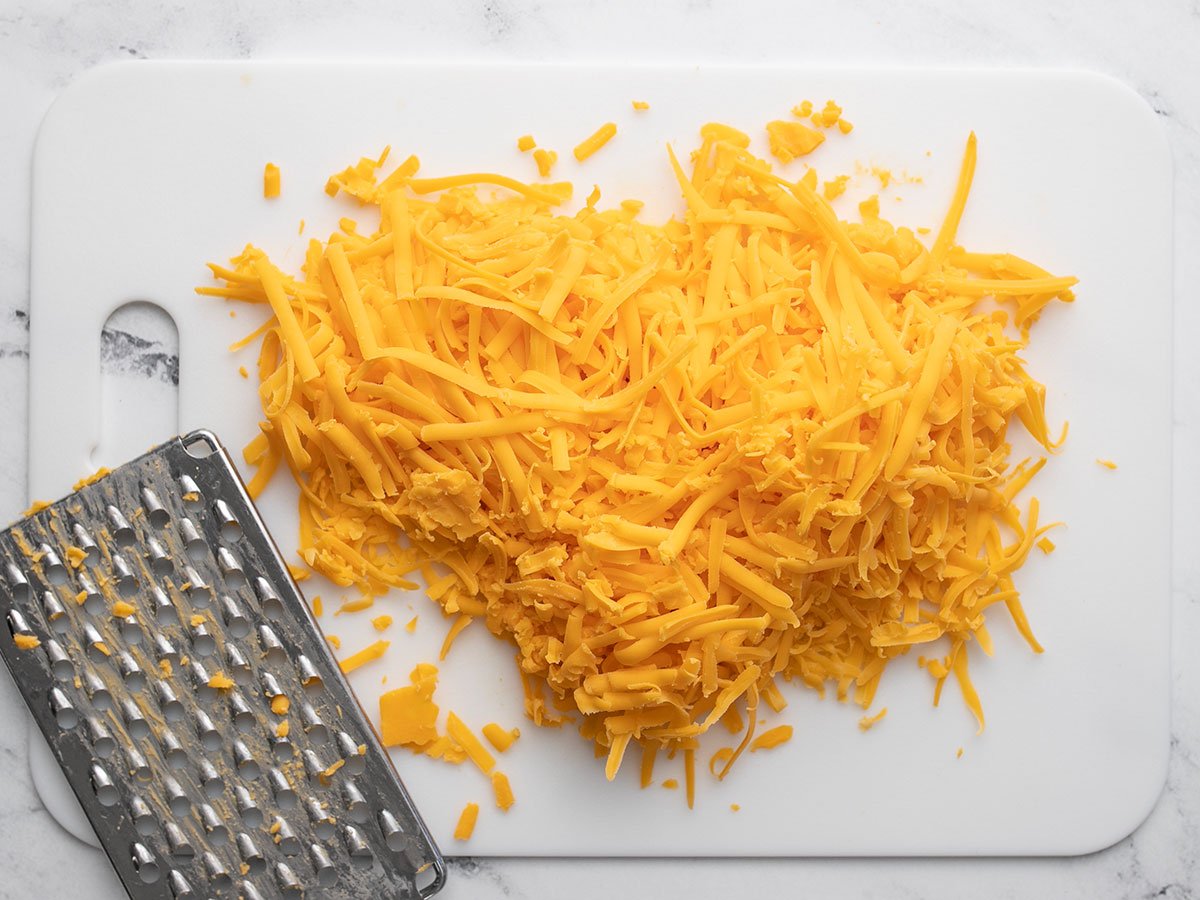
Start by shredding an 8 oz. block of sharp cheddar cheese. Using block cheese that you shred yourself instead of pre-shredded cheese makes a much better sauce.
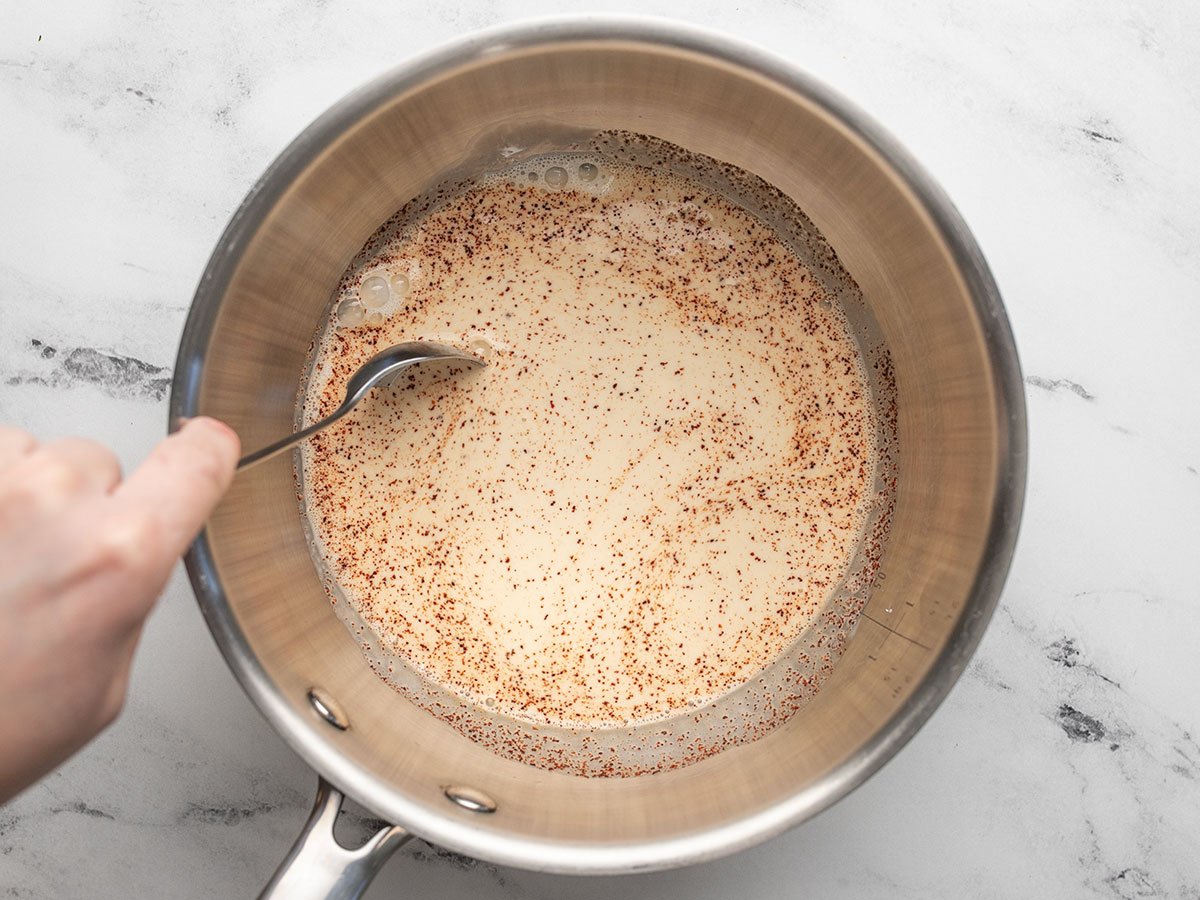
Add one cup of evaporated milk to a sauce pot along with ¼ tsp chili powder. Heat and stir over medium-high until it comes to a simmer.
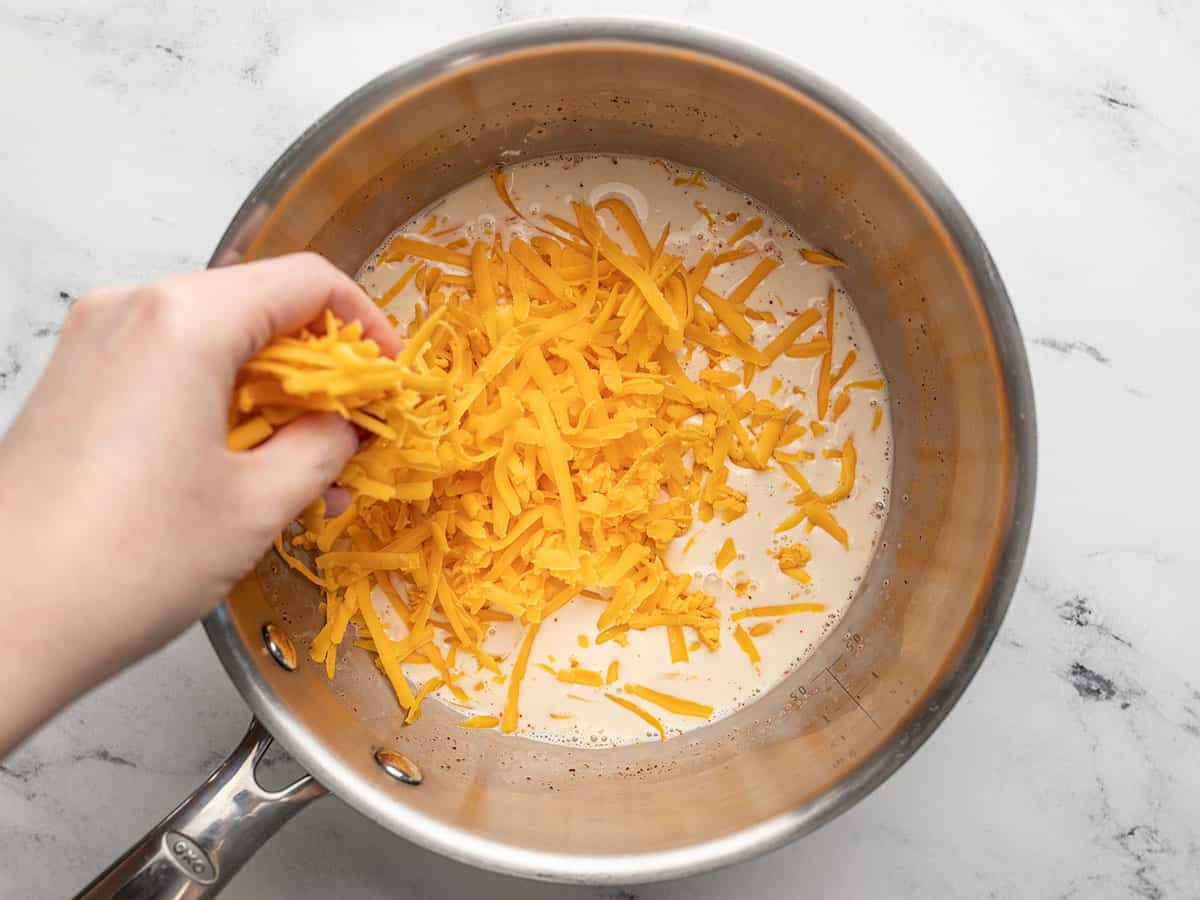
When it reaches a simmer, turn the heat down to low. Begin adding the shredded cheese, one handful at a time, stirring it in until completely melted before adding the next handful.
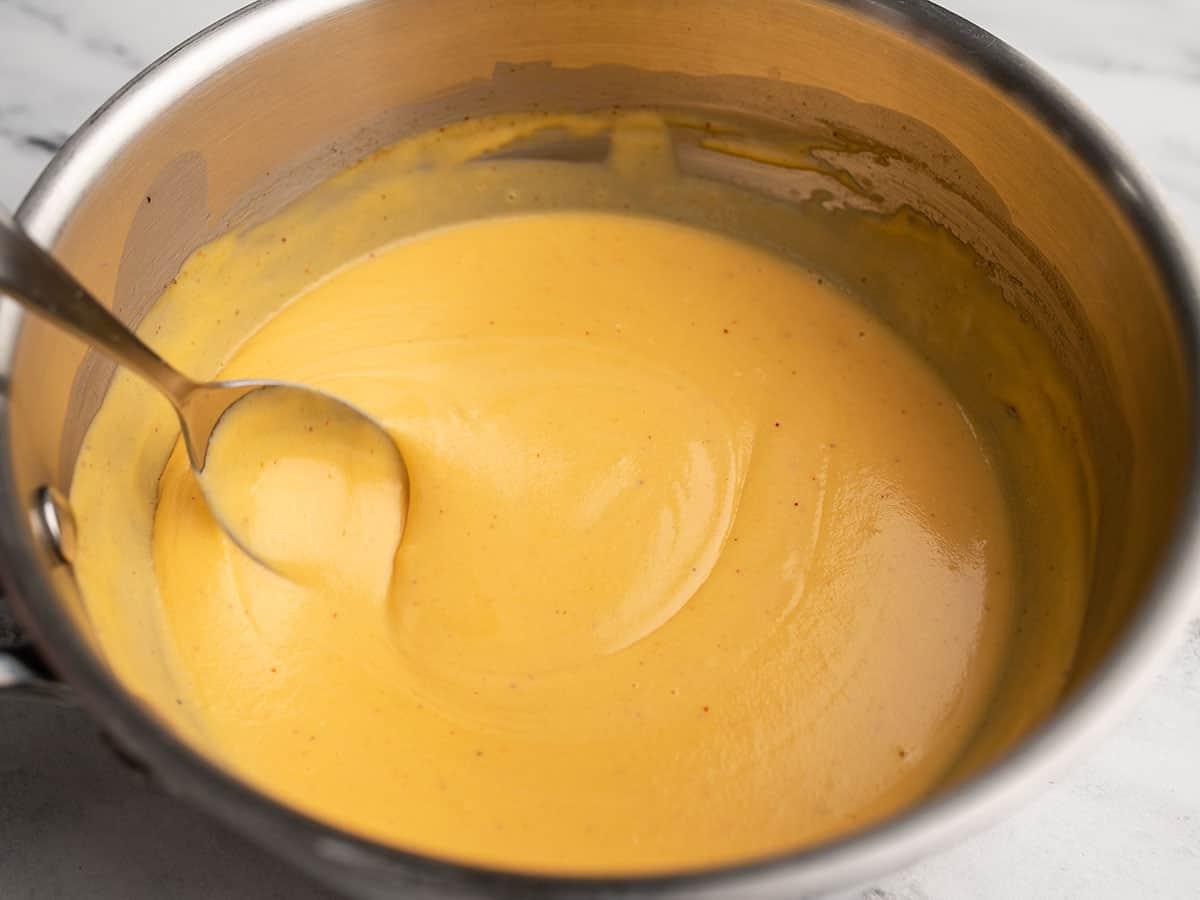
Continue adding cheese until it has all been added to the sauce. Finally, stir in 1 Tbsp brine from pickled jalapeños. Give the cheese a taste and add a pinch of salt, if needed.

Pour your nacho cheese sauce over a plate of chips, your favorite vegetables, or just about anything. Cheese makes everything better. :P

Taste was fine, but the texture was very gritty and unappealing and it chunked back up as soon as it was less than warm or stopped moving. I kinda wish I had my block of cheddar back. I measured everything exactly, used the right temps, and shredded from a block of cheese. Still though, it was an adventure and I appreciate you putting it out there.
Mine turned out very gritty and not runny at all or smooth. I grated a block of sharp cheddar and followed recipe as directed.
This was very good, and much more healthy than using processed junk. I didn’t use the pickled jalapeño juice. Some of the cheese didn’t want to melt smooth (yes, I did grate a block), but it was still delicious. The texture is not the same as what you get at a concession stand, a bit runnier, but still delicious. I cut up some jalapeños and hubby and I had salad and nachos and cheese for dinner. Yum!
Scrumptious! Instead of the chili powder and brine, I added garlic powder and black pepper, and we put it on shaved steak sandwiches. This will be part of our rotation for sure.
Oh, one more question–can I use lowfat or nonfat evap milk?
You are welcome to try a low-fat product with this recipe, but the results will likely be different from our recipe and may not be as successful. ~ marion :)
Marion, thank you for your reply. I know some recipes just don’t translate well with lowfat or nonfat milk–evaporated or not. This recipe tempts me since it can be poured over veggies, rice, etc. I will try it with whole evap milk. Thanks again. Barb
How long with this keep in the fridge and can it be frozen?
It can be refrigerated in an air-tight container for 4-5 days. As Beth mentions, it does reheat beautifully. This is what I’d suggest (as well as reducing the serving size to reduce leftovers.) While we haven’t tried it ourselves, and I don’t know how the flavor and texture will change once frozen — you should also be able to free this cheese sauce since evaporated milk freezes very well. I would suggest lining an ice cube tray (or a mini muffin pan) with plastic wrap, or spraying liberally with cooking spray, and freezing it into cubes before transferring the cubes to a freezer bag. Freezing into smaller chunks will make reheating much easier — but if you do freeze it all in one container, make sure it’s not totally full so it has some room to expand. It can be frozen for a few months. ~ Marion :)
Thank you again for your reply and hints.
Any time!
Its so easy to make and very good! Be sure to not use shredded cheese and it will come out perfect!
I tried this tonight…I have the same thing happen tonight that usually happens with cheese sauce…it turns gritty…it’s still good but it doesn’t look anything like yours. :)
Did you use shredded cheese? Since its coated to not stick, it tends to melt weirdly.
I have the same issue. What could be causing this
If all your cheese sauces are gritty, I would check the ingredients in the cheese. It should only be: fresh pasteurized milk; cheese cultures; salt; enzymes.
Try a good vermont cheese like Cabot.
Also, Cheddar cheese is not naturally orange, so they use ground Annatto seeds for color. That would be my first guess, but I don’t use orange cheese.
This is awesome, and a bonus is that it’s gluten free (my niece is allergic to wheat). I’ll be giving this a try!
Can you tell me how to make it more spicy? I love a spicy cheese sauce and can’t seem to find one that satisfies the heat I love!
I hear ya! I’m a spicy gal, too. Replace the chili powder with cayenne pepper, adding 1/8 teaspoon at a time until it hits that heat level you’re looking for. You could also amp up the heat by switching up the pickled jalapenos for fresh or reaching for a serrano pepper instead. ~ Marion :)
Thank you! I’m excited to try this tonight!