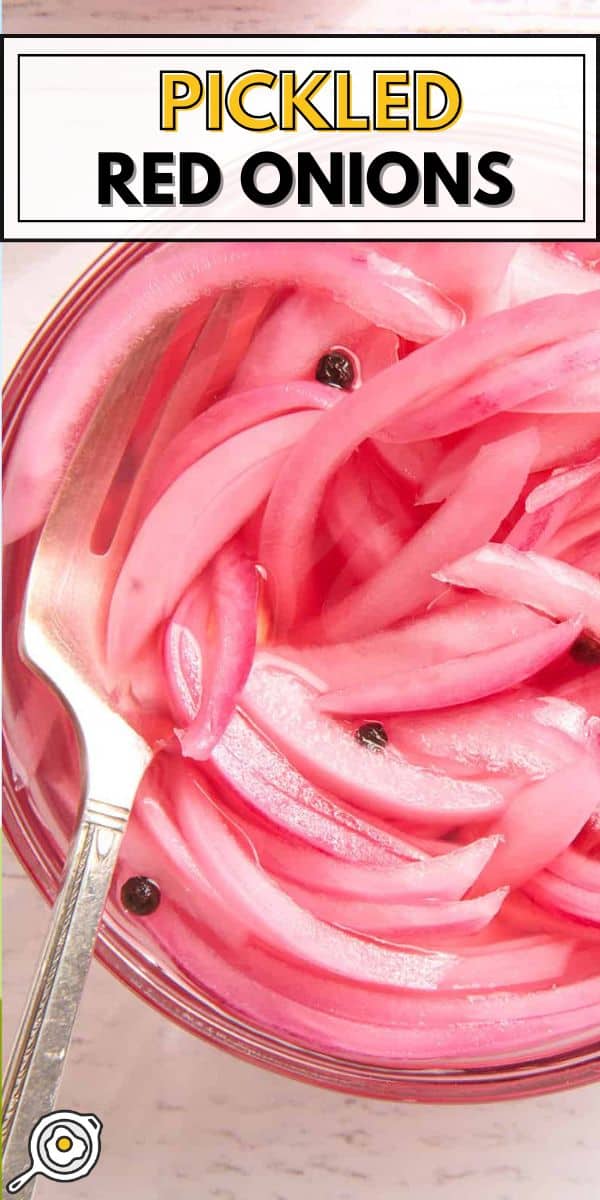
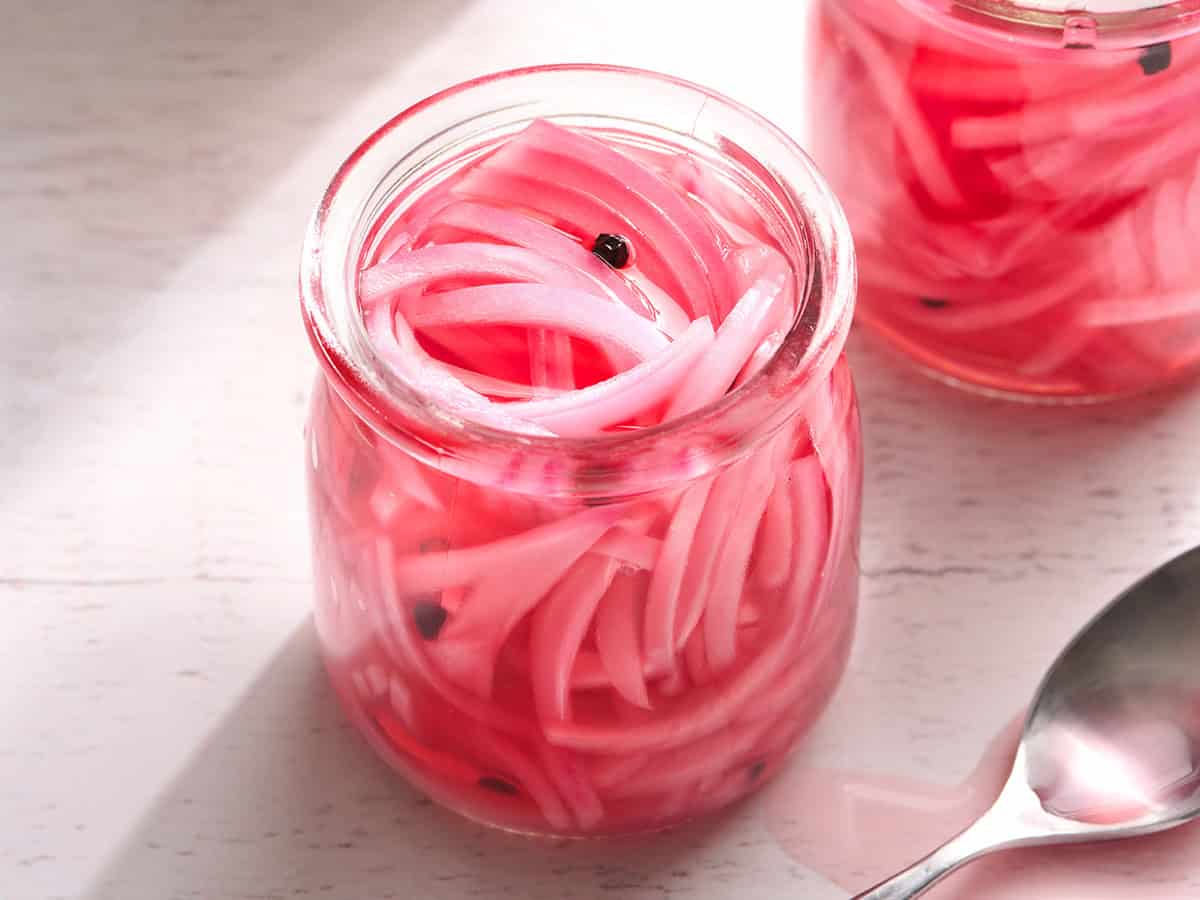
I love red onions because even just a few slivers can truly transform a recipe, and there’s no substitute that’s really quite like it. But I can rarely find a red onion that’s smaller than a softball, and I usually only need ¼ or less for whatever I’m making. Because I hate to waste the rest of the onion, I always use the leftovers to make a batch of these quick Pickled Red Onions. They’re bright, tangy, budget-friendly, and an easy way to add a punch of flavor to tacos, sandwiches, salads, bowls, and more. Just slice, brine, chill, and they’re ready to go!
All recipes are rigorously tested in our Nashville Test Kitchen to ensure they are easy, affordable, and delicious.
“Amazing!! We put these on everything….some even ate them straight out the jar! Thank you for sharing this wonderful (and easy) recipe!”
Kristina
A Quick Pickle That Goes With Everything
There are a million different ways to make pickled red onions, but this is the simple, budget-friendly version I keep coming back to. Pickled red onions are incredibly easy because they only require pantry staples and take about 5 minutes of active prep. You don’t have to worry about canning or fermentation here. These are quick refrigerator pickles, so the vinegar brine does the work for you as the onions cool and chill!
What I love most about this recipe for pickled red onions is the bold and tangy brine. Boiling the vinegar with the salt and sugar helps everything dissolve evenly, softens the sharp bite of the vinegar, and gently relaxes the onion’s cell walls so they can soak up the brine faster. That quick heat also helps the onions soften just enough and turn a gorgeous bright pink color. After about 30 minutes, they’re ready to pile onto tacos, sandwiches, salads, bowls, eggs, or anything that needs a little zippy crunch.
I’ve kept this recipe very basic so it’s easy to make with what you already have, but it’s also easy to customize once you’ve made it a few times. Try adding a bay leaf, star anise, sliced jalapeño, red pepper flakes, or extra garlic to make the flavor your own.
Recipe Success Tips
- Use kosher salt for a clear, balanced brine. The measurements in my recipe here are based on kosher salt, which has large crystals that dissolve well in the warm vinegar brine. Table salt is much finer and can make the brine taste overly salty. If all you have is table salt, use about half the amount, then taste the brine once the salt and sugar have dissolved. You can always add more, but you can’t take it back once it’s added!
- Thin slices of onion pickle faster. Thinly sliced onions soften and absorb the brine quickly, which is why I slice mine about ⅛-inch thick. If you want a crunchier onion with a slightly milder bite, slice them a little thicker.
- Although rare, pickled red onions can sometimes turn blue, green, or dark due to oxidation. This happens when the onion’s natural pigments react with oxygen, metal pans/containers, or darker ingredients (like apple cider vinegar and certain spices, if used). Garlic can also react with the vinegar and turn slightly greenish-blue. This color change is harmless, and the onions are still safe to eat as long as they smell fresh and have been stored properly.
Pickled Red Onions
Cost $2.17 recipe / $0.22 serving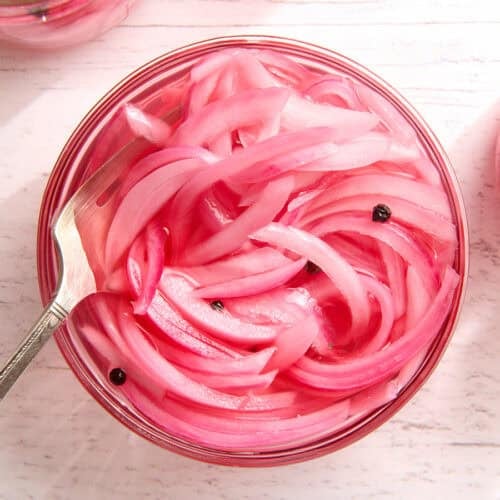
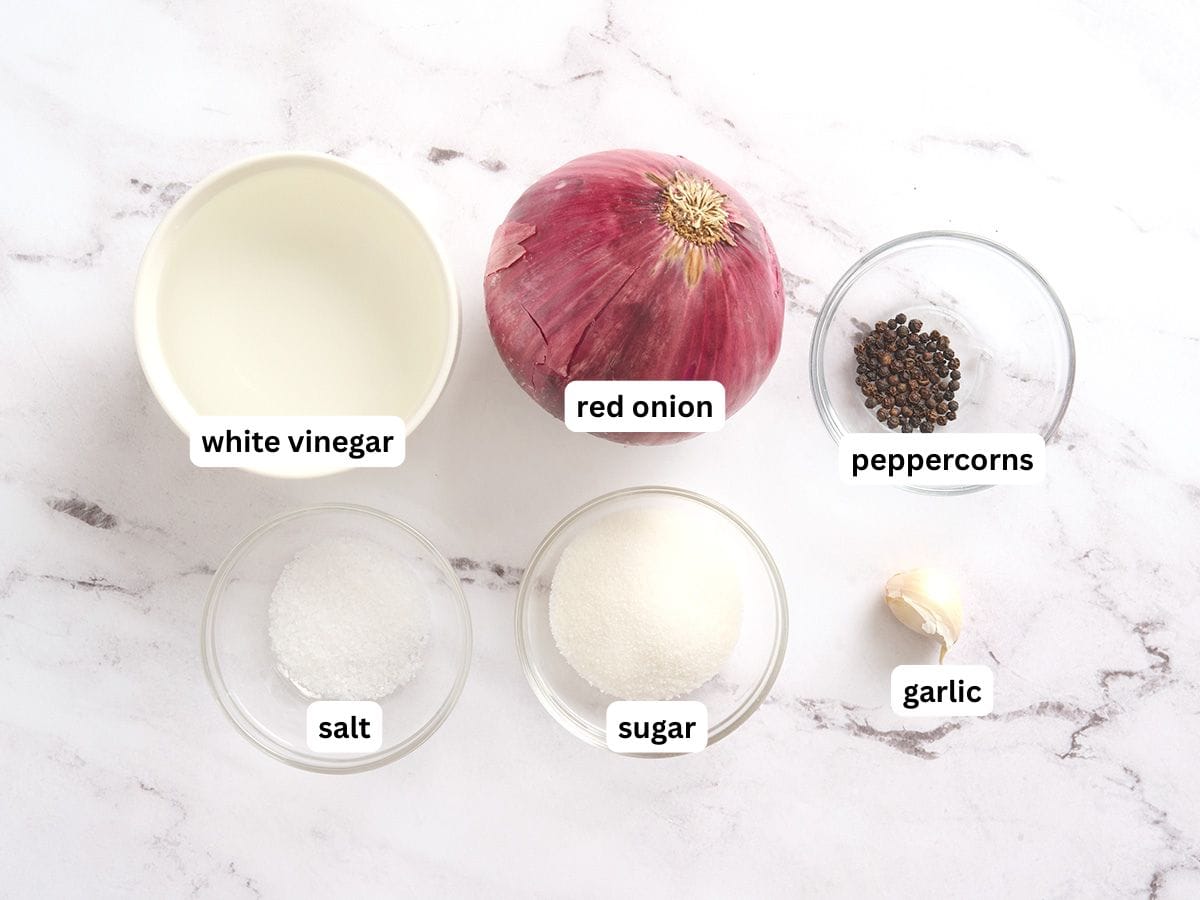
Ingredients
- 2 cups red onion (sliced thin, (about 1lb.) $1.53)
- 1 garlic clove (peeled and tipped, $0.06)
- 3 Tbsp white sugar (45g, $0.07*)
- 1 Tbsp kosher salt (15g, $0.10)
- ½ tsp whole black peppercorns (3g, $0.04)
- 1 cup white vinegar (8oz., $0.37**)
Video
Instructions
- Gather and prepare all ingredients.
- Thinly slice the red onion into ⅛-inch slices. Peel the garlic. Place the onion and garlic in a large glass or ceramic bowl.
- Add the sugar, salt, and peppercorns to a small sauce pot. Add the vinegar and whisk until most of the sugar and salt are dissolved. Place a lid on the pot and bring the mixture up to a boil over medium-high heat.
- When it reaches a boil, pour the vinegar over the sliced onion and garlic.*** Press the onion down so all the pieces are submerged, then let the mixture cool to room temperature. I sometimes place a piece of plastic wrap over the onions to help push them down and hold them below the surface of the brine (see the step-by-step photos below).
- Once cool, use the onions immediately or transfer the onions and all the brine to a covered non-reactive container (glass, ceramic, or plastic) for storage in the refrigerator. The onions can be stored in the refrigerator for 3-4 weeks.
See how we calculate recipe costs here.
Notes
Nutrition Information
How to Make Pickled Red Onions Step-by-Step Photos
Gather all of your ingredients.
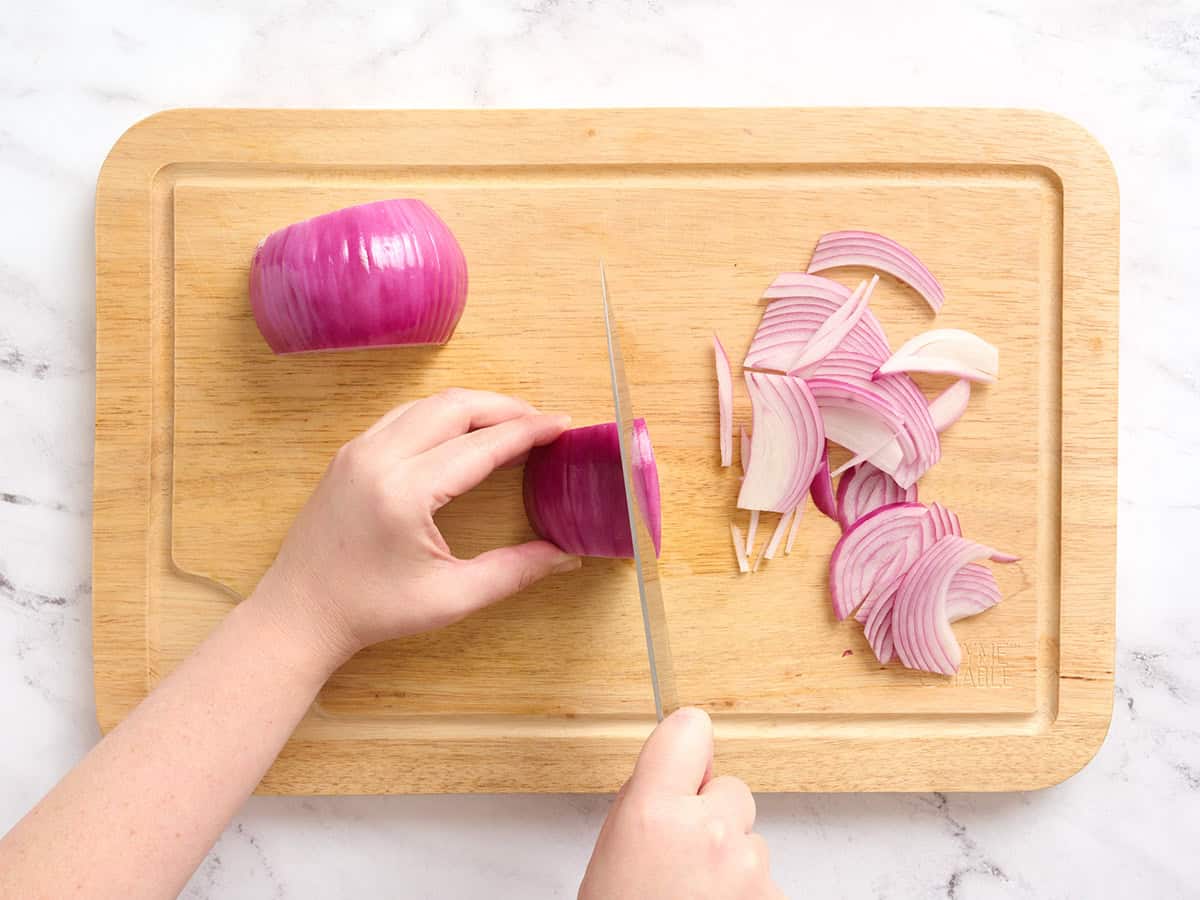
Slice the onion: This recipe works for about 2 cups of thinly sliced red onion, but you can use less if that’s what you have. It’s great for using up a leftover half onion, but I’ve used a whole onion for demonstration purposes here. Slice the onion into ⅛-inch slices. This helps maximize surface area and allows the brine to penetrate the onion quickly. It also helps distribute the pickled onion through the dish you’re using it for, so it doesn’t overpower individual bites. Thinner slices will soften faster, and thicker slices will stay crunchier.
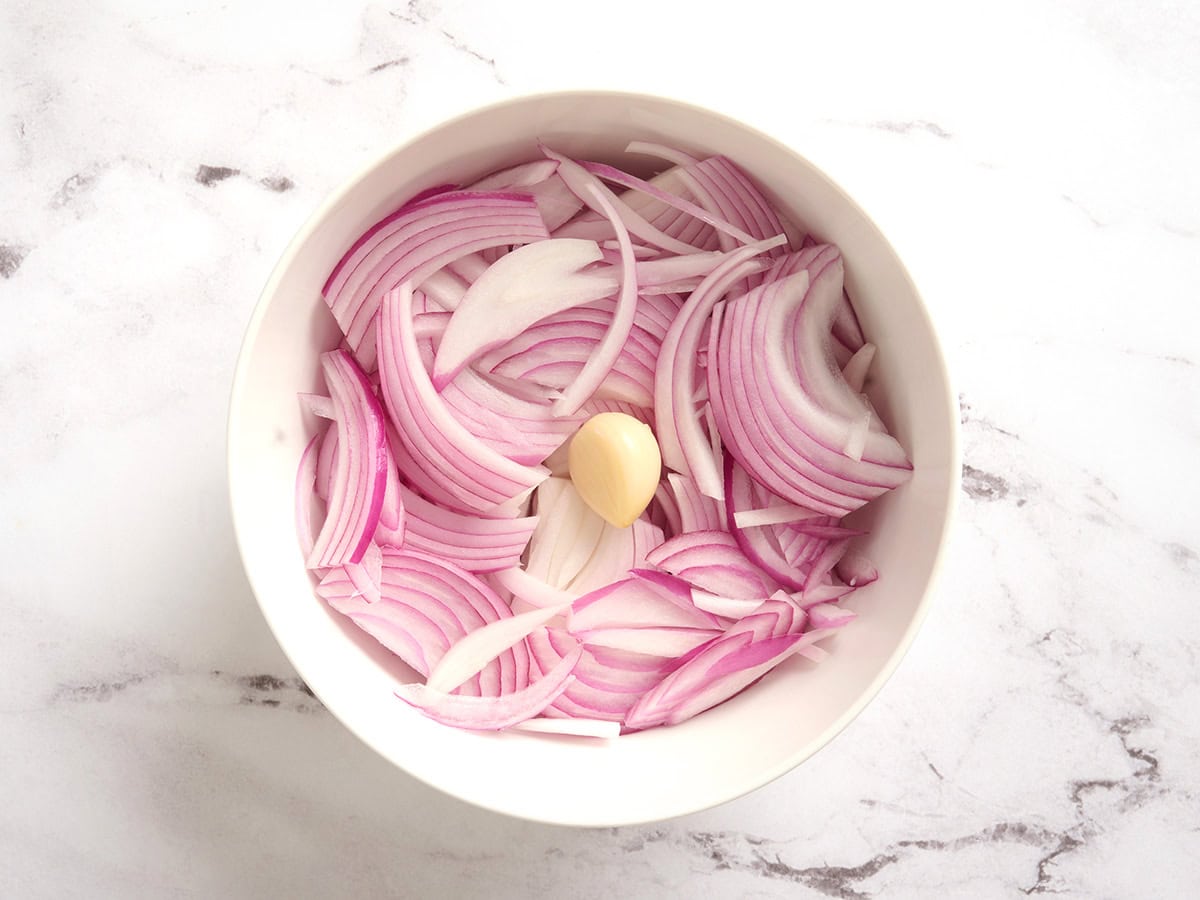
Place the sliced onions and one clove of peeled garlic in a large ceramic or glass bowl.
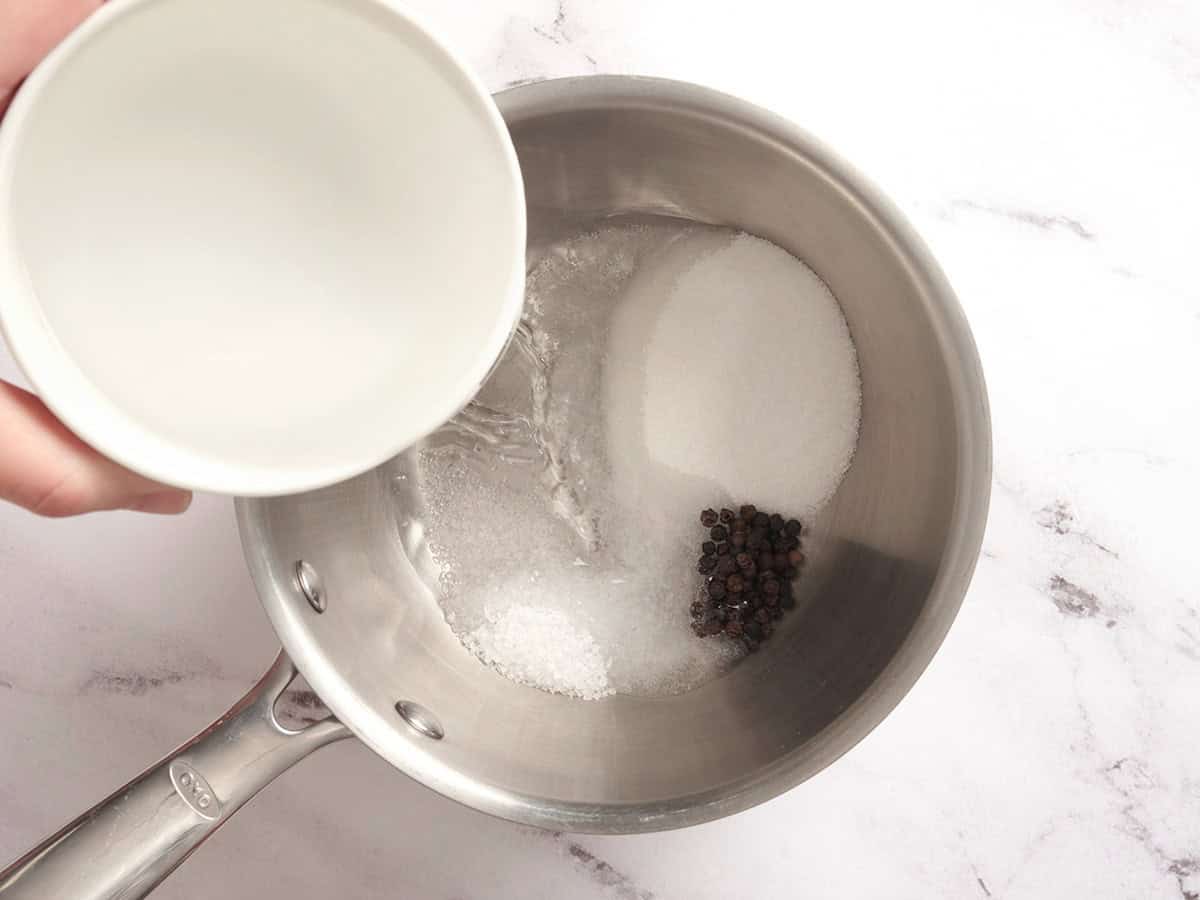
Make the brine: Add 1 Tbsp kosher salt, 3 Tbsp sugar, ½ tsp whole black peppercorns, and 1 cup white vinegar to a saucepot.
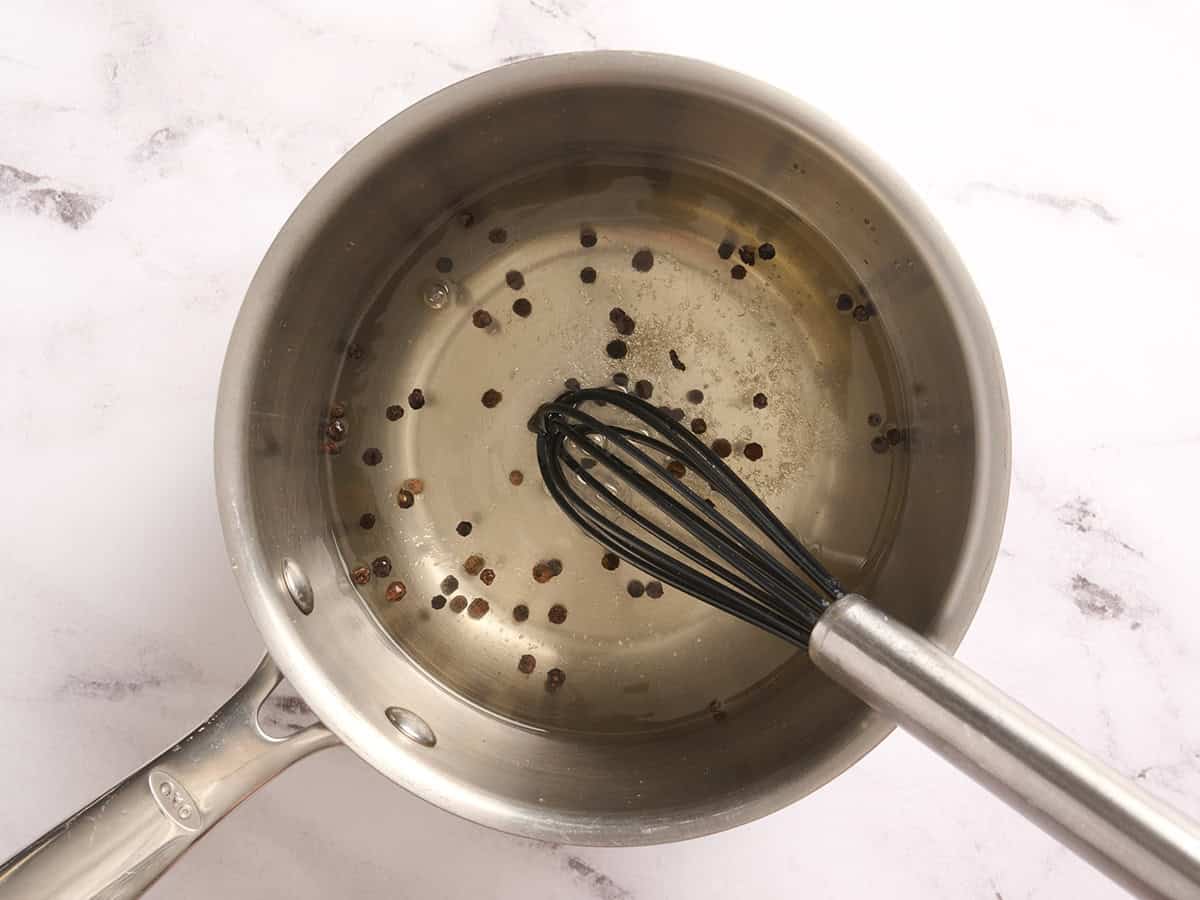
Stir to dissolve as much of the salt and sugar as possible. Place a lid on the pot and bring it up to a boil over medium-high heat. The heat helps dissolve everything fully and softens the sharp bite of the vinegar.
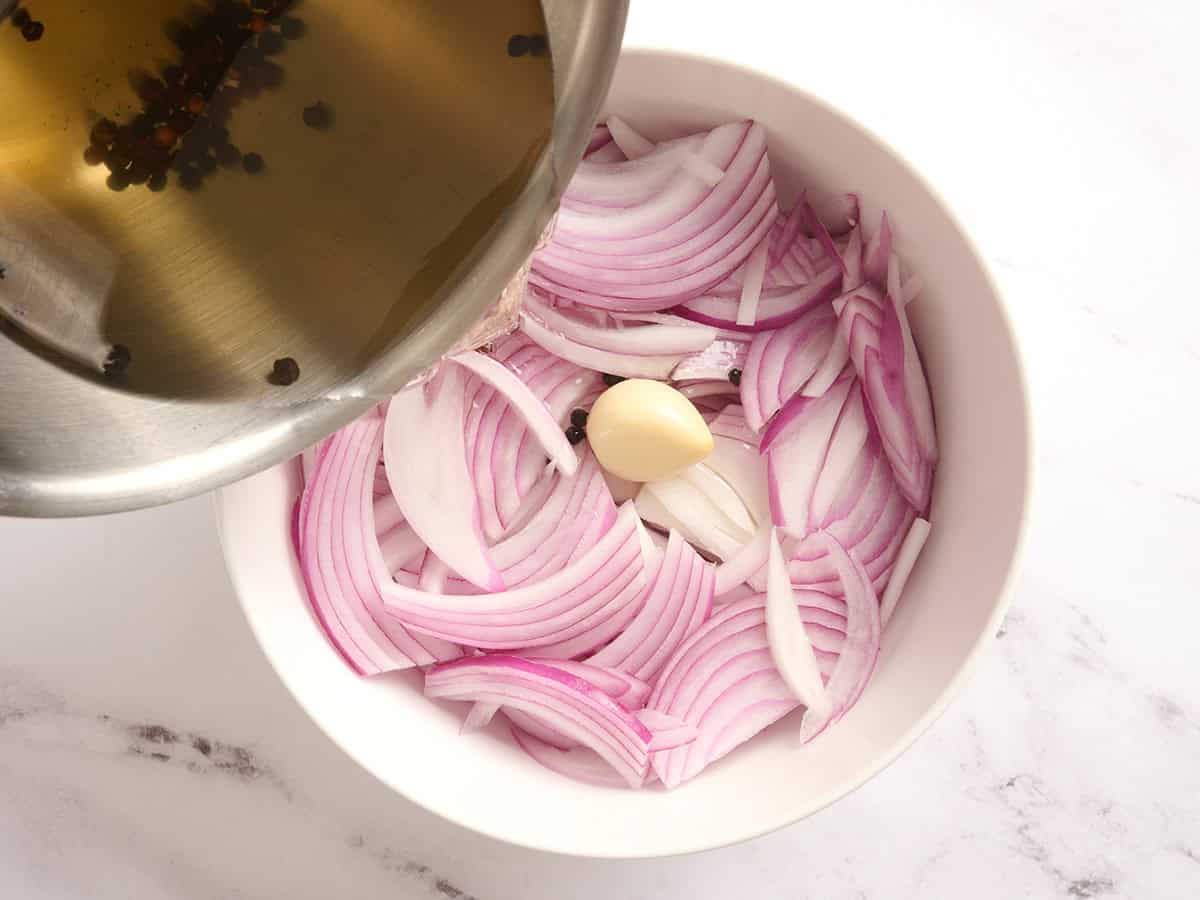
Pour the brine over the onions: Carefully pour the hot vinegar brine over the sliced onions and garlic in the bowl. Stir to combine, then press the onions below the brine. Let the mixture cool to room temperature so the onions can soften slightly, absorb the flavor, and stay crisp and bright.
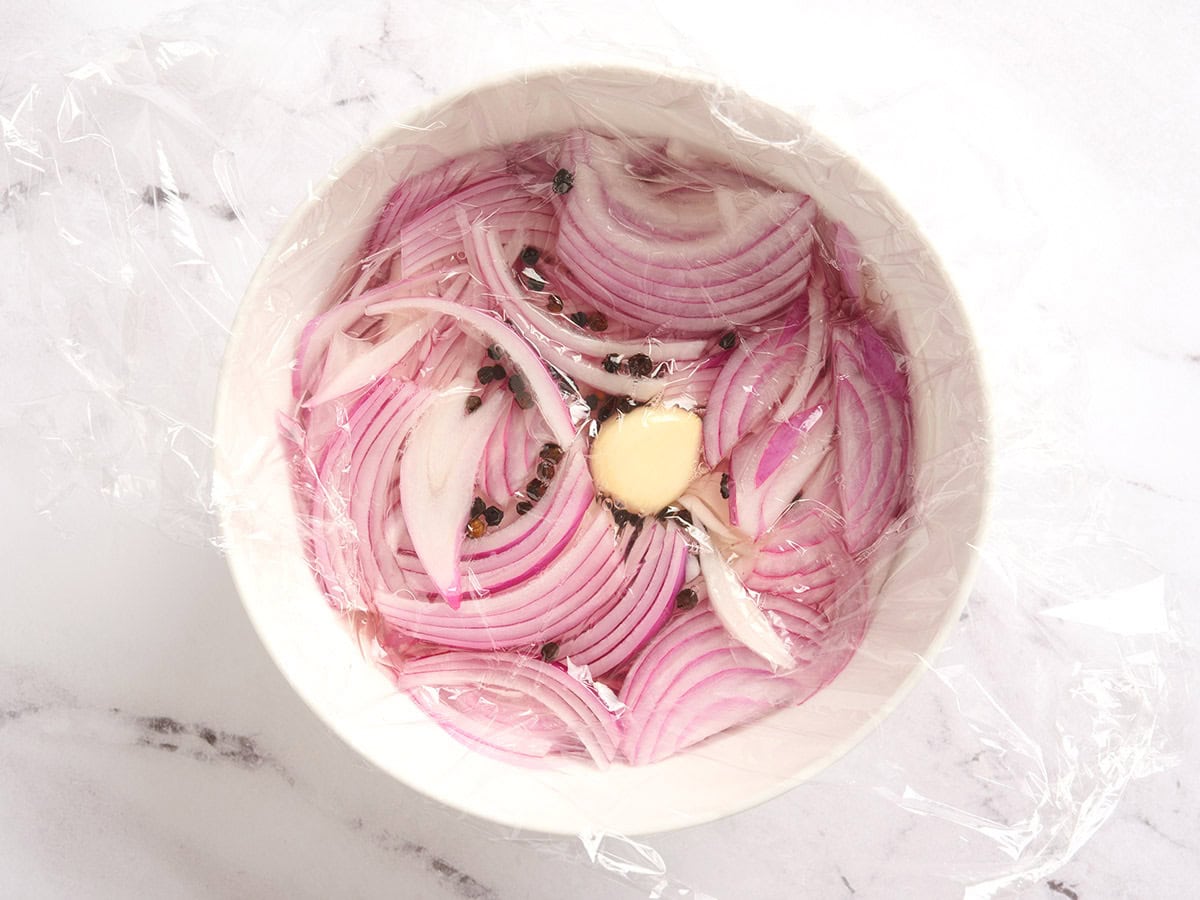
I like to press a piece of plastic wrap down onto the onions to help keep them submerged once they’re cool enough to touch.
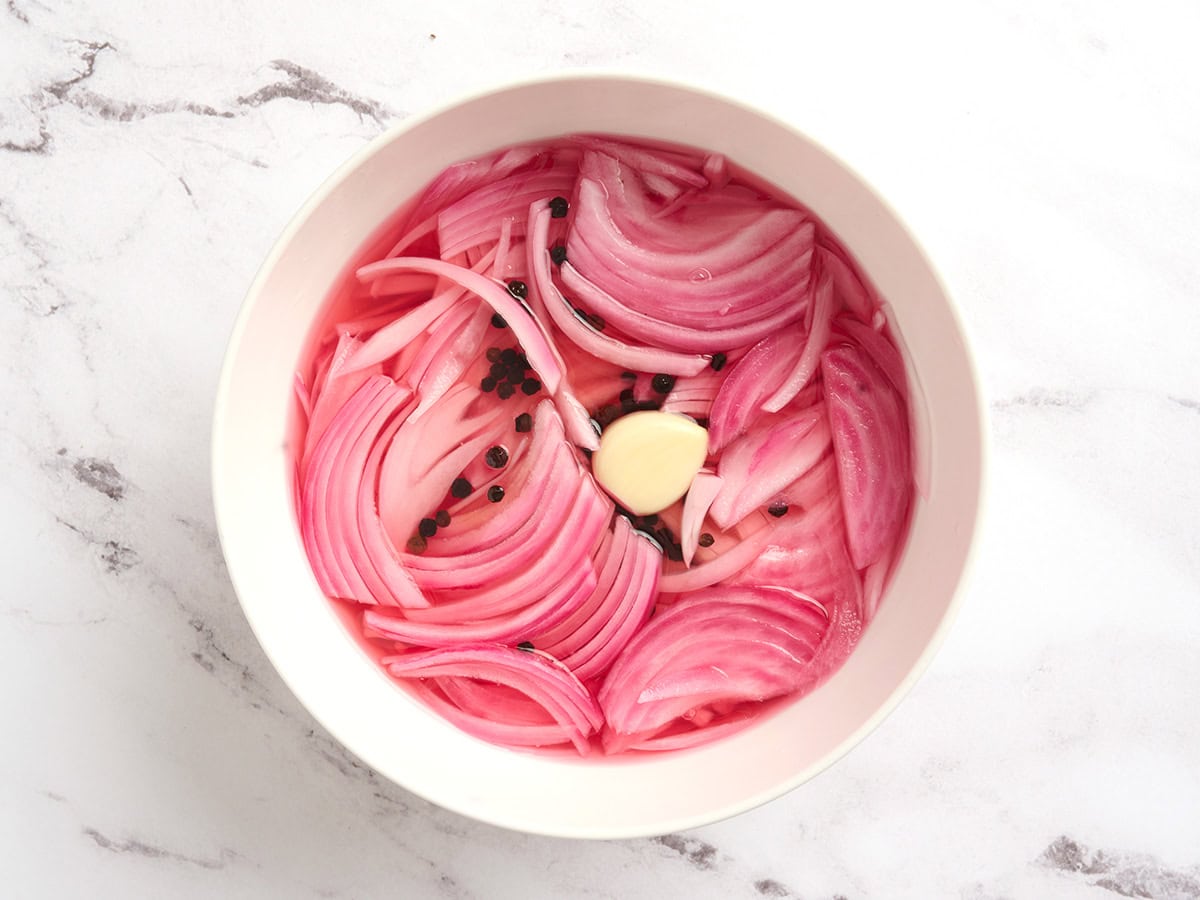
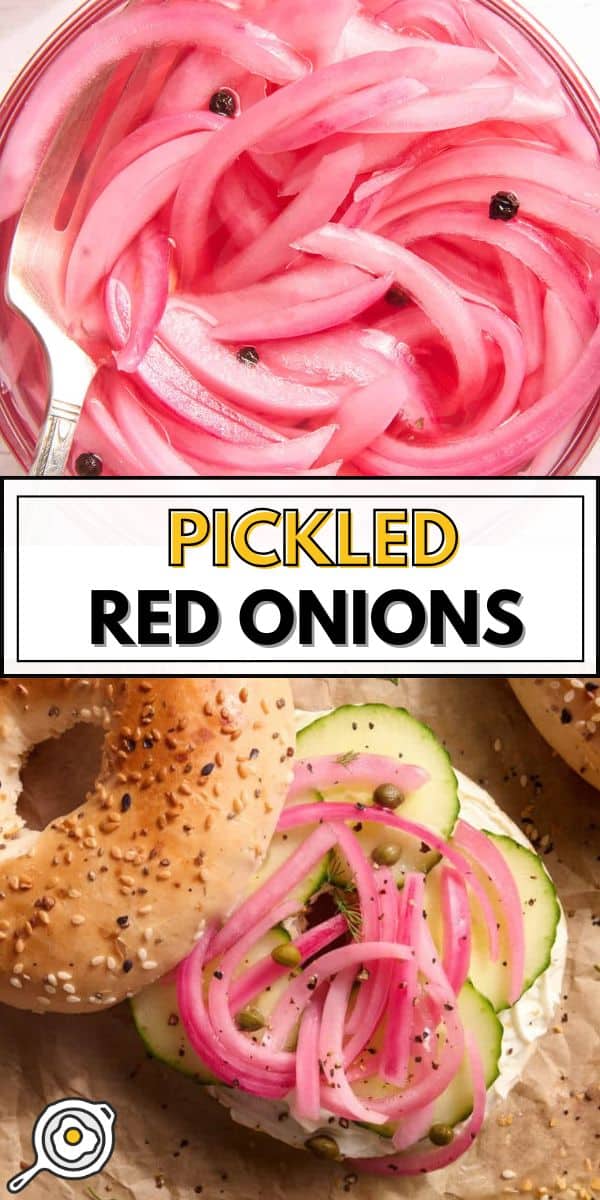
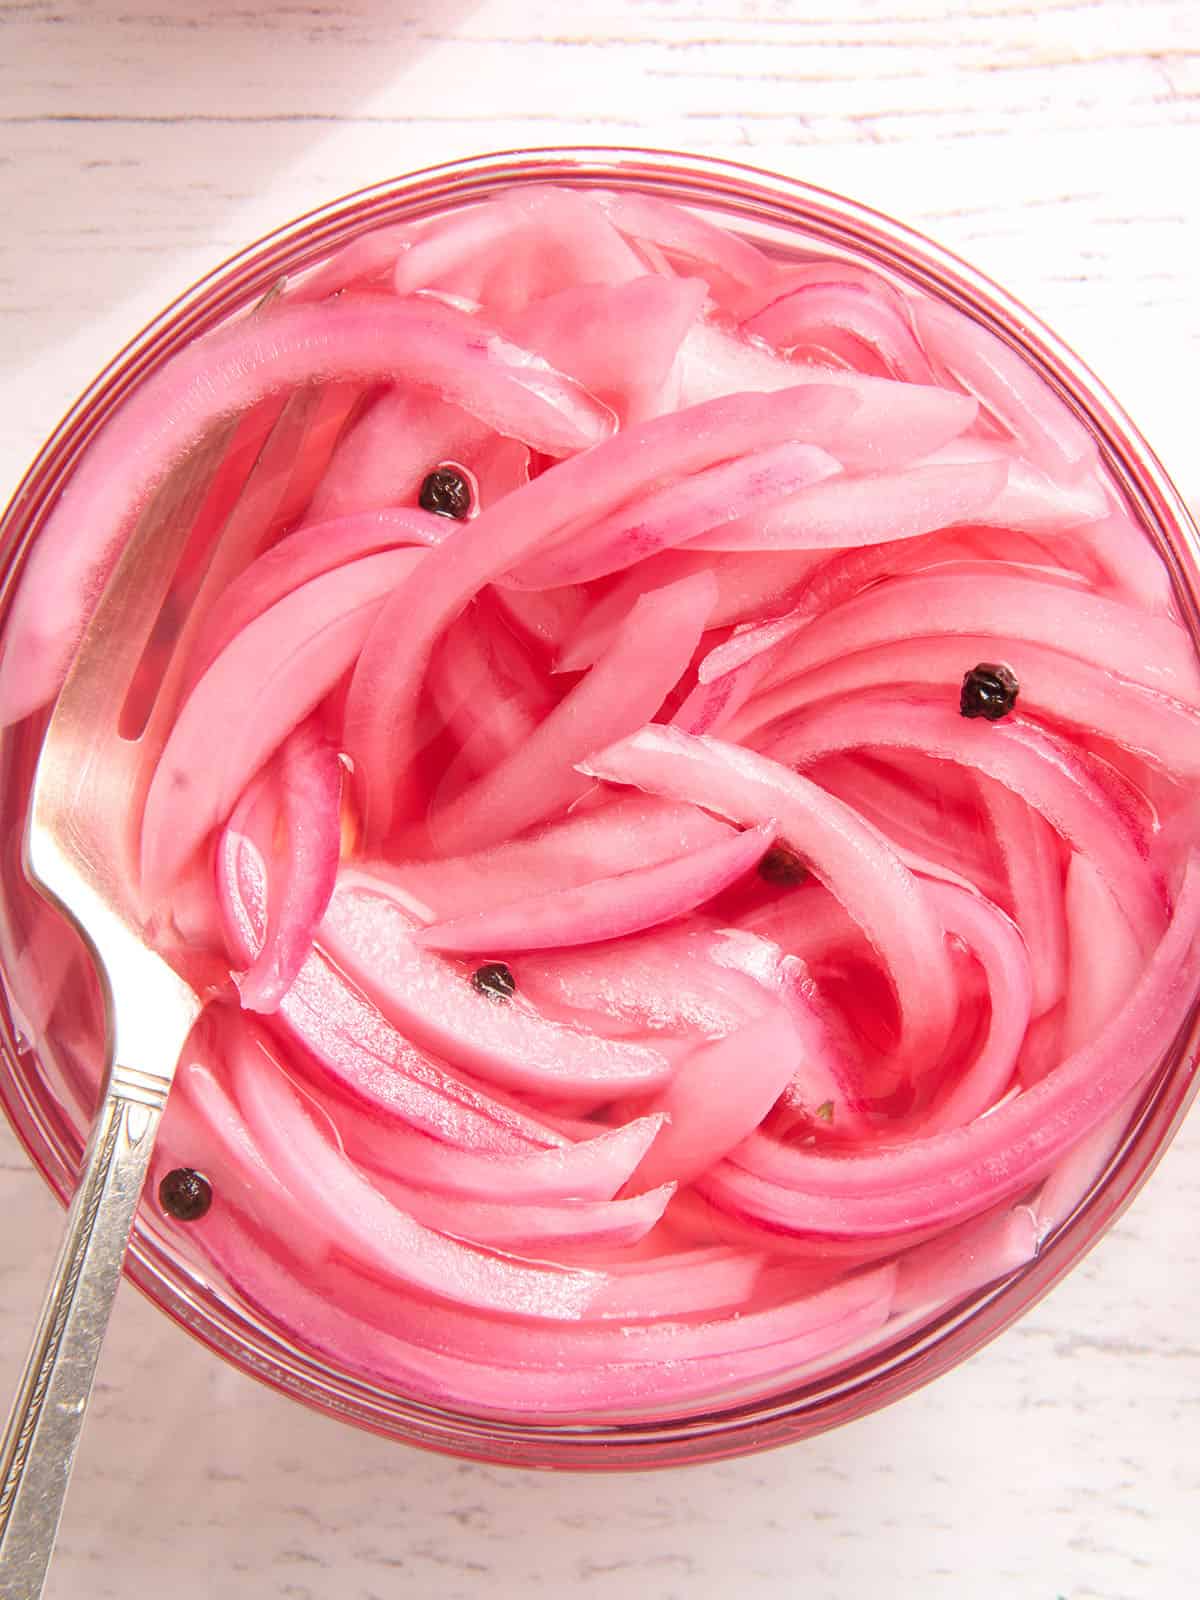
Soak the onions: As the onions soak in the brine, they’ll begin to turn an incredibly vibrant shade of pink. The pigment in red onions is a natural pH indicator. Don’t you just love food science??
Serve or store: Once the onions have come to room temperature and are a vibrant pink color, transfer them to an airtight food storage container and refrigerate until ready to eat, or up to 3-4 weeks. The flavor gets even better after a few days once everything has time to mingle!
Serving Suggestions
Pickled red onions don’t just add onion flavor. They add brightness, acidity, color, and a crisp-tender bite that can make rich, creamy, smoky, or starchy dishes taste more balanced. I like to think of them less as a substitute for fresh red onion and more like a non-spicy alternative to pickled jalapeños. Anywhere you’d want a tangy little pop, these work beautifully:
- Sandwiches, wraps, and burgers: These onions wake up anything creamy, cheesy, or savory. I especially like them tucked into a chicken shawarma wrap for a tangy contrast.
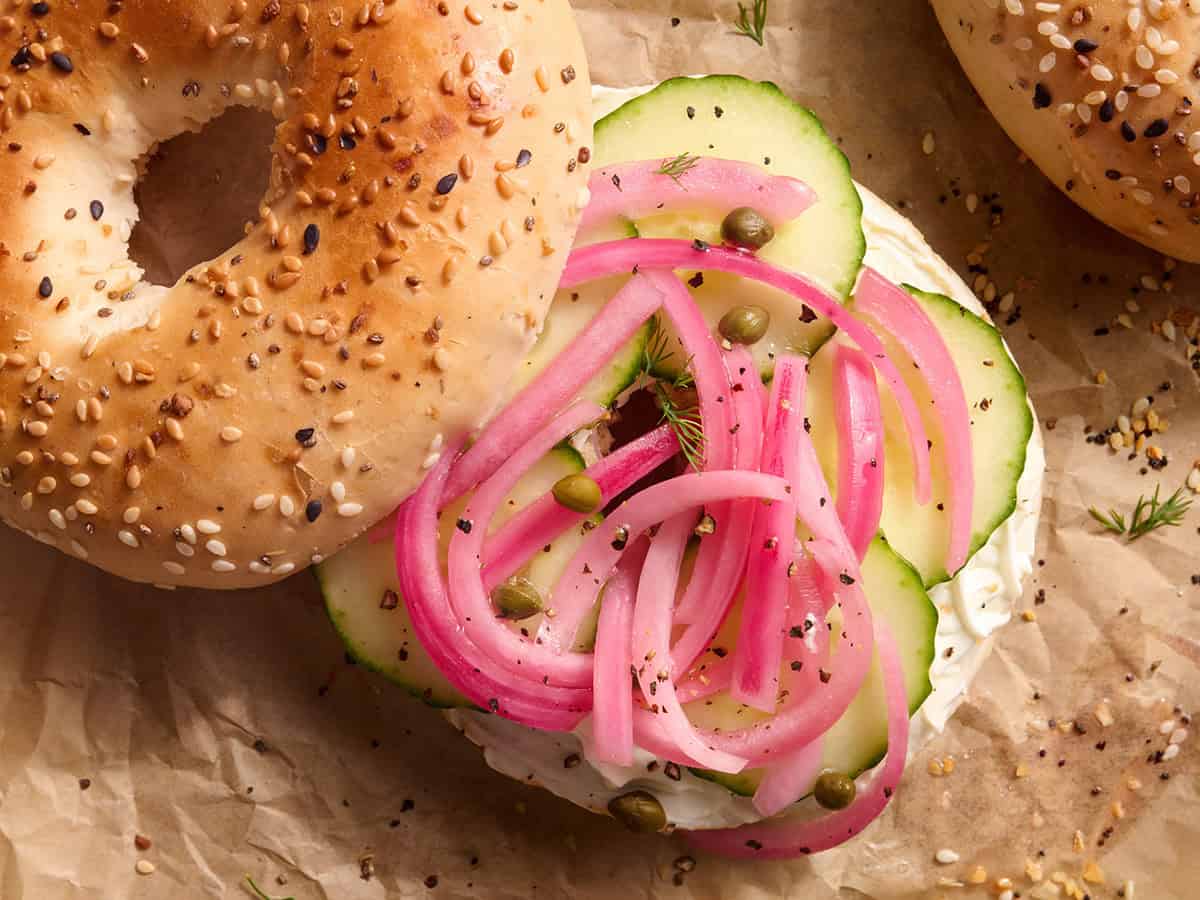
- Bagels and cream cheese: Red pickled onions are the ultimate bagel upgrade. Their bright, acidic tang balances rich cream cheese and makes every bite taste fresher. I LOVE them on a toasted bagel with cream cheese and cucumber.
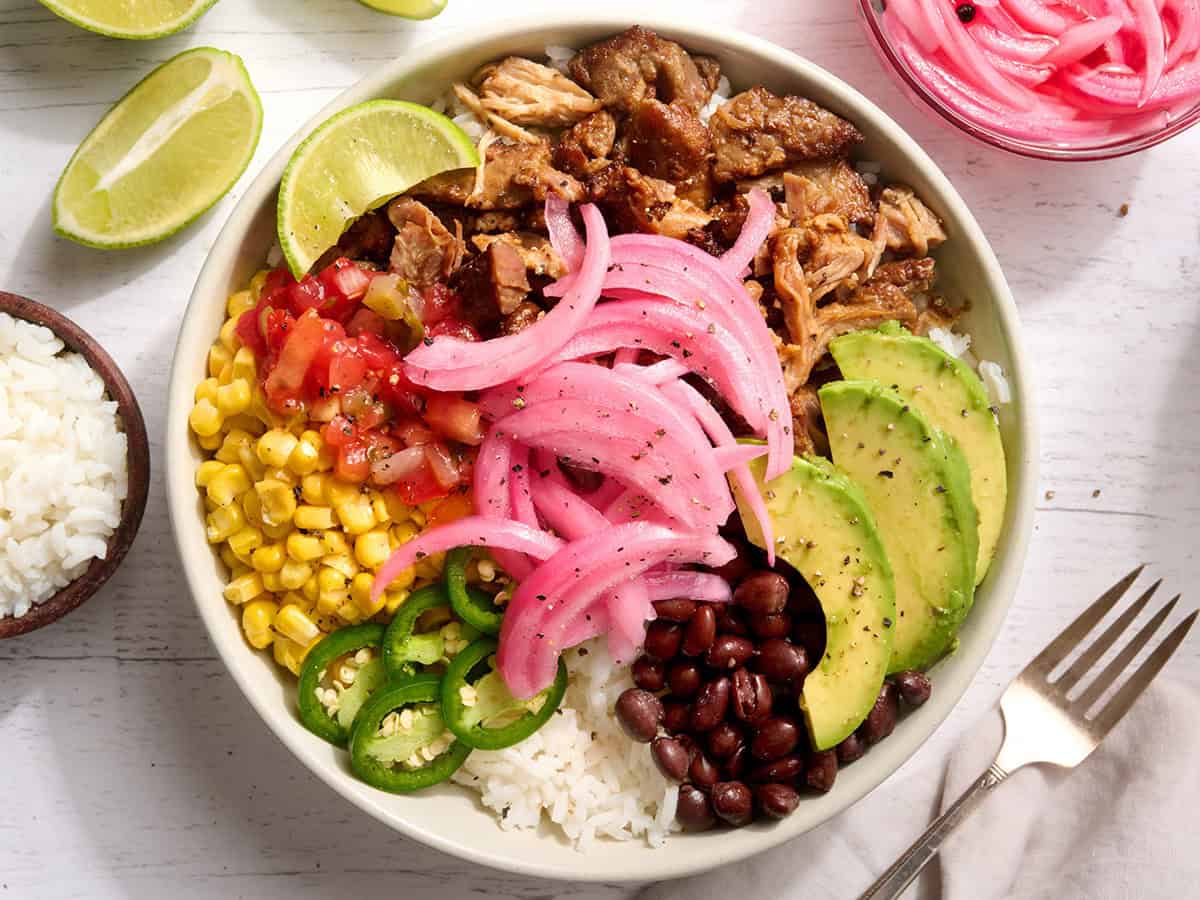
- Tacos, nachos, and burrito bowls: These are perfect anywhere you’d normally add pickled jalapeños, especially if you want tang without heat. Try them with carnitas, black beans, smoky stovetop chicken fajitas, or practically any Mexican-inspired dish.
- Rice and grain bowls: A spoonful of pickled red onions adds a pop of acidity and helps balance starchy grains, saucy toppings, and rich proteins. They also make the whole bowl look prettier with their bright pink color!
- Soups and curries: A few pickled onions on top of rich, cozy dishes like my Thai curry vegetable soup add a bright contrast and keep each spoonful from feeling too rich or heavy.
- Salads: Toss them onto green salads (made with any fresh veggies you’ve got) for crunch and flavor without making a whole dressing from scratch!
How To Store
Keep your pickled red onions refrigerated and submerged in the brine, and they’ll last about 3-4 weeks in the refrigerator! The flavor gets better over time as the onions marinate in the brine. Just make sure to keep them refrigerated in a non-reactive, airtight container, like a mason jar or other food-safe storage container with a glass or ceramic-coated lid.
Try These Easy Pickled Recipes Next!
- Spicy Pickled Carrots get extra flavor from jalapeño, red onion, cumin, oregano, and a simple vinegar brine.
- I’m not saying Pickled Jalapeños belong on everything, but nachos, chili, queso, and mac and cheese make a strong case.
- Our Yuca En Escabeche is a bold, briny side dish with tender cassava, olives, onions, garlic, and a tangy vinegar dressing!

So good!
Easy recipe! They are delicious!!
This quick hitter was so good and easy. Perfect complement for rich meat like birria tacos
I have found a simpler way. Shave, red onions and place in water in the microwave. Drain the onions. Over the onions add vlasic banana pepper rings chop away. Use as much juice as you like.!
These are so tasty, perfectly easy to make, and lend themselves to everything that needs a little zing!
That is ALOT of sodium for that receipt. Anyway to make it without all the sodium?
Unless you’re utilizing all of the pickling liquid, a good portion of that sodium with be left behind in the liquid and not absorbed into the onions! The salt is a pretty crucial part of the recipe though. You may be able to reduce it a bit if you need to!
This was my first time making pickled onions. I doubled the batch and am glad I did. So easy and delicious!
Made it as written. So good. I made two pints from one large onion.
I have been snacking on them right out of the jar. They are very strong so watch the first bite. I think next time I might weaken the vinegar by 1/8 cup with water and cut my onions a little thicker.
But those are just personal preference. Try the recipe as written first. You won’t be disappointed.
Used the remainder of an onion in the fridge. Cut the recipe a bit and used red wine vinegar. Yum!
These are so delicious that I’m having a hard time not gorging on them! Question though – most of the other quick pickle recipes I see dilute the vinegar with equal parts water. Is there a reason this recipe doesn’t?
Thank you for your wonderful insight and explanation of the process
How much can I cut the salt by? I don’t need it for taste, but don’t want to halt a chemical reaction…
Leaving it out wont effect the pickling of the onions, but it will impact the texture and flavor!
I want to try this with cabbage
I love pickled onions!
I love pickled onions!
This is delicious. I tried this recipe because it was recommended to with the leftover onion from one of Beth’s meal plans. I cut down on the sugar by 1/3rd and it was delicious. What a beautiful flavor.