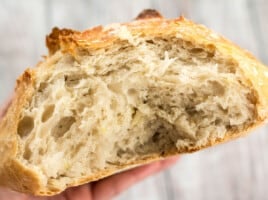
Y’all. I may have just accidentally reignited my bread obsession. No-knead breads have been a favorite of mine for quite some time because A) they’re easy and B) the long fermentation of the dough produces a really lovely and complex flavor. But I’ve always liked my bread to have a lot of texture. I like a lot of little bits and pieces in my bread. So this week I experimented with my basic No-Knead Bread and added a variety of seeds and grains from my pantry. The Seeded No-Knead Bread that resulted is absolutely ah-maz-ing. I’ve got my third batch brewing on my countertop as we speak.

All recipes are rigorously tested in our Nashville Test Kitchen to ensure they are easy, affordable, and delicious.
Small Batch No-Knead Bread
This time around I made a half batch, or a mini-boule, because I find these no-knead breads to not have a super long shelf life. They start to get that “yeasty” smell fairly quickly, so I’d rather make a small batch and have fewer leftovers. If you prefer, you can easily double the ingredients below and then just bake for 30 minutes with the lid on the dutch oven and about 15-20 minutes after removing the lid.
What Kind of Seeds Can I Use?
For my mix of “seeds” I used ground flaxseed, chia, and hemp. I also made a batch using uncooked quinoa in place of the flax and that worked just as well! So, you can probably play around with the seeds depending on what you have on hand, as long as you keep the ratios the same.
All-Purpose or Whole Wheat Flour?
And lastly, I know you’re wondering if you can just use all whole wheat flour instead of a mix of white and whole wheat and the answer is that if you do it will greatly affect the texture of this bread. No-knead breads can be even more finicky with whole wheat flour than regular kneaded yeast breads. While you can make a no-knead whole wheat loaf, most people add extra wheat gluten to help strengthen the dough, support the extra weight, and prevent having a super dense loaf. So, do I suggest it? No. Unless you have some wheat gluten handy.

Seeded No-Knead Bread
Cost $0.68 recipe / $0.17 serving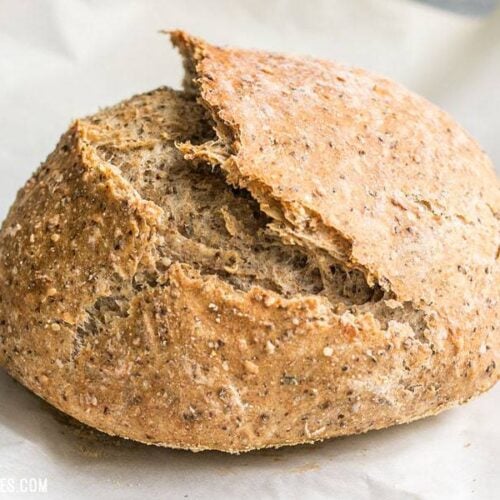
Ingredients
- 2 Tbsp rolled oats ($0.02)
- 1 Tbsp chia seeds ($0.16)
- 1 Tbsp hemp seed hearts ($0.17)
- 1 Tbsp ground flaxseed ($0.04)
- 1/2 cup warm water ($0.00)
- 1 cup all-purpose flour ($0.08)
- 1/2 cup whole wheat flour ($0.10)
- 3/4 tsp salt ($0.02)
- 1/8 tsp instant yeast (or bread machine yeast) ($0.02)
- 1/2 cup room temperature water ($0.00)
Instructions
- Place the oats, chia seeds, hemp hearts, and flaxseed in a small bowl. Add 1/2 cup warm water and stir to combine. Let the seeds soak for 1 hour.
- In a separate large bowl, combine the all-purpose flour, whole wheat flour, salt, and yeast. Stir until very well combined. Add the soaked seeds and then stir until they are as combined as possible (the mixture will be fairly dry). Add about 1/2 cup water, or just enough to form a sticky dough. The dough should be wet enough that there is no dry flour left on the bottom of the bowl, but not so wet that it appears slimy. It should be sticky to the touch.
- Cover the bowl of dough loosely with plastic and let it sit at room temperature for 12-18 hours. If you can not tend to the dough within 18 hours, you can press “pause” on the fermentation by transferring the bowl to the refrigerator.
- When you’re ready to make the bread, the dough should have expanded and have an almost fluffy appearance. Sprinkle it liberally with flour and scrape it away from the edges of the bowl. Turn the dough over on itself in the bowl a few times, adding more flour as needed to keep it from sticking to your hands, until it forms a smooth ball and is no longer quite as sticky.
- Transfer the ball of dough to a piece of parchment paper and let it rise for one hour. About half way through the rise time, place a Dutch oven, with its lid, into your oven and set it to bake at 425ºF. Allow the Dutch oven to preheat inside the oven for 30 minutes.
- Once the dough has risen a bit on the parchment (it will tend to spread out and not so much up), it’s time to bake. Carefully remove the Dutch oven from the oven, remove the lid, and then lift up the entire piece of parchment with the dough and place them inside the Dutch oven. Place the lid back on the Dutch oven and carefully return it to the hot oven.
- Bake the bread in the Dutch oven for 30 minutes, then carefully remove the lid and bake for another 10 minutes so the top can brown. When finished baking, carefully pick up the parchment to lift the bread out of the Dutch oven and allow the bread to cool slightly before cutting and serving.
See how we calculate recipe costs here.
Nutrition Information

How to Make Seeded No-Knead Bread – Step by Step Photos
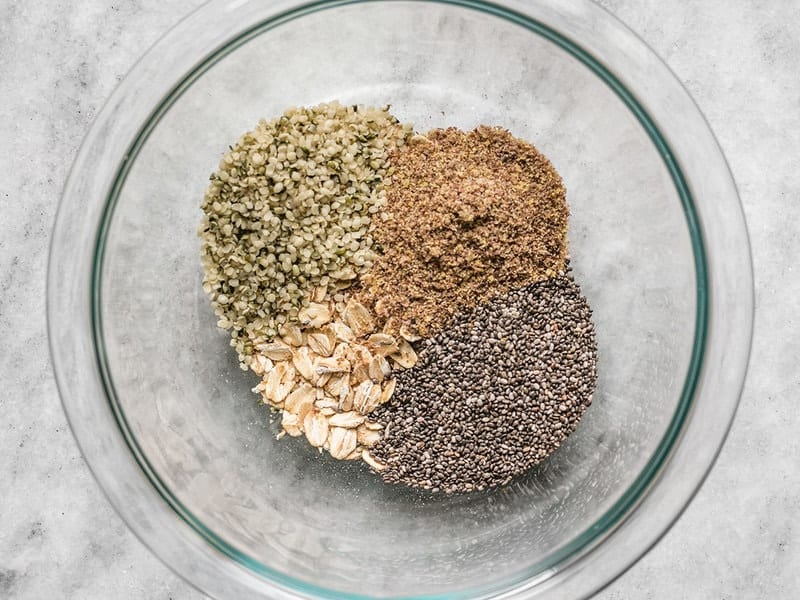
Because these seeds absorb a LOT of water, we want to soak them first to make sure our bread dough gets all the moisture it needs. So, in a small bowl combine 2 Tbsp rolled oats, 1 Tbsp ground flaxseed, 1 Tbsp hemp hearts, and 1 Tbsp chia seeds.
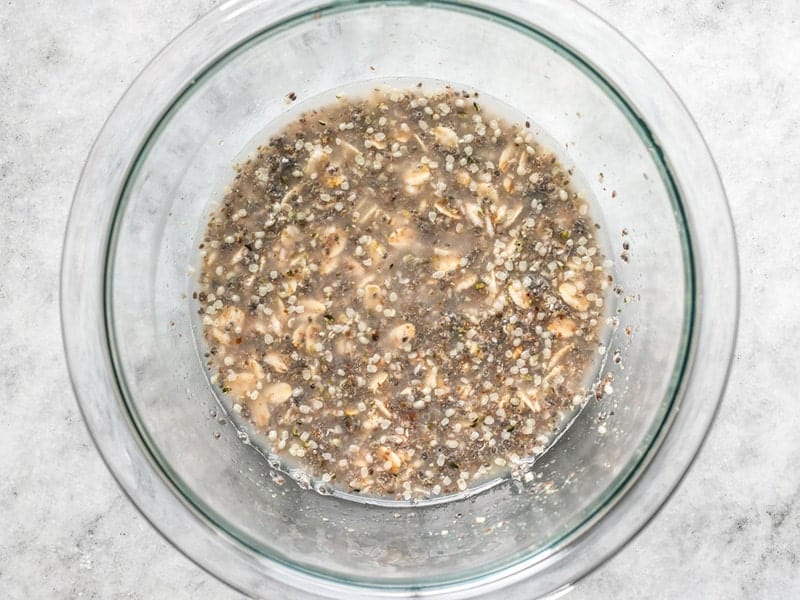
Add 1/2 cup warm water and stir to combine. Let these guys sit for about an hour…
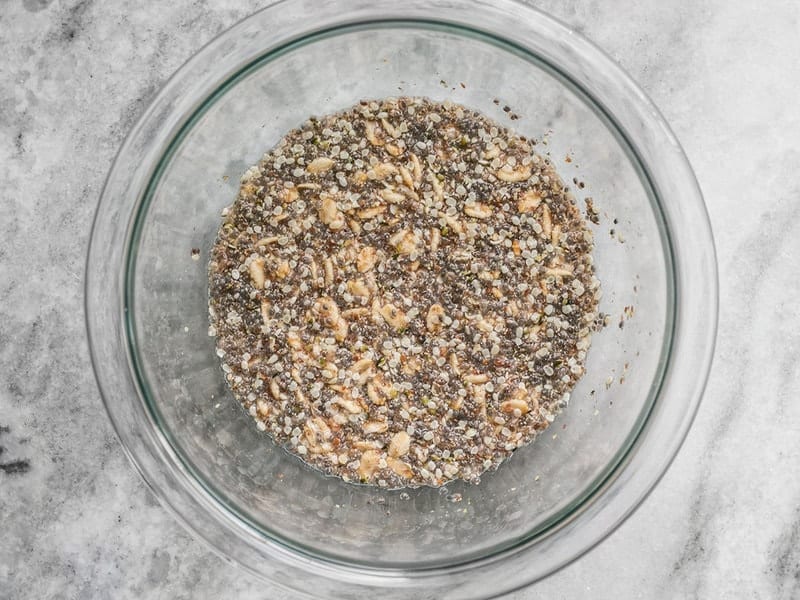
After they soak up all that water they’ll be like a gelled mass. Pretty cool.
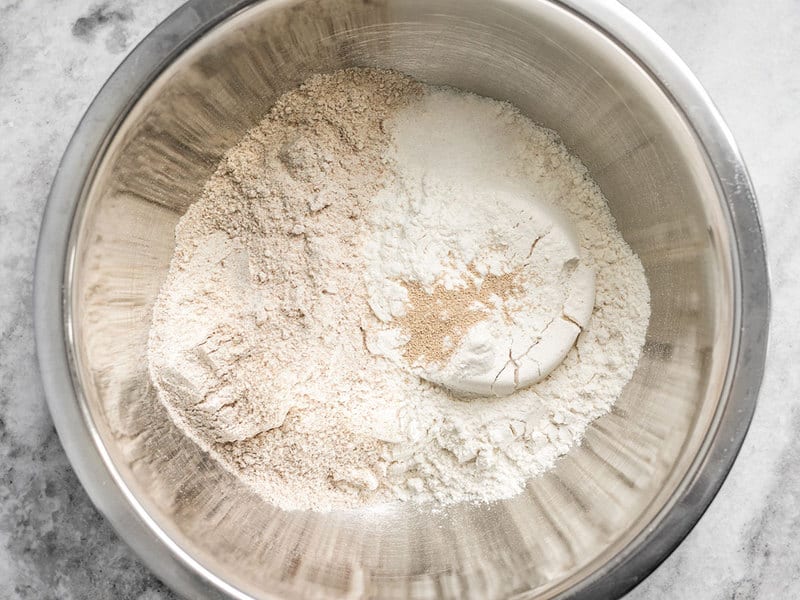
In a separate large bowl combine 1 cup all-purpose flour, 1/2 cup whole wheat flour, 3/4 tsp salt, and 1/8 tsp instant yeast or bread machine yeast. Yes, only 1/8 tsp. Since it sits for so long that little amount of yeast has time to reproduce and turn into a lot of yeast. Stir these dry ingredients together until they’re very well combined.
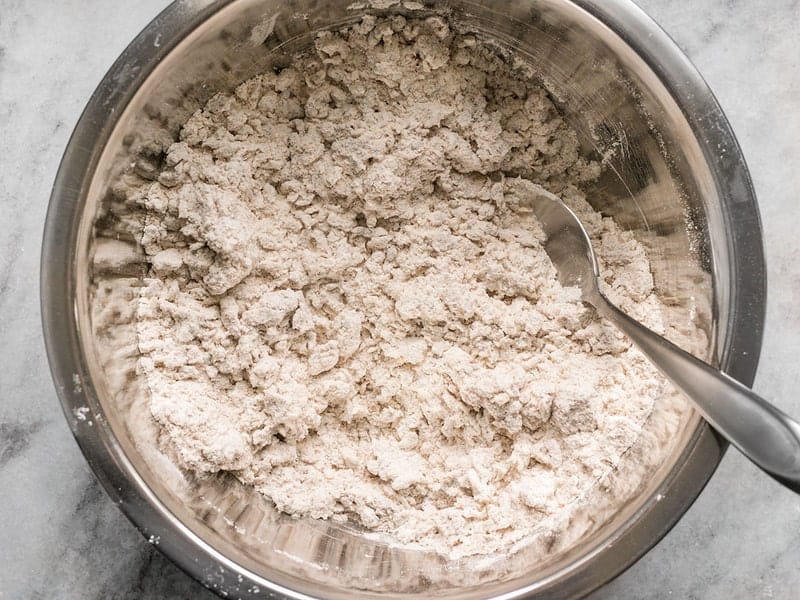
Add the water-soaked seeds to the bowl of dry ingredients and stir them together as much as possible (this helps break up that gelled mass).
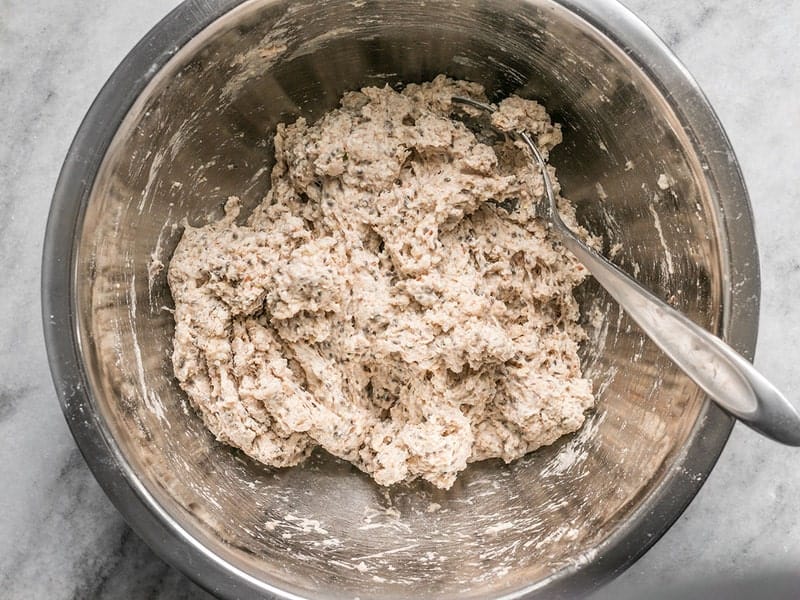
Add about 1/2 cup room temperature water, or just enough to form a sticky dough. The dough should be wet enough so that there is no dry flour left on the bottom of the bowl, but not so wet that it looks slimy. No-knead doughs do better when they’re a little on the wet side. Loosely cover the bowl and let it sit at room temperature for 12-18 hours. Remember, if you need to let it sit for longer than 18 hours, you can “press pause” on the fermentation by placing it in the refrigerator.
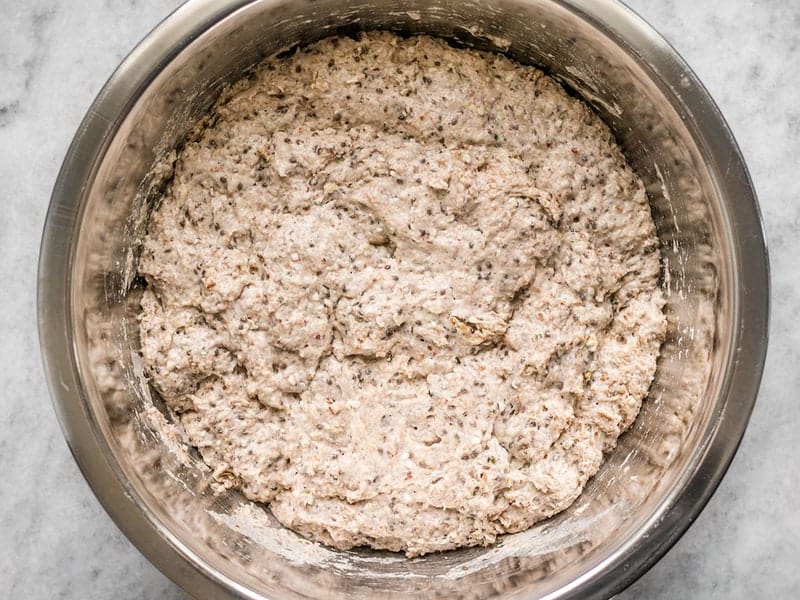
After 12 hours or so, the dough should have puffed up and taken on a sort of light, fluffy appearance.
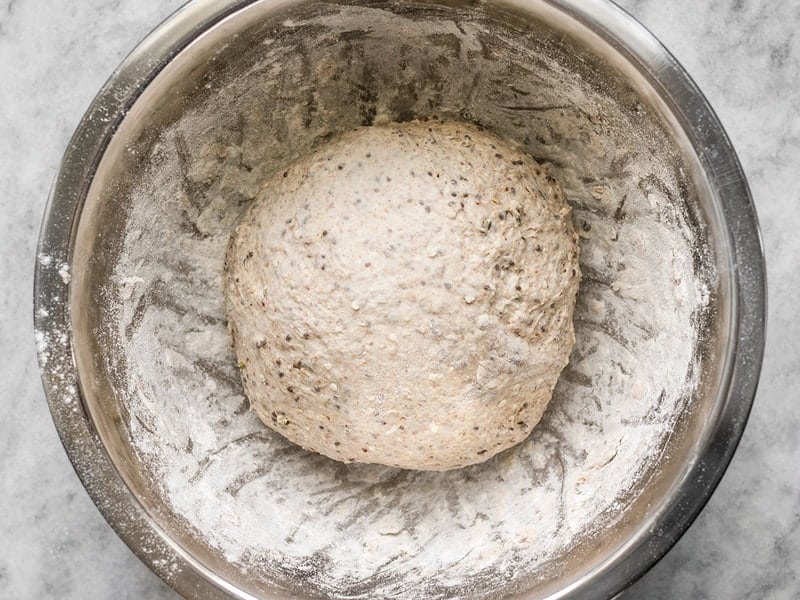
Sprinkle a liberal amount of flour over the fluffy dough (because it’s sticky, remember?) and scrape it away from the sides of the bowl. Turn the dough over on itself a few times in the bowl, adding more flour if needed to keep it from sticking to your hands, until you can form it into a smooth ball. It might still be just a little sticky, but not so much that you can’t work with it.

Transfer the ball of dough to a sheet of parchment paper and let it rise for one hour. Sometimes I sprinkle a little cornmeal on the parchment first because it makes the bottom extra crispy, but this isn’t required. While the dough is rising, place your Dutch oven in the oven and set it to preheat to 425ºF. Let the Dutch oven heat with the oven for at least 30 minutes.
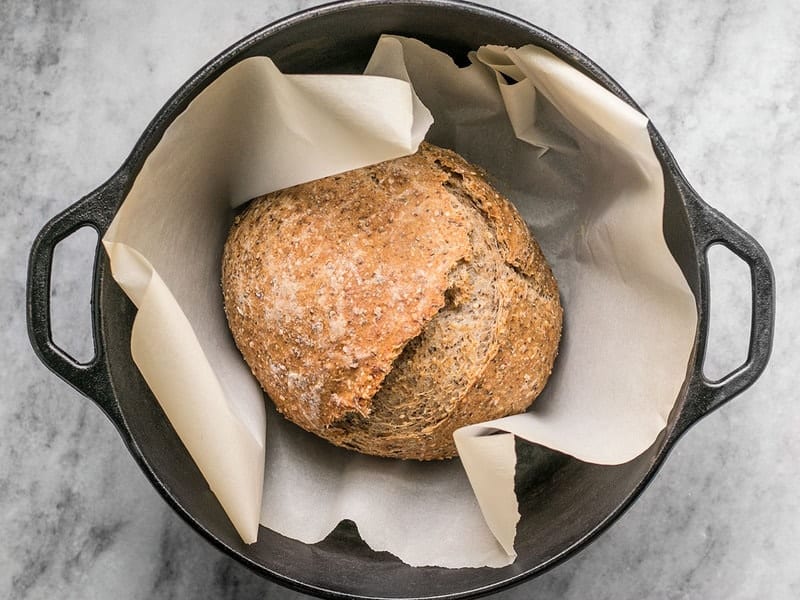
Once the Dutch oven is preheated and the dough is risen, carefully remove the hot Dutch oven from the oven, remove the lid, and then lift the entire piece of parchment with the dough into the Dutch oven. Put the lid back on top and then place it back into the hot oven. Bake the bread in the Dutch oven, with the lid for 30 minutes. After 30 minutes, remove the lid and let it continue to bake for 10 more minutes to get nice and brown on top. Once golden brown remove the Dutch oven from the oven and lift the parchment with the bread out. Let the seeded no-knead bread cool for a few minutes before serving.

I don’t know if there is a joy any more simple than freshly baked bread smeared with butter. ❤️

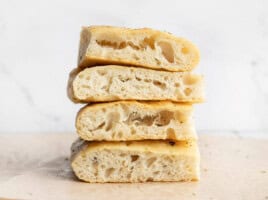
This Seeded No-Knead Bread is my new love. Thanks to all those moisture loving seeds, the dough is soft, moist, and tender!

What size Dutch oven do you recommend for these “mini” loaves? I’m planning to use my large Dutch oven like I use for a full sized loaf, but am curious if these loaves could bake in a smaller one. One of my older family members struggles with the heavy weight of the big dutch oven and we’re looking into some of the smaller ones for some recipes.
We just used our regular 5qt dutch oven for the smaller loaf, which is linked under the Equipment section of the recipe card. As you will see in the step-by-step images, unlike some bread recipes, this one does not continue to spread and fill up whatever container you put it in by the time it’s ready for the oven. I would guess (but not certain!) that this recipe would fit into any dutch oven with at least a 2 qt capacity. Since most dutch ovens typically hold between 5-7qts, I would suggest getting something in the 2-3 qt range to use when making smaller or half-batches of recipes so it doesn’t end up being too small and lose functionality. ~ Marion :)
Could you throw this into a bread machine?
We haven’t tested it in a bread machine and therefore can’t give you direction. XOXO -Monti
Thank you for the recipe. I don’t have a dutch oven. How can I make it without that?
It won’t turn out quite the same, but you can bake it on a baking sheet. I suggest lightly brushing the surface with water before baking.
How much wheat gluten do I add when only
using whole wheat flour?
Unfortunately, I haven’t tried this method myself, so I can’t offer a suggestion.
Ok, my first attempt came out OK. (enough butter and honey will make anything taste good). But I have a few questions. First, can you substitute bread flour for the all purpose flour? Second, when you say sprinkle liberally does that mean the outside of the doughball shouldn’t stick to your hands? What about the inside of the dough ball? How well does this recipe scale up? Four servings is kind of small and if I’m making bread I’d rather have two loaves or one big loaf.
Hi Carol! Bread flour should work well for a recipe like this, but you may need to use more water as those higher protein flours can sometimes absorb more than all-purpose. And yes, sprinkle liberally is just so it doesn’t stick to your hands, but you want the rest of the dough to still be fairly loose and moist so it can expand easily (a dough that is more dry will be more stiff and probably turn out more dense). The recipe scales up great as long as you make sure you’re using a Dutch oven that is big enough to hold the larger loaf. :)
Is there a typo n the recipe? 1.5 cups water is listed twice.
You soak the seeds in ½ cup water, then add another ½ cup water to the flour later. :)
I love making no knead bread and was excited to try a seeded version. I didn’t have hemp hearts, so I subbed sesame seeds. I also added a tsp honey and a splash of olive oil – usually include sugar & oil in bread. It’s delicious! I figured I’d be the one eating it since it’s so healthy but my family loved it too. That said, could I double the recipe for a larger loaf? And it proofed just fine but didn’t bake as tall as your photo – should I have sliced the top before baking? Thanks for another great recipe Beth!
I don’t slice the top of mine, so it’s hard to say without being there to see the process why yours didn’t rise quite as much while baking. You can try slicing to see if that helps. :)
I was looking for a recipe similar to the bread at the bakery near my workplace, since I wouldn’t be able to get there often while working from home. I don’t have a cast iron Dutch oven so I used the Corning Ware Dutch oven that my parents received as a wedding gift 50 years ago. The first time, the bread wasn’t quite cooked so now I bake it with the lid on the entire cooking time. It works perfectly. I prefer it over the white version, and my mom does too, and she doesn’t like anything if it seems remotely healthy. 😂 My boyfriend is a very healthy eater but very picky about quality and taste, so the fact that he likes it is high praise. After I started making this bread, I discovered that I can’t eat dairy, eggs, legumes, or barley. It was difficult to adjust, except for bread. I already had this recipe, which is perfect. I love this bread!
I followed the recipe exactly but mine was very puddle-like on the second rise time. I let it go a full 18 hours and it was in a warm area (top of the fridge). I don’t have a Dutch oven but warmed a roasting pan with the oven preheating, and can definitely tell it helped with the crust texture. I’m sure a regular Dutch oven would be better but I’m happy with my quarantine results.
Love your recipes! If i don’t have whole wheat flour can I use all white flour?
Yes you certainly can use what you have on hand.
I would love to make this during quarantine, do you think I could use a glass loaf pan lined with parchment paper and bake? if not, could I use parchment paper and a cast iron pan since I don’t have a Dutch oven? Thanks!
Yes or you can try the sheet pan method Beth outlines.
Thank you! I ended up baking in a covered pot and it came out amazing! I used a blend of dried quinoa, flax, and chia seeds. I wish I put cracks on top for texture but still came out amazing! Worth the wait
Oh no! I don’t have a Dutch oven. Can I make it una regular cast iron?
Yes or you can try the baking sheet method.
I used different seeds when I made this. I just used the seeds I happened to have in my kitchen — sesame seeds, poppy seeds, and caraway seeds. They didn’t really absorbed any water when I soaked them, so I ended up needing to use a little more flour than called for. But it came out great — very tasty! I think the caraway seeds added a lot of flavor.
I saw on your other no-knead bread recipe that you use a 5.5 quart dutch oven. How do you think it would compare to using a 4 quart dutch oven?
Yes, this is a smaller loaf, so it will definitely fit in a 4 quart Dutch oven. :)
I started making this yesterday and just finished eating this for breakfast! I subbed hemp hearts and flax seeds for quinoa as I had some in my pantry. Also since I’m leaving for a few days and didn’t want to buy a whole bag of whole wheat flour, I just put the same amount of oatmeal in a food processor. I also made it into rolls. This was perfect and so easy!