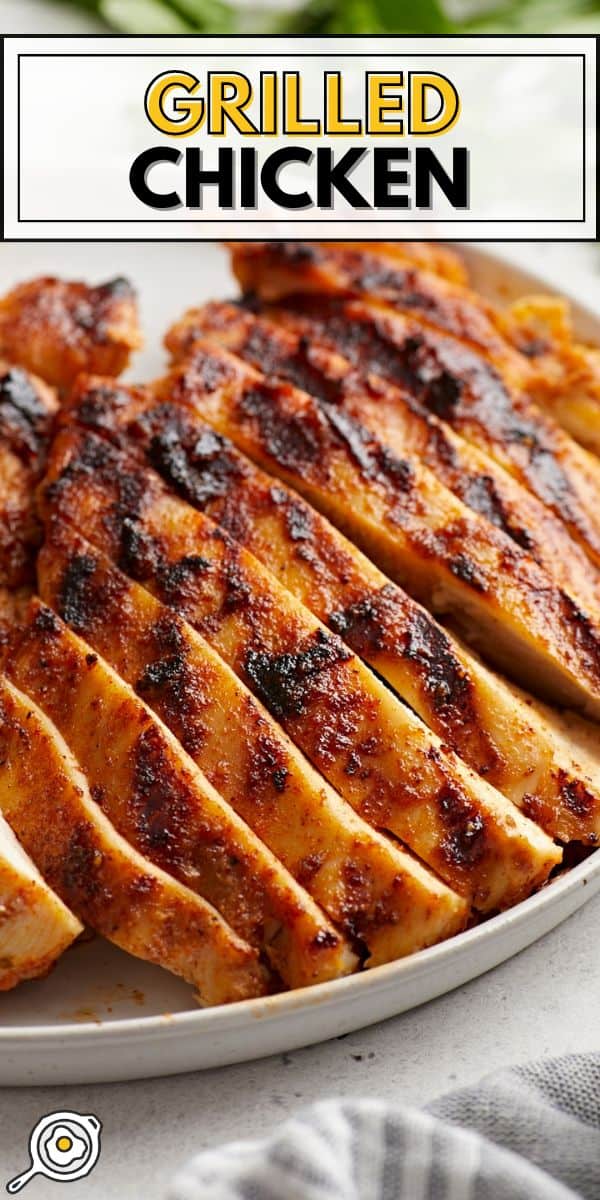
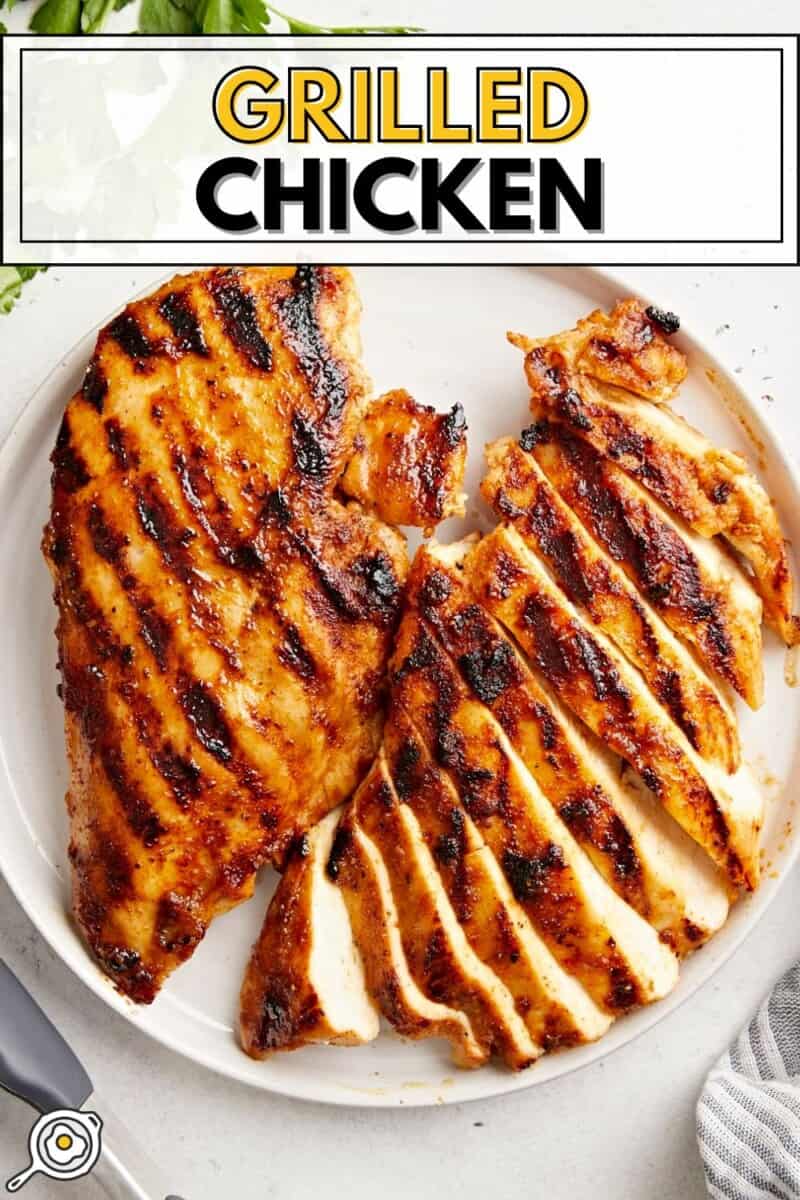
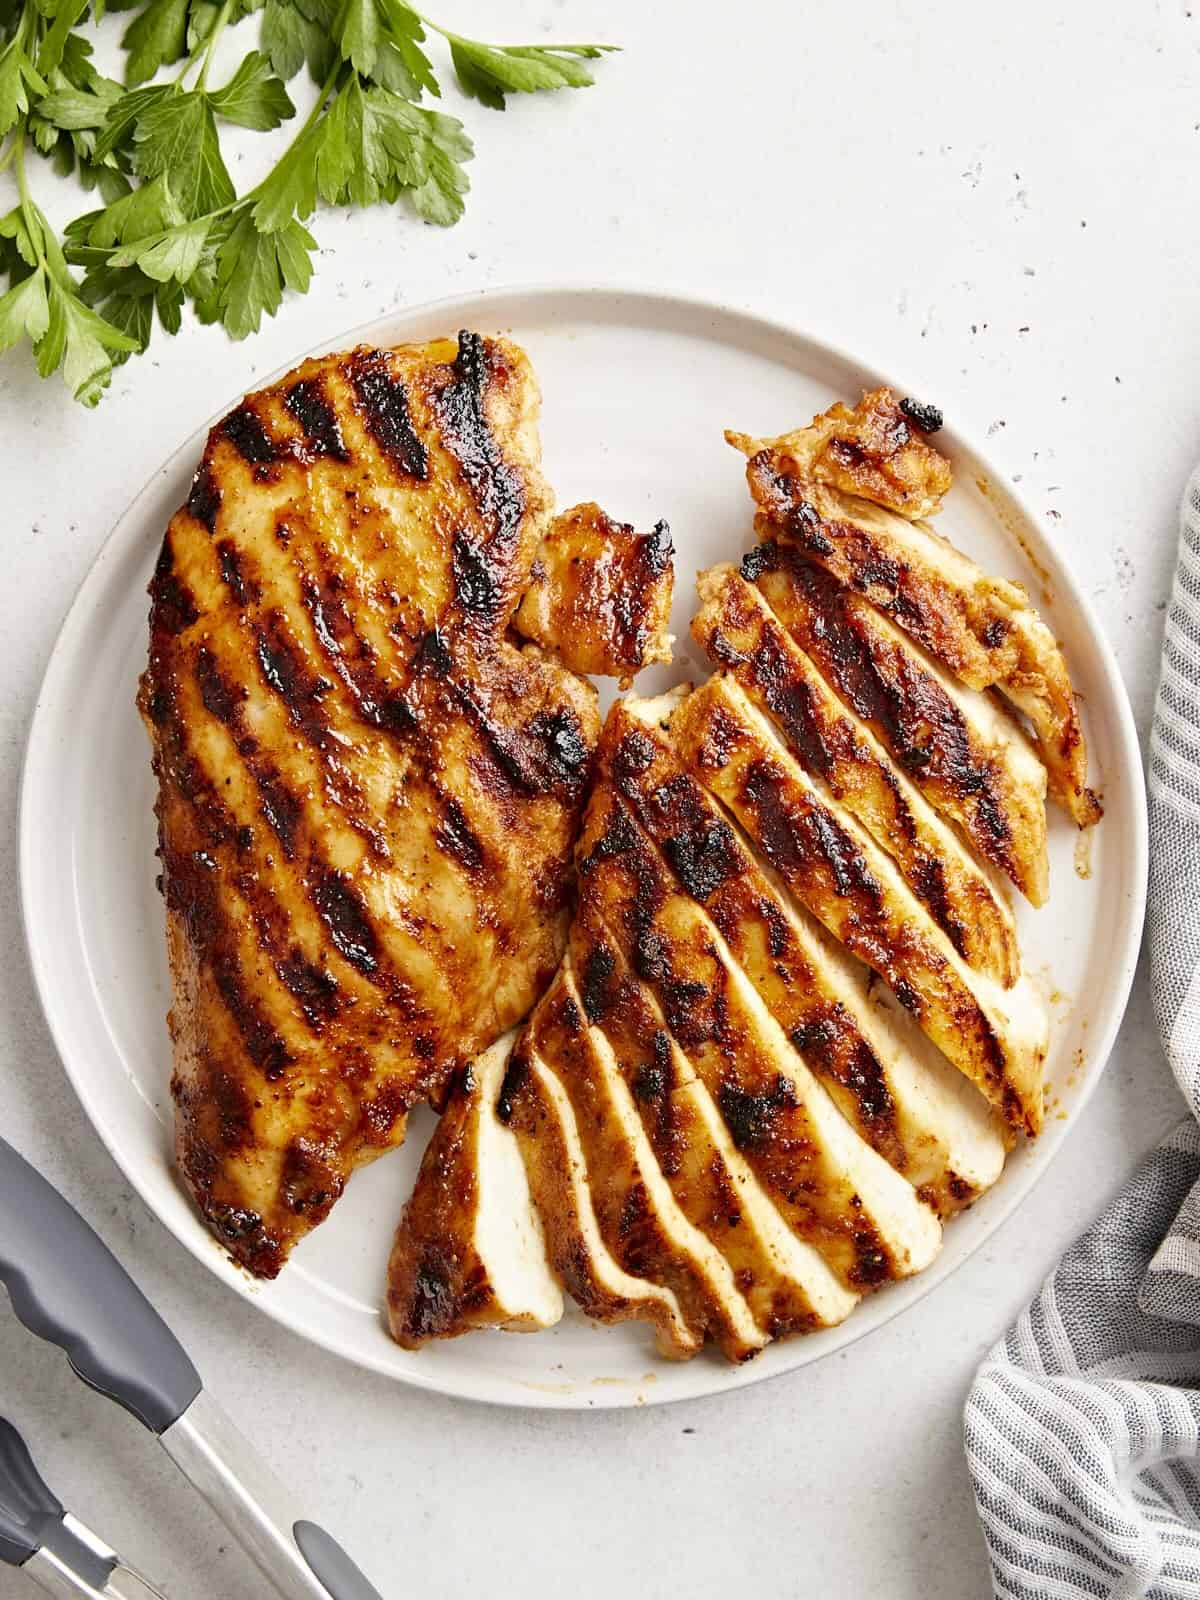
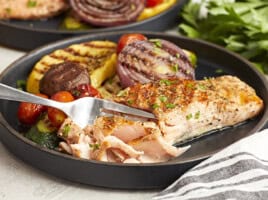
During grilling season, I make this Grilled Chicken for my family at least once a week. It’s one of those simple recipes that works for even the pickiest eaters! I brine large chicken breasts, then coat them in a sweet and savory spice rub to create the juiciest grilled chicken you’ve ever tasted! Everyone at my house loves this chicken, and the delicious char from grilling takes the flavor to the next level.
All recipes are rigorously tested in our Nashville Test Kitchen to ensure they are easy, affordable, and delicious.
“I made this today on the grill. Absolutely delicious. Chicken can be so bland and this is great! I made a big batch up for meal prep.”
Kristin
Easy Grilled Chicken Recipe
Juicy grilled chicken is a staple at my house this time of year. I never have to worry if my picky toddler will finish her dinner or if my husband will go back for seconds. It’s one of the magical recipes that’s always a winner whenever I make it. The best part is the leftovers are great to use in just about any chicken salad recipe, which makes lunches the rest of the week a no-brainer. To top it all off, using the grill means my house isn’t sweltering hot in the middle of the summer! Need I say more?
Grilled Chicken
Cost $9.02 recipe / $2.25 serving
Ingredients
- 2 large chicken breasts (boneless skinless, (mine weighed 1.61 lbs total) $8.03*)
Brine Ingredients:
- ¼ cup kosher salt ($0.14)
- ¼ cup granulated sugar ($0.18)
- 2 quarts water ($0.00)
Rub ingredients:
- 1 tsp salt ($0.01)
- ¼ tsp black pepper (freshly cracked, $0.04)
- ¼ tsp cayenne pepper ($0.06)
- 1 tsp garlic powder ($0.15)
- 2 tsp smoked paprika ($0.32)
- ½ tsp onion powder ($0.08)
- 1 tsp brown sugar ($0.01)
Video
Instructions
- Create your wet brine: Combine ¼ cup kosher salt and ¼ cup granulated sugar in 2 quarts of cold water. Whisk to combine.
- With a fork, poke holes all over the chicken breasts and then transfer to a Ziplock bag. Pound chicken breasts to ½ inch to ¾ inch with a tenderizing mallet or rolling pin inside a Ziplock bag.
- Pour the wet brine into the Ziplock bag with the tenderized chicken breasts. Close the bag and allow it to brine at room temperature for 30 minutes, or in the refrigerator for up to 24 hours.
- Make the seasoning blend by combining the salt, pepper, cayenne, garlic powder, smoked paprika, onion powder, and brown sugar in a bowl.
- Remove the chicken breasts from the brine, rinse, and pat dry on both sides with paper towels, drizzle with olive oil, and rub with the seasoning blend on both sides.
- Preheat grill to 475°F. Note: If you are using an indoor grill, we found putting the chicken on the grill while it’s preheating helps get the middle of the breast to temperature in a timely manner and keeps the outside from overcooking and burning. If your chicken has been in the refrigerator, allow it to come to room temperature for at least 10 minutes before starting the grilling process.
- Cook the chicken for 5-7 minutes on each side, or until the internal temp reads between 155-160°F. The chicken will continue to cook while it’s resting (because it’s so hot and juicy!) so you can remove it a little early, just make sure it reaches the internal temperature of 165°F while resting, or you may need to throw it back on the grill for a couple more minutes.
See how we calculate recipe costs here.
Notes
Nutrition Information
how to make Grilled Chicken step-by-step photos

Make your wet brine: Pour ¼ cup kosher salt and ¼ cup granulated sugar into 2 quarts of cold water in a mixing bowl. Whisk to combine.

Pound the chicken: Use a fork to poke holes all over 2 large boneless skinless chicken breasts and then transfer to a Ziplock bag. Pound the chicken breasts to ½ inch to 3/4 inch with a tenderizing mallet or rolling pin while inside the Ziplock bag.

Brine the chicken: Pour the wet brine into the Ziplock bag with the tenderized chicken breasts. Now close the bag and let the chicken brine at room temperature for 30 minutes. You can also let it brine in the refrigerator for up to 24 hours. Don’t skip this step! The brine infuses the chicken with flavor, helps to combat moisture loss, and makes the meat super tender.

Make the seasoning blend: Combine 1 tsp salt, ¼ tsp pepper, ¼ tsp cayenne, 1 tsp garlic powder, 2 tsp smoked paprika, ½ tsp onion powder, and 1 tsp brown sugar in a bowl.

Season the chicken: Remove the chicken breasts from the brine, rinse, and pat dry on both sides with paper towels. Make sure you rinse the brine off your chicken, or it might end up too salty! Drizzle the chicken breasts with olive oil, and use your hands to rub the seasoning blend on both sides.

Grill the chicken: Preheat your grill to 475°F. Note: If you’re using an indoor grill, I found putting the chicken on the grill while it’s preheating helps get the middle of the breast to temperature in a timely manner and keeps the outside from overcooking and burning. If your chicken has been in the refrigerator, allow it to come to room temperature for at least 10 minutes before starting the grilling process.

Cook the chicken for 5-7 minutes on each side, or until the internal temp reads between 155-160°F. The chicken will continue to cook while it’s resting (because it’s so hot and juicy!), so you can remove it a little early. Just make sure it reaches the internal temperature of 165°F while resting, or you may need to throw it back on the grill for a couple more minutes.

Juicy, tender, and full of flavor, this grilled chicken is a winner every time!
Serving Suggestions
I often serve this grilled chicken sliced over a fresh green salad for a really simple but satisfying meal for my family. But honestly, it’s one of those recipes that goes with just about anything. Dress it up by serving it with a grilled peach salad. Or, if you’re craving something cozy, try it with lemon butter green beans. On warmer days, I’d pair it with a ditalini pasta salad for an easy backyard dinner. And if you want to give it a little extra flavor boost, a light drizzle of homemade balsamic glaze really takes things up a notch.
Tips and Notes
- Make sure to use kosher salt for the brine. The flat, flaky crystals dissolve extremely well in water and create a crystal-clear brine. Just don’t forget to rinse the brine off before cooking. Skipping that step can leave the chicken overly salty.
- Don’t skip the brown sugar; it helps develop that beautiful char!
- Putting the smooth part of the breast down on the grill first helps ensure you get those glorious grill marks on the top! So, start with the smooth side down to ensure you get some sexy grill marks on that bird!
- If your chicken is sticking to the grill, allow it to cook for another minute or two. It should lift off easily when you flip.
- Want to make this in the oven? I’d preheat the oven to 450°F and bake the chicken breasts for about 15-20 minutes. The internal temperature will register as 165°F on a meat thermometer once done. Alternatively, you could try our tried and true baked chicken breast recipe!
Storage Instructions
I recommend storing leftover grilled chicken in an airtight container in the refrigerator for up to 3 days. To freeze, wrap individual chicken breasts in plastic wrap or aluminum foil and place them in a Ziplock bag to store for up to 3 months. Let thaw overnight in the refrigerator before reheating in the microwave or on the stovetop over medium-low heat.
Our Favorite Cost effective grill
When I was looking for a grill for us to use in the Budget Bytes kitchen, I wanted one that was easy to find, simple to set up, easy to clean, and didn’t make me miss my charcoal grill. I went with the Ninja Sizzle Smokeless Grill after contemplating a few different ones that would be widely available at Walmart, Target, and Amazon.
The cheapest grill option I found was a simple and small camping charcoal grill. That’s also a great option if you want to grill outside, get that smokier grill flavor, and don’t mind keeping charcoal on hand.
The Ninja Sizzle Smokeless Grill we ended up deciding on comes with a grill top and a flat top, so it’s perfect as a quick, clean option for grilling at home or even in an RV/camper. (I have since bought one for my chef kit and my in-laws bought one for their camper!)
More Grilled Recipes


Our Grilled Chicken recipe was originally published 6/17/24. It was retested, reworked, and republished to be better than ever 7/8/25.
delicious! I will make this a regular in our dinner rotation. Leftovers are great for salad or burrito bowls, too.
The chicken was delicious! Well seasoned and tender. We loved it!
But for the future, could I cut down on the brine liquid? It seems to be LOTS more than it needs. I could have easily put twice as much chicken into the recommended amount of liquid and still had it be well covered.
This was great! Juicy, tender, and didn’t take forever to cook!
My boyfriend has this recipe saved in his calorie tracking app as “Randi’s Best Chicken.” 🤣 I’ve always struggled to grill chicken without drying it out or being raw on the inside and this brine method works like a charm!! And that rub is delightful!
Thanks, Randi! Sounds like he’s a keeper, too! :)
Do you have a recommendation for asugar substitute? I am not able to eat/consumer regular sugar at all due to health reasons. What is the reason for the sugar in the brine?
We don’t have much experience with sugar alternatives, but I do know that several brands make stevia or monk fruit versions of brown sugar that you can find at larger grocery stores. You’re also welcome to omit it but it does add a subtle sweetness and caramelization to the chicken and the sugar in the brine balances out the salt!
Hey Dari, I love Swerve (that’s the brand name) as a sugar-free brown sugar substitute. They have a granular sugar, confectioner’s sugar, and brown sugar! I’ve used all when cooking for private clients avoiding sugar and it’s a super easy swap. I know the Walmart near my house carries it (and we are in a very rural area) so I imagine/hope it’s easy to find where you are, too!
I second your recommendation for Swerve–my husband has type2 diabetes, and having fought weight all of my life, it doesn’t hurt me to cut back on sugar, either. Most of the time I use stevia, but Swerve tastes most like sugar and I definitely rely on it for some recipes. It’s available in all of my local supermarkets as well as Walmart. I firmly believe that one problem with using “artificial” sweeteners is that most recipes and most prepared foods use too much. With modest use, it’s usually hard to tell the difference between sugar and other sweeteners.
As a change of subject, you persuaded me to try a brine and my resulting grilled chicken was pretty good. I have been grilling for years, so my normal unbrined results are good, too, but it does take a watchful eye to keep boneless breasts from drying out and the brined chicken is more forgiving. The rub, pretty normal, is nice, too, although I used more garlic and onion powders. Bringing the chicken to room temp prior to cooking is VERY important. This recipe produces wonderful leftovers, and when I cook chicken with any method I cook extra to use for sandwiches, salad or salad toppings, etc.
I love hearing all of this! Thanks, Jan.
I may be wrong but I don’t think there’s such a thing as too much garlic… at least not for my palate! Hehe.
If you were to use an oven for this recipe, what temperature and time would you do?
Hi, D. I suggest 450 degrees for 15-20 minutes. It should stay nice and juicy! *Make sure you use a meat thermometer to make sure the breasts reach an internal temperature of 165. You can pull it a few degrees early and let it rest, covered with foil, but you want to make sure it’s fully cooked. I think you’ll be really happy with it! Enjoy.
Help! I seem to be the only one who had a problem. The taste was delish, the chicken so tender and juicy, but it was so over-salty that we couldn’t eat it. I never have that problem and my husband loves salt, so it was so strange. I used the 1/4 cup kosher salt for the wet brine, and the 1 tsp salt for the rub. Perhaps the brine needs to be rinsed? But by that time it’s well inside the chicken, so I doubt a rinse would help. I did marinate in the brine for 24 hours. What am I doing wrong that it was way too salty?
Hey, Wendy. I would recommend rinsing off the brine and patting the chicken dry before grilling.
Have made this before and love it – a cost and waste saving tip id thought to pass on. For the brine- using the brine from feta cheese or dill pickles works a charm too and adds a slightly different flavour option. 😀
Ooh, that’s a great idea, Mari!
Can I do this recipe with bone in large chicken breasts?
Definitely! You just may have to cook them a bit longer. Checking the internal temp with a meat thermometer is your best bet!
Yes, you will need to adjust your cook time on the grill– just make sure you have a meat thermometer handy!
I made this today on the grill. Absolutely delicious. Chicken can be so bland and this is great! I made a big batch up for meal prep.
I made this the other night using chicken tenders. It turned out delicious and had so much flavor. I did use 1/8 tsp of cayenne pepper knowing how spicy cayenne can be. Thanks for sharing the recipe, I already had a request to make it again.
Hi, I was reading through the nutrition facts. It says 7877 mg. sodium for a 6 oz. serving of chicken! Is this correct?
It seems the nutrition counter is basing that on the salt used in the brine. Unfortunately, it’s hard to gauge how much of that actually makes it into the chicken vs is discarded after the brining. But rest assured it would be no where near that in actuality!
Can you use a George Foreman grill for this recipe?
The ingredients would all be the same, but the cooking time would likely be a little different since you’re cooking the bottom and the top at the same time. I would go by a meat thermometer for the best results!
The JUICIEST grilled chicken. Love the brown sugar in the rub. Will definitely try this.