
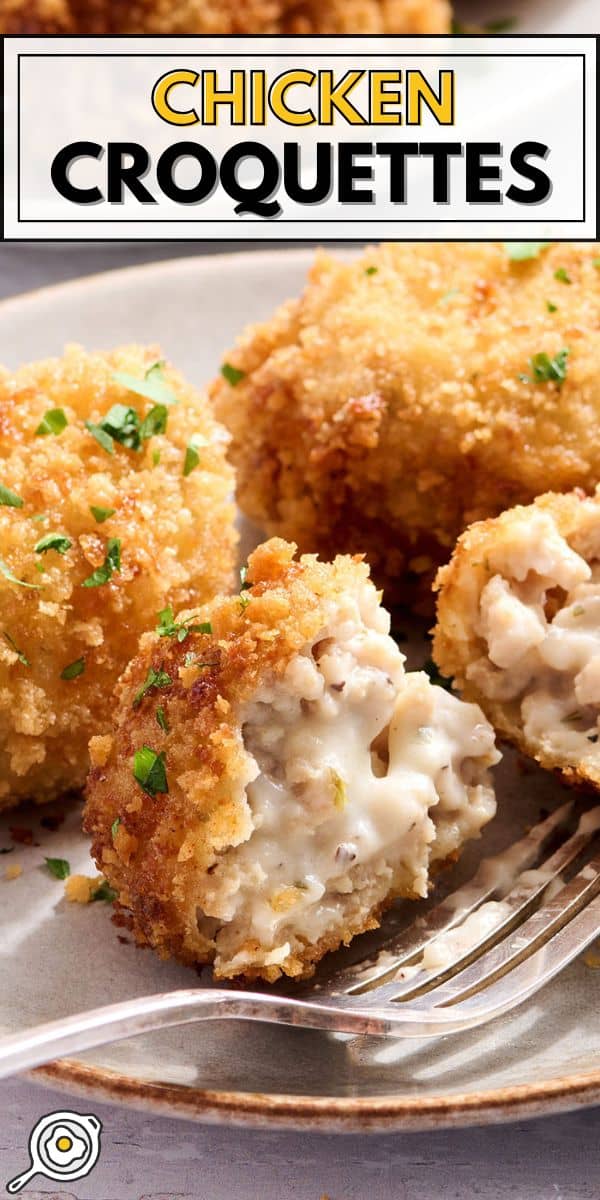
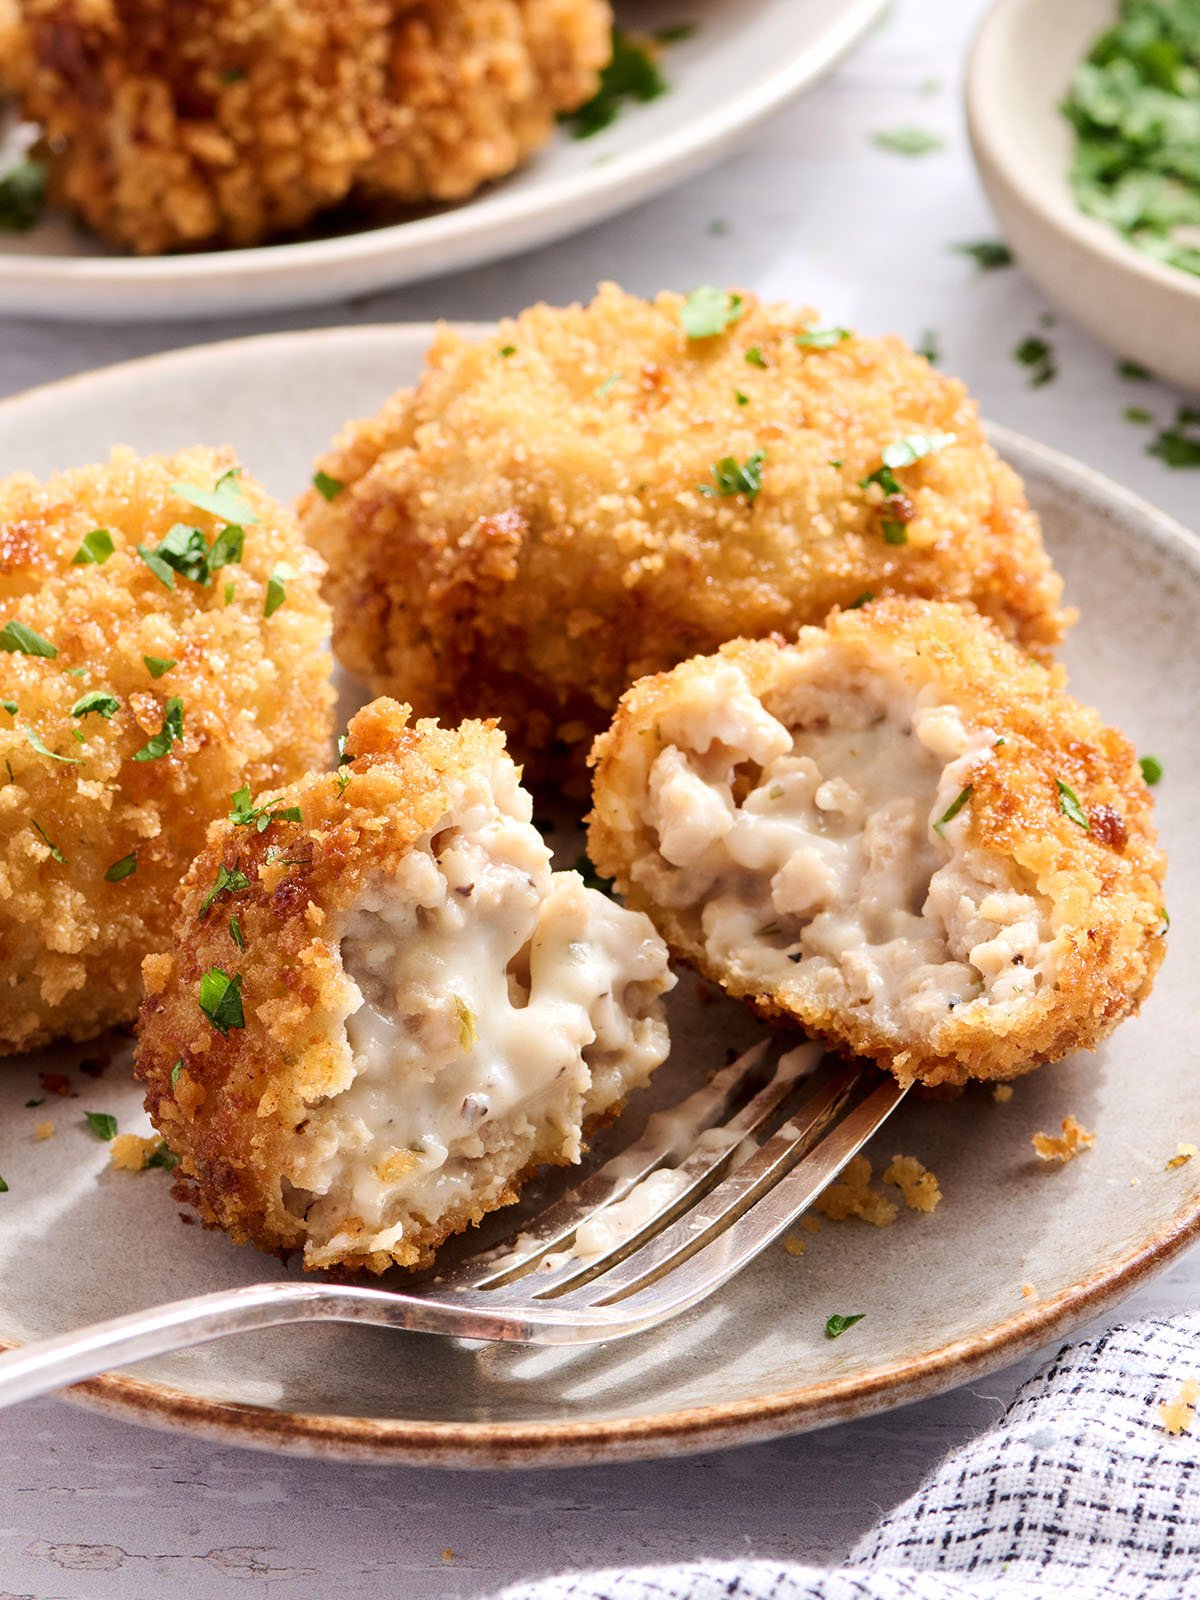
Have you ever heard of Chicken Croquettes? If you haven’t, don’t worry. They’re similar to chicken nuggets, but fancier. They’re made with pantry staples I already had on hand, and a little bit of patience. Well-seasoned chicken is combined with a creamy sauce, then breaded and fried to golden perfection. If you’ve tried to make chicken croquettes before and they turned into an oozy mess, here is where patience comes in. Make sure to chill the mixture, shape, and freeze them until they’re firm, before breading and frying. This simple make-ahead step keeps them from falling apart and guarantees a crunchy outside every time!
All recipes are rigorously tested in our Nashville Test Kitchen to ensure they are easy, affordable, and delicious.
Homemade Chicken Croquettes From Scratch
Chicken croquettes originated in France and derive from the French word croquer, meaning ‘to crunch.’ It was a thrifty way to use up leftovers like chicken, mixed with a thick creamy sauce or bechamel. From there, their popularity spread, especially to Spain. There, croquettes evolved to use other fillings like ham and fish, and sometimes used mashed potatoes instead of sauce, known as croquetas. Now you’ll find a variety of different options, each delicious in its own way.
I kept this chicken croquette recipe pretty classic! You can still use leftover chicken (make sure to finely chop it), but I went with well-seasoned ground chicken. I then make a really quick bechamel sauce, combine the two, and let it cool. After that, the croquettes are shaped and frozen, so they’re not an oozy mess when frying. Once they’re nice and firm, they get breaded and fried. So don’t worry, I didn’t forget the crunch!
Recipe Success Tips
- Season to taste. The sauce in this recipe for chicken croquettes is actually a version of a bechamel. You start with the butter and flour to make the roux. Then slowly whisk in the milk until thick. I seasoned it with salt, pepper, garlic powder, onion powder, and dried parsley. Feel free to season with any herbs, spices, or seasoning blends you have and love!
- Spray your hands for easy shaping. You can spray your hands with a nonstick spray to help the chicken mixture stick to you less. It’s still going to get a little messy, though, so just be ready!
- Make any shape you like! I went with ovals, but you can also shape the meat into cylinders, balls, or patties. Make sure the chicken and sauce mix is chilled for at least 30 minutes so it’s easier to shape.
- Don’t skip the freezing step. The sauce helps bind and hold the chicken together, but it’s still pretty wet. It’s important to freeze the shaped chicken croquettes so they fry properly and not fall apart.
- Prep them ahead. To make your life easier, you can also break this recipe into two days. Leave the shaped chicken in the freezer overnight (make sure to cover them once frozen) and then fry them the next day.
- Shallow frying vs. deep frying chicken croquettes. I like to shallow fry my croquettes. This means they aren’t fully submerged in the oil, and you’ll have to flip the ovals halfway through cooking. Shallow frying saves money on oil, and there’s less to clean up. 😊
- Keep the oil right around 350°F for the crispiest breading. Adjust the heat as you fry so it doesn’t dip too low or climb too high. A simple kitchen thermometer makes this easy, but if you don’t have one, you can check the oil’s temperature by dipping the handle of a wooden spoon into it. Steady bubbles forming around the wood means it’s the right temperature.
Chicken Croquettes
Cost $6.48 recipe / $1.62 serving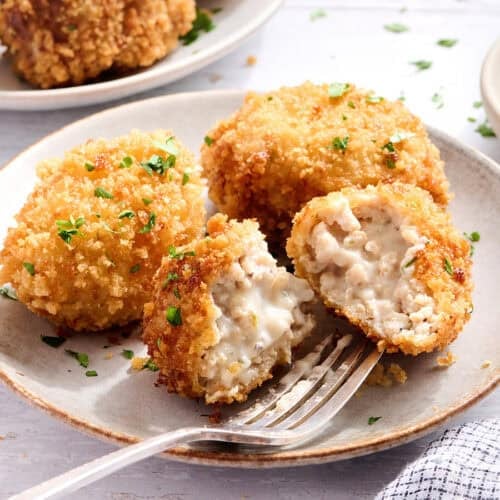
Ingredients
Ingredients for Chicken
- 1 Tbsp vegetable oil ($0.04)
- 1 lb. ground chicken ($3.72*)
- ½ tsp salt ($0.02)
- ¼ tsp black pepper (freshly cracked, $0.04)
- ½ tsp garlic powder ($0.02)
Remaining Ingredients
- 2 Tbsp butter ($0.23)
- 3 Tbsp all-purpose flour (30g, $0.03)
- 1 cup milk (8oz., $0.23)
- ½ tsp salt ($0.02)
- ¼ tsp black pepper (freshly cracked, $0.04)
- ½ tsp garlic powder ($0.02)
- ¼ tsp onion powder ($0.01)
- ¼ tsp dried parsley ($0.01)
- 2 cups vegetable oil (16oz., $1.19**)
- ¼ cup all-purpose flour (40g, $0.04)
- 1 egg ($0.16)
- 2 Tbsp water ($0.00)
- 1 cup panko breadcrumbs (80g, $0.66***)
Instructions
- Gather and prepare all ingredients.
- Heat the vegetable oil in a medium skillet over medium heat. Once hot, add the ground chicken, ½ tsp salt, ¼ tsp pepper, and ½ tsp garlic powder.
- Cook the chicken for about 8 minutes, breaking it up as you go, until fully cooked and no longer pink. Using a slotted spoon, remove the cooked chicken to a medium bowl and set aside.
- Wipe out the skillet. Melt the butter in the skillet over medium heat. Once melted, add 3 tablespoons flour and cook for 1 minute.
- Slowly add the milk, whisking as you go. Continue whisking for about 2 minutes until thick and smooth.
- Turn off the heat and whisk in the remaining ½ tsp salt, ¼ tsp pepper, ½ tsp garlic powder, onion powder, and dried parsley.
- Pour the sauce on top of the ground chicken and fold to combine. Place the bowl in the refrigerator to cool for at least 30 minutes.
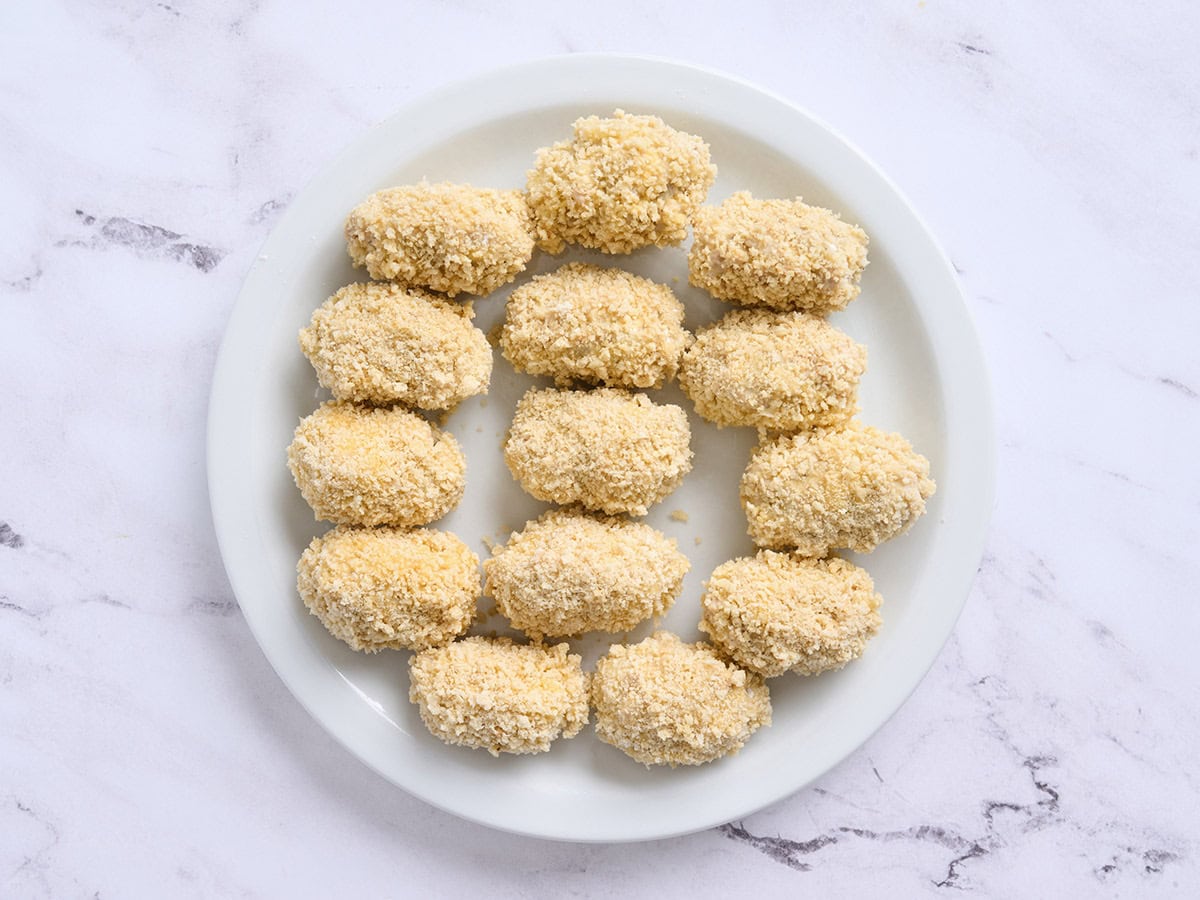
- Once the croquette mixture is cold, pull the bowl from the refrigerator. Using a 1/8 cup (or 2 tablespoons), evenly divide and shape the croquettes into 14 ovals. Place them on a parchment-lined plate. Place the plate in the freezer for at least 2 hours.
- After two hours, start preheating the vegetable oil in a medium pot over medium-low heat. Grab 4 medium bowls or shallow dishes. In the first bowl, add the flour. In the second bowl, whisk together the egg and 2 tablespoons of water. In the third bowl, add the panko. Leave the last bowl/plate empty.
- Pull the croquettes from the freezer. Roll each oval in flour, covering all sides, and transfer it to the egg bowl. Roll it in the egg wash, letting any extra drip off, then transfer to the panko. Roll the croquettes and press them to ensure full coverage. Place them on the empty plate until all are breaded.
- Heat the oil to 350°F-365°F, turning it up to medium if needed. Once the oil is hot, carefully place the croquettes into the oil. Do not overcrowd the pot, and work in batches. I was able to fit five into my pot at a time.
- Fry, undisturbed for about 2 minutes, until golden brown. Using tongs, gently flip and continue cooking for another 2 minutes.
- Once the croquettes are done, place them on paper towels to drain. Make sure to maintain the oil temperature at 350°F and continue frying until all the ovals are done, then enjoy.
See how we calculate recipe costs here.
Notes
Nutrition Information
how to make Chicken Croquettes step-by-step photos
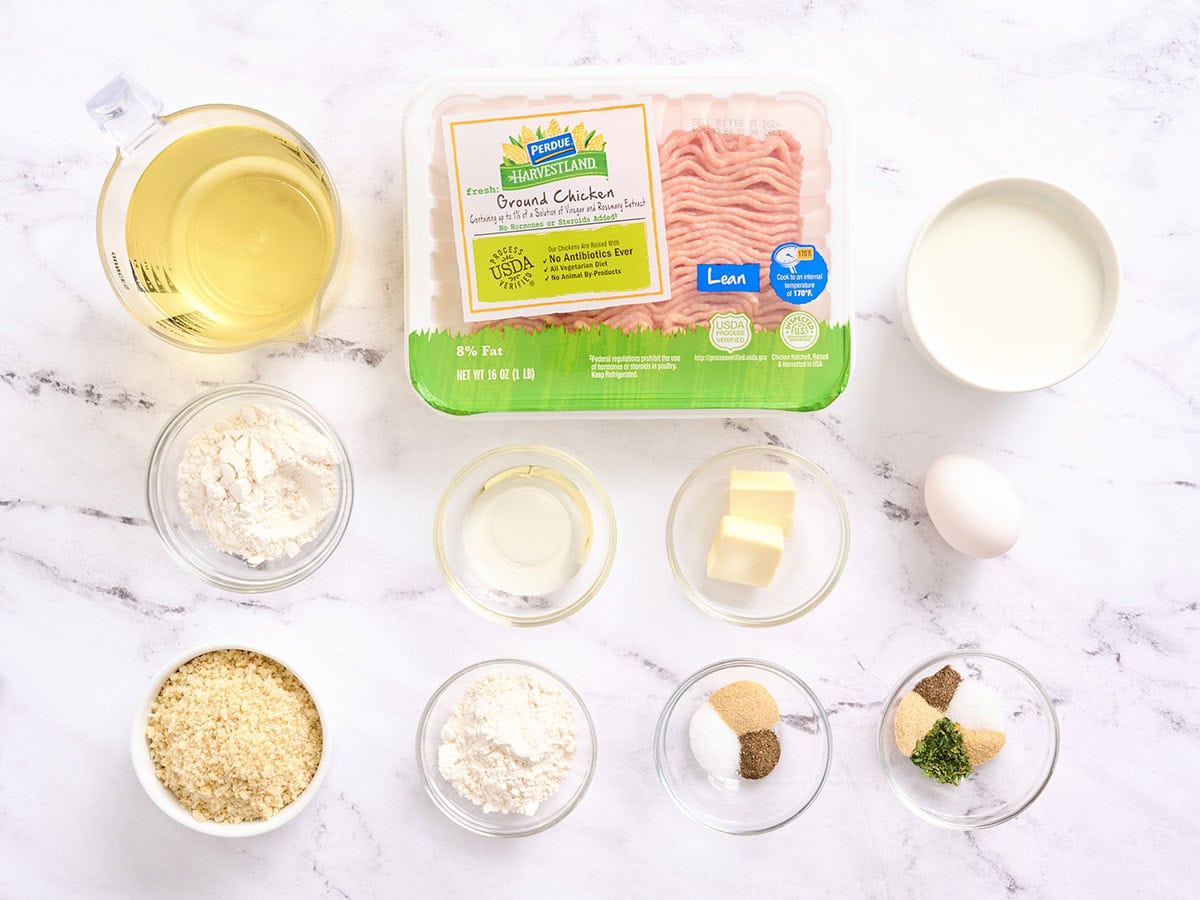
Gather all of your ingredients.
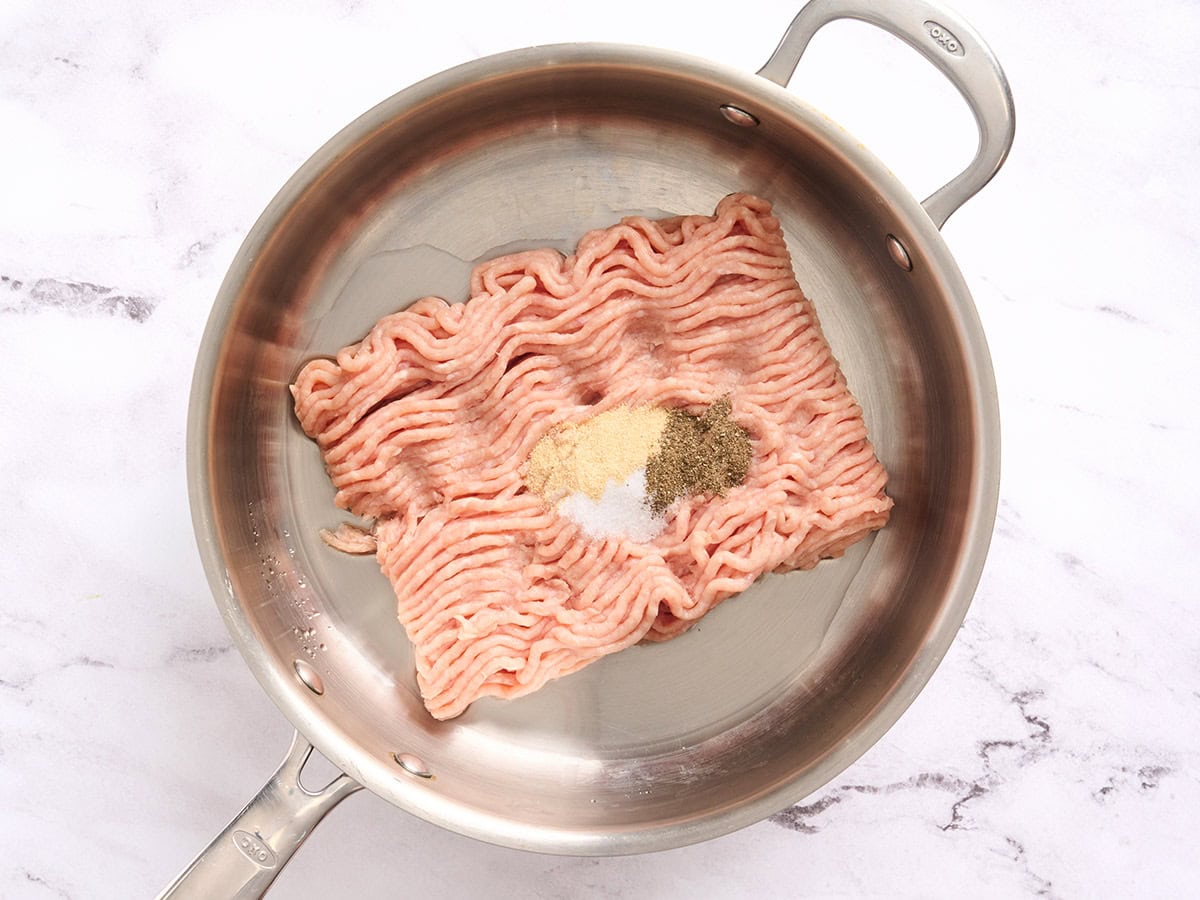
Cook the filling: Heat 1 Tbsp vegetable oil in a medium skillet over medium heat. Once hot, add 1 lb. ground chicken, ½ tsp salt, ¼ tsp black pepper, and ½ tsp garlic powder.
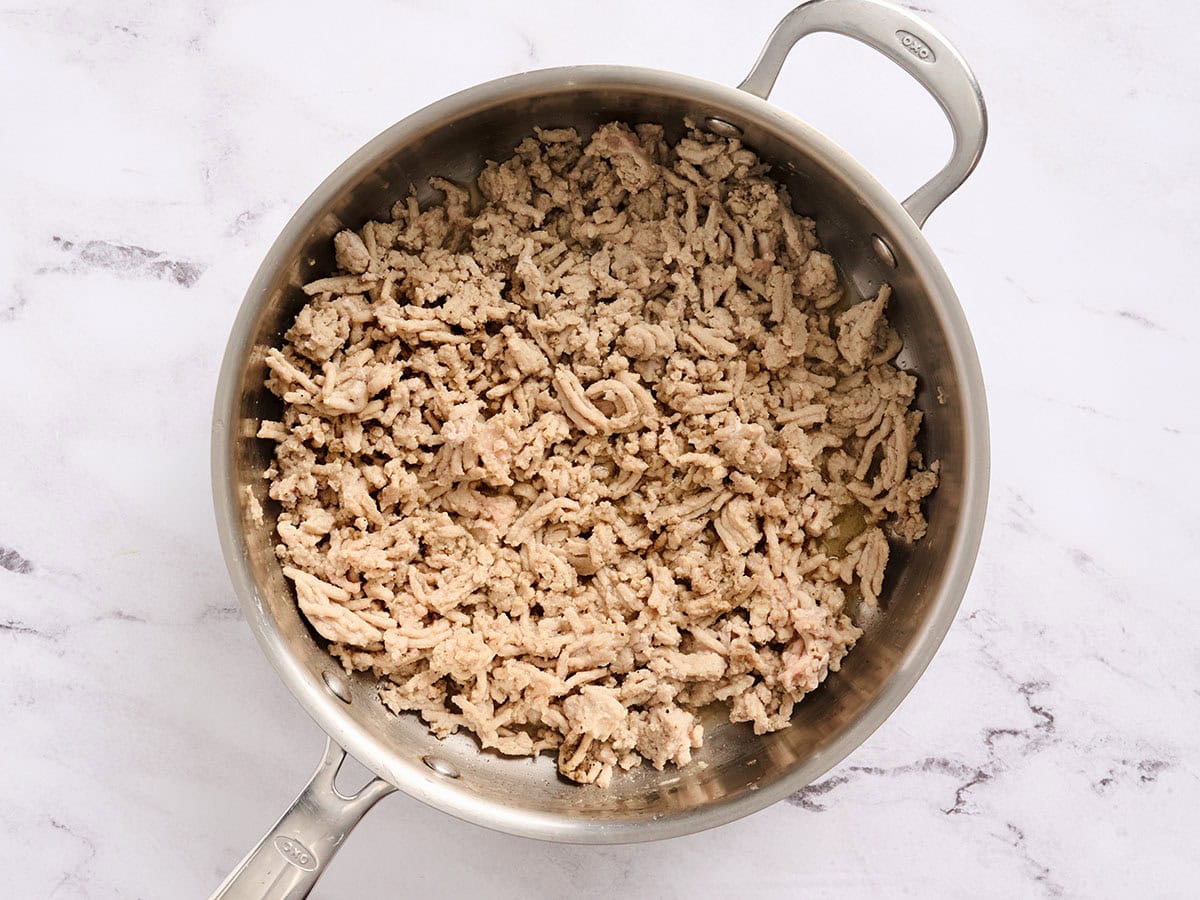
Cook for about 8 minutes, breaking the chicken up as it browns, until fully cooked and not pink. Use a slotted spoon to transfer the chicken to a medium bowl. Set this aside for now.
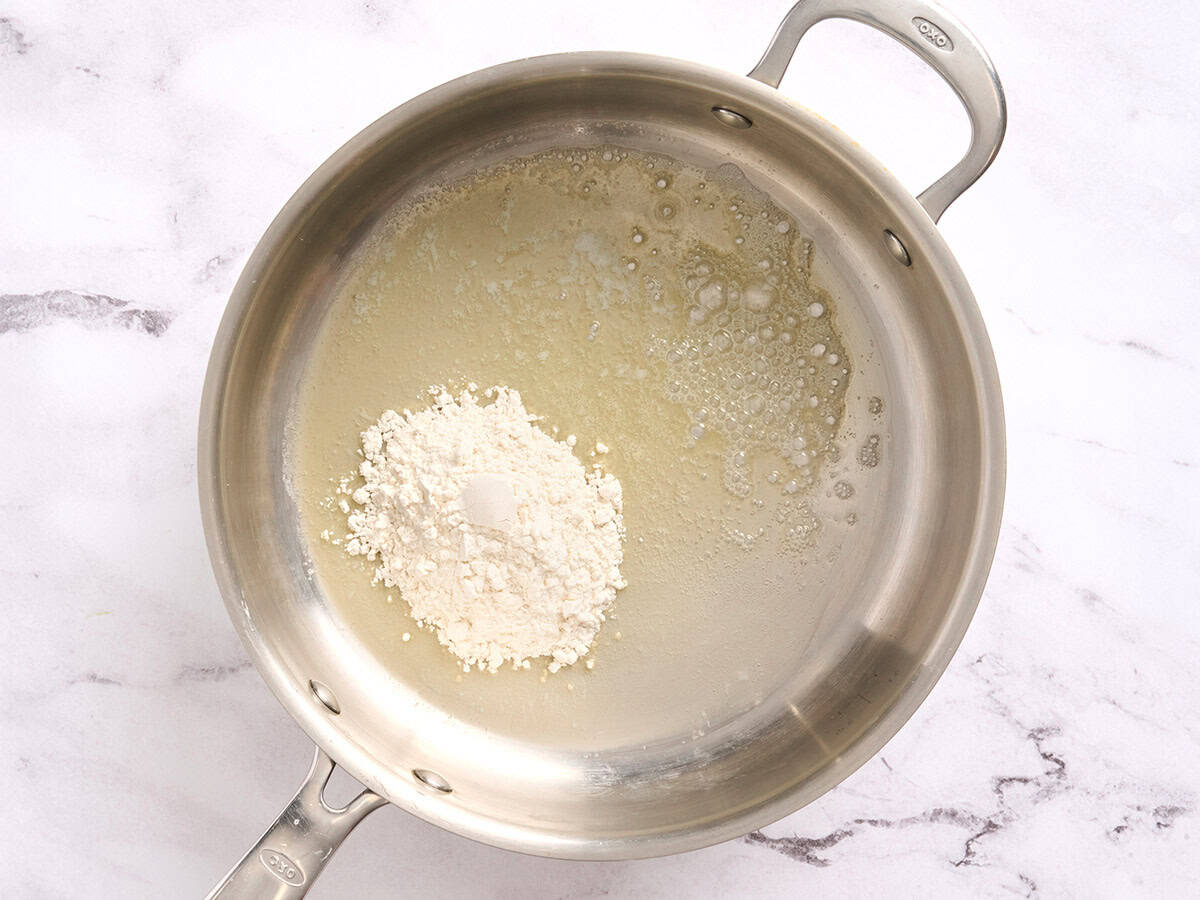
Make the sauce: Carefully wipe out the skillet (don’t burn yourself!), then melt 2 Tbsp butter over medium heat. Sprinkle in 3 Tbsp flour and cook, stirring, for 1 minute.
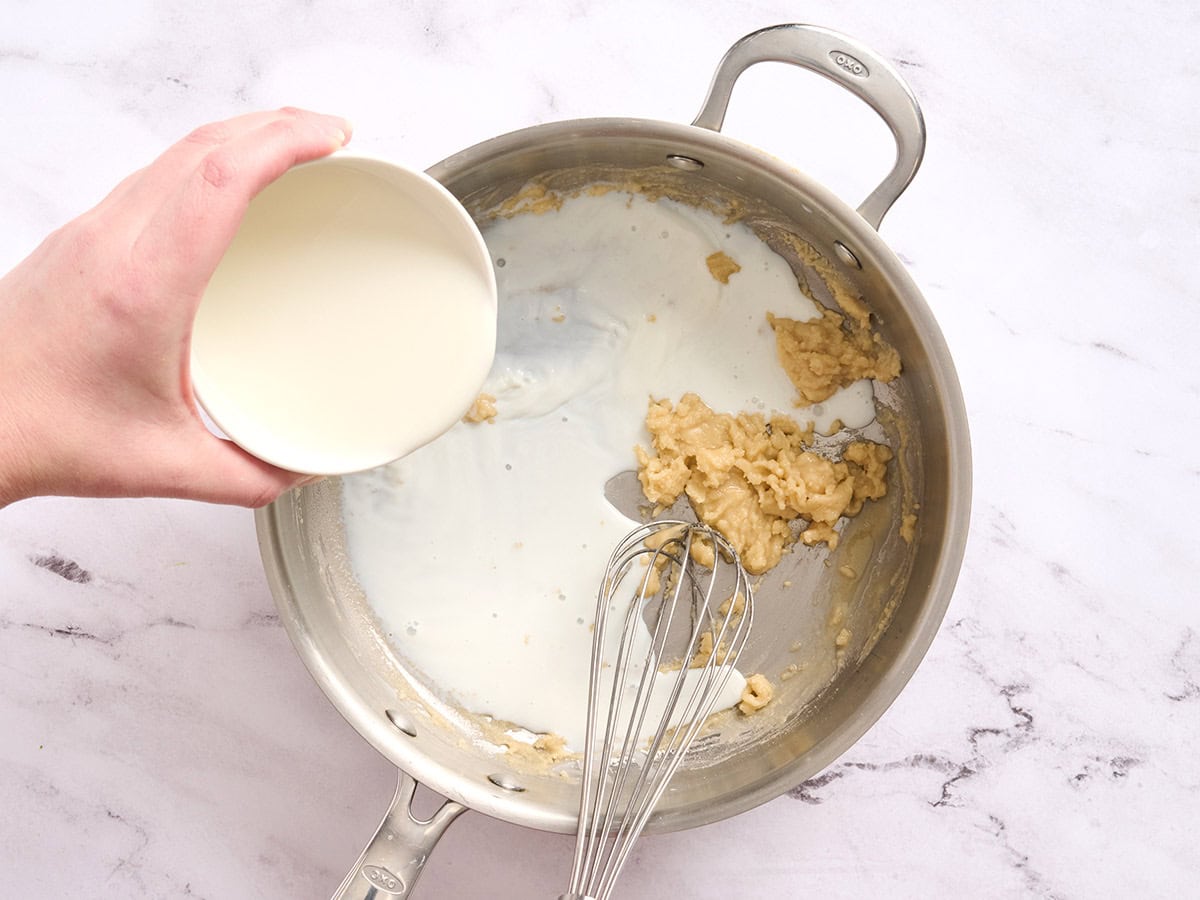
Slowly pour in 1 cup milk while whisking. Keep whisking for about 2 minutes, until the sauce is smooth and thick. As the mixture heats, the roux (butter-flour mix) will thicken the sauce.
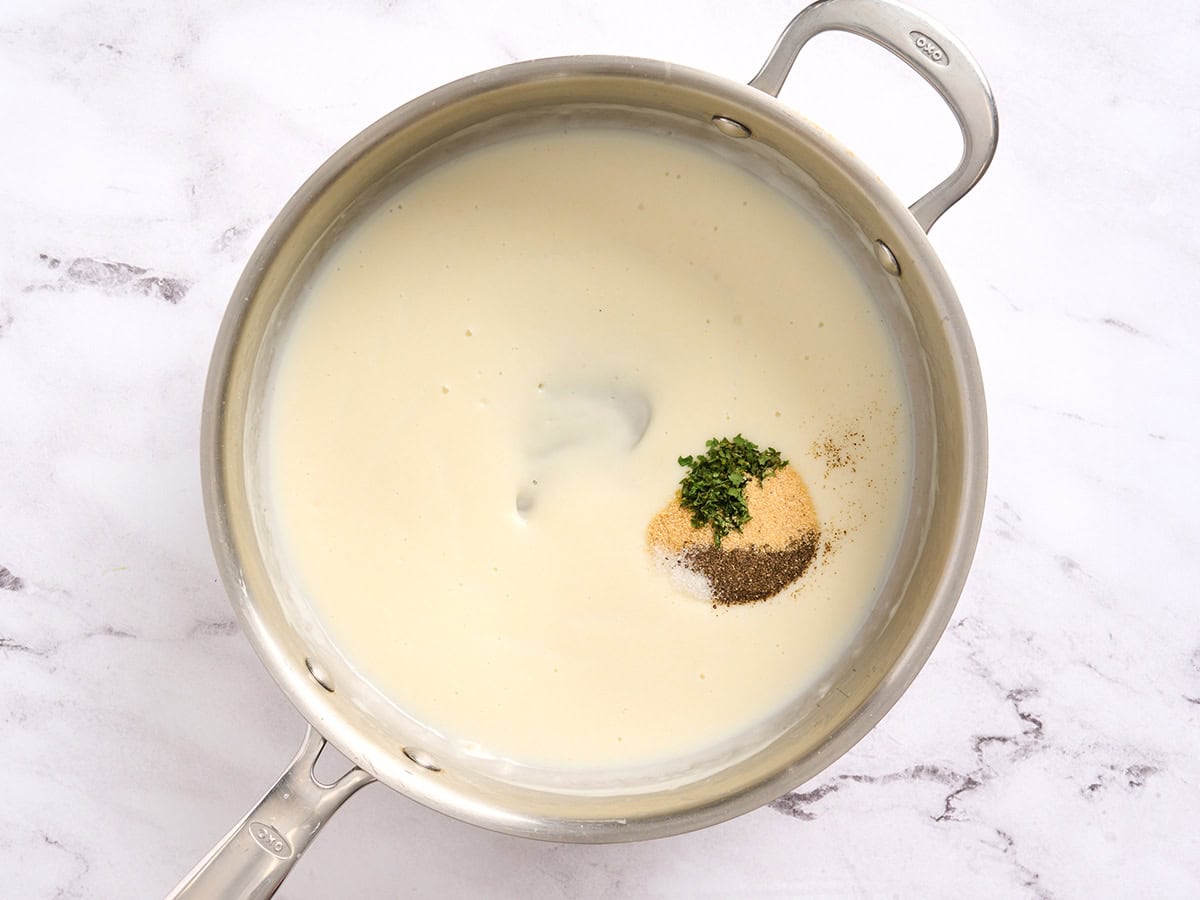
Add seasonings: Turn off the heat and mix in ½ tsp salt, ¼ tsp pepper, ½ tsp garlic powder, ¼ tsp onion powder, and ¼ tsp dried parsley until evenly combined.
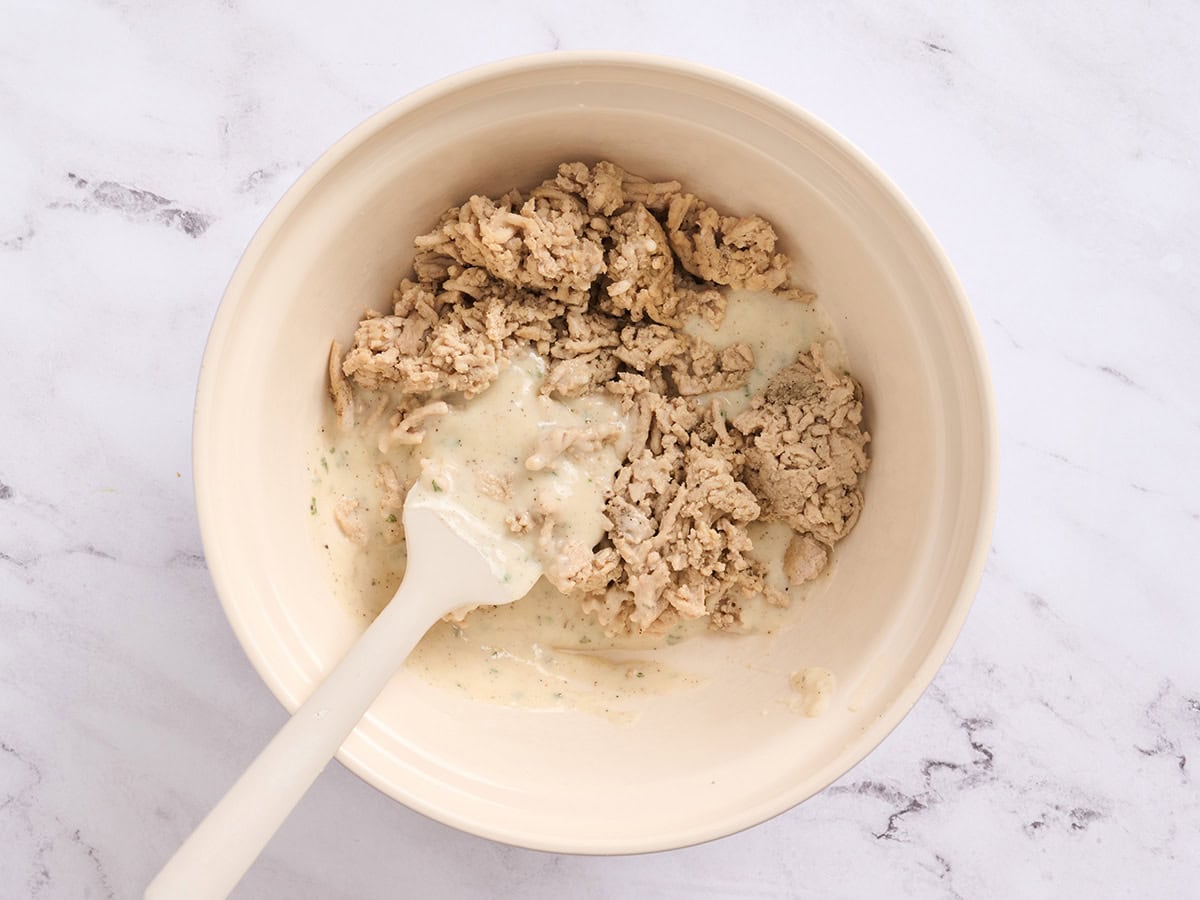
Finish the chicken filling: Pour your seasoned bechamel sauce over the cooked chicken and fold until evenly combined. Refrigerate the mixture for at least 30 minutes to cool.

Form the chicken mixture: Once chilled, use a ⅛ cup scoop (or 2 Tbsp) to portion the mixture and shape into 14 oval croquettes.
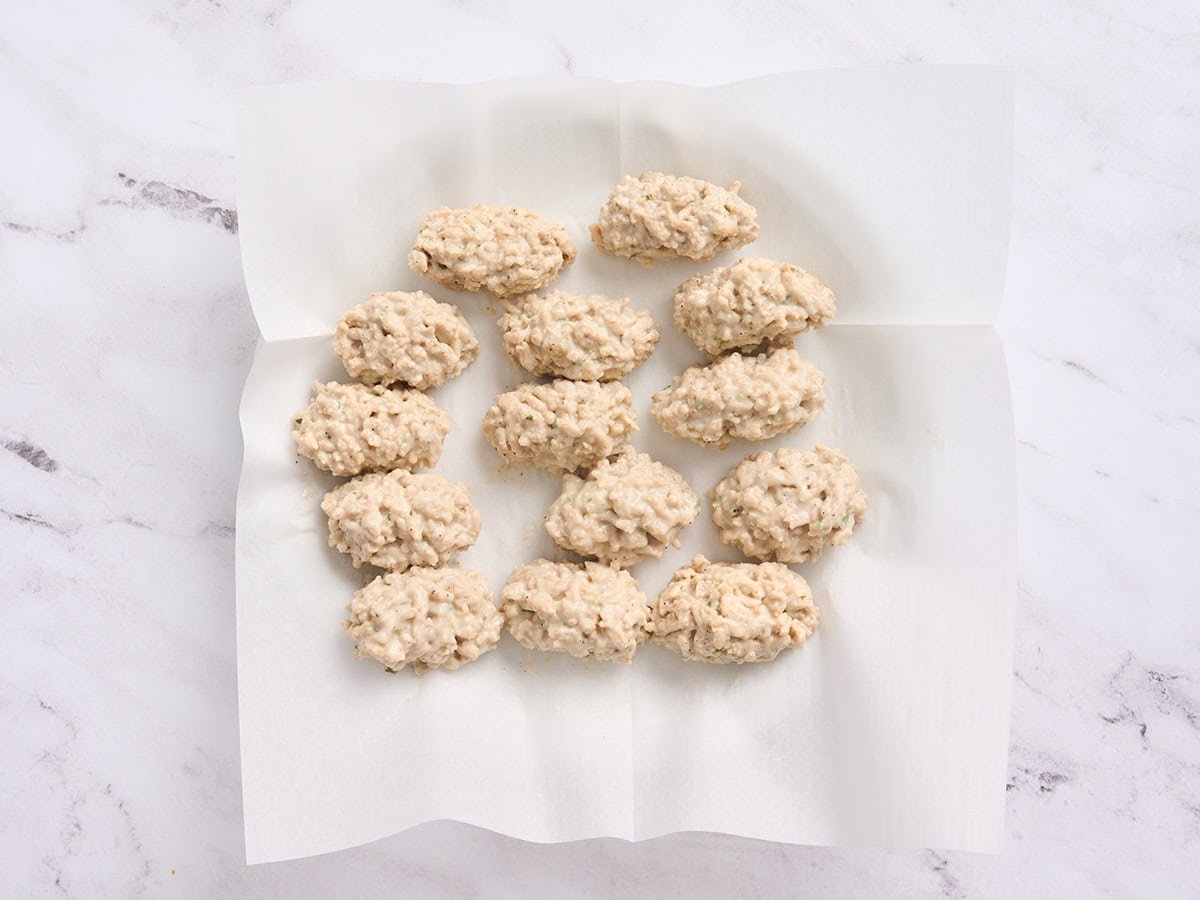
Freeze: Set the shaped chicken mixture on a parchment-lined plate, then freeze for at least 2 hours.
After 2 hours, the chicken coquettes should be frozen solid. Add 2 cups vegetable oil to a medium pot and begin heating over medium-low.

Set up a dredging station: Grab 3 bowls (or shallow dishes) and add ¼ cup flour to the first, whisk 1 egg with 2 Tbsp water in the second, and add 1 cup panko breadcrumbs to the third.
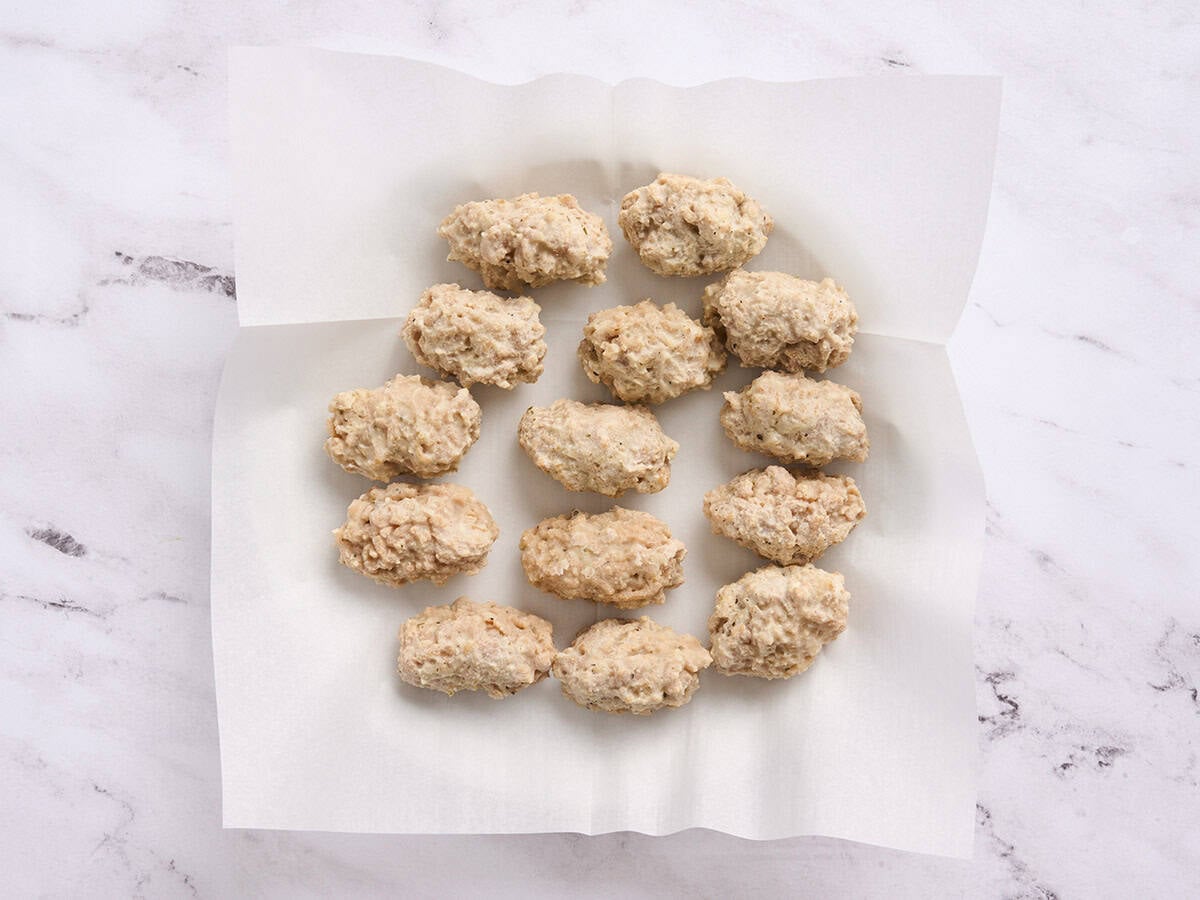
Working with the frozen croquettes, roll each one in the flour, dip into the egg and water mixture (letting excess drip off), then press into panko until fully coated. Place them on a fourth plate as you go.
Repeat until all are coated in the breadcrumbs.
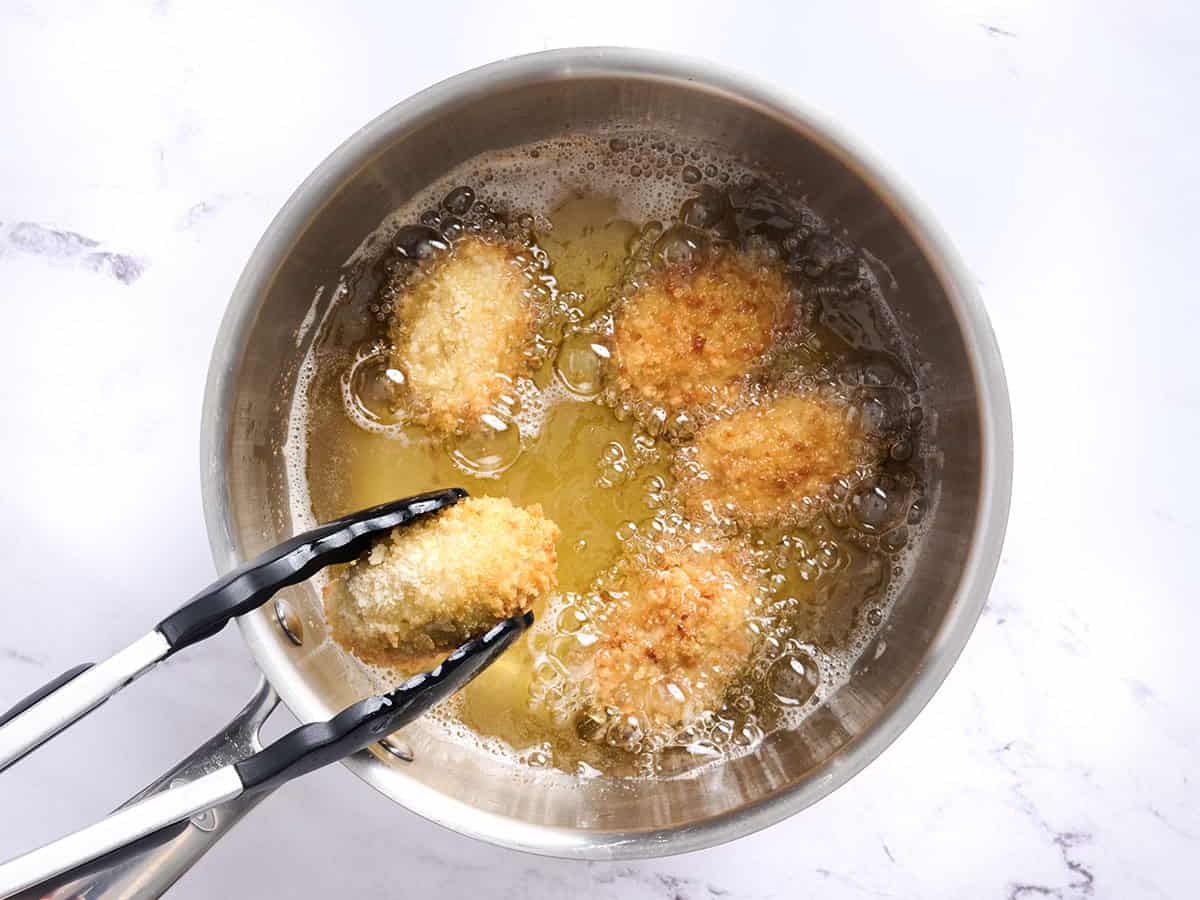
Fry in batches: Heat the oil to 350-365°F, increasing to medium if needed. Carefully add the breaded ovals to the hot oil in batches (avoid crowding the pot, and work in batches as needed. I could fit about 5 at a time in my pot).
Fry, undisturbed, for about 2 minutes until golden brown, then flip with tongs and cook for another 2 minutes, or until evenly browned.
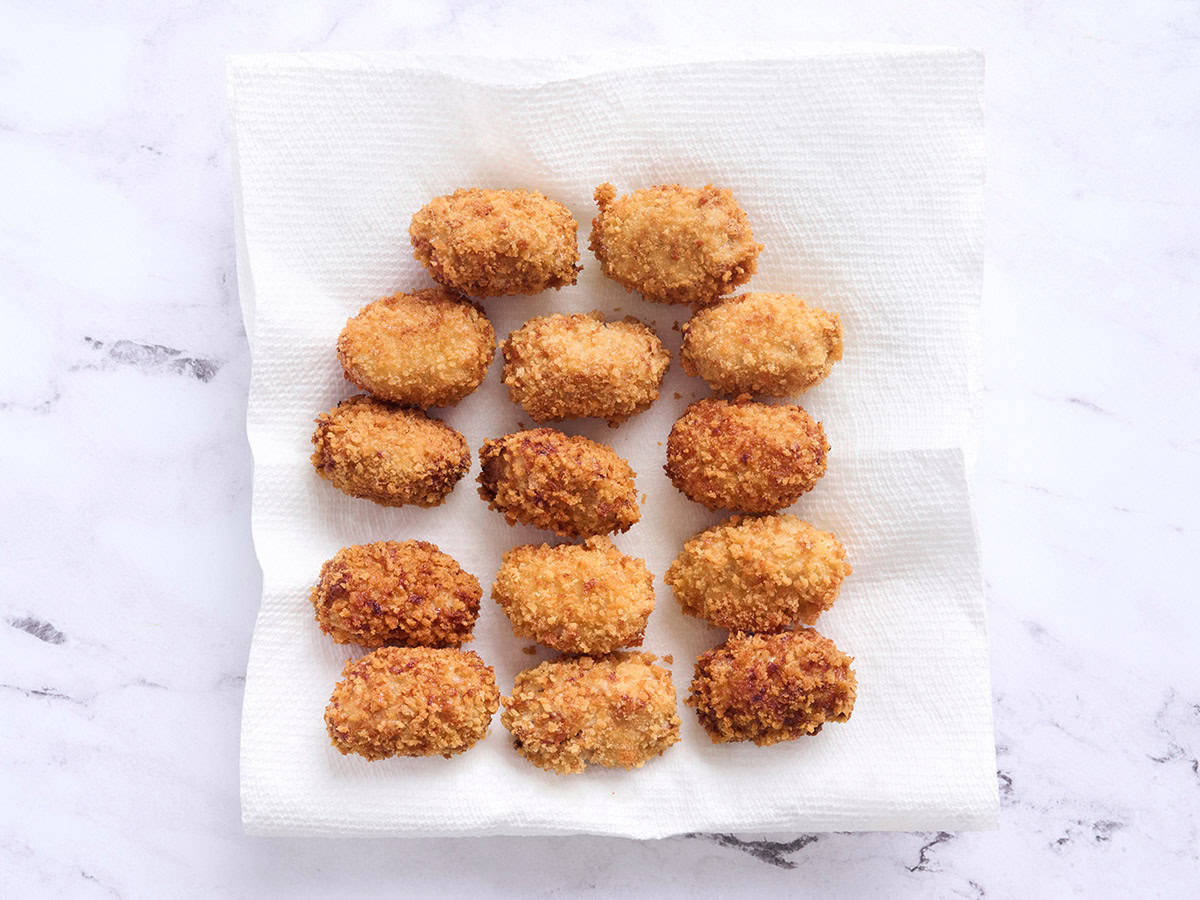
Finish and serve: Transfer them to paper towels to drain. Keep the oil around 350°F as you continue frying the remaining batches, then serve and enjoy!

Serving Suggestions
I usually enjoy these homemade chicken croquettes as-is, but sometimes I’ll add a side or two to make it a full meal. But since they’re a little hands-on, I like to pair them with sides that mostly take care of themselves. Creamy Instant Pot mashed potatoes are perfect because the pressure cooker does all the work while you fry. For something green, I’d make some oven roasted frozen broccoli or an easy cucumber and tomato salad. For dipping, I love remoulade, plus easy options like garlic mayo, honey mustard, or a quick ketchup + hot sauce mix.
Storage & Reheating
Leftovers can be stored in an airtight container in the refrigerator for up to 3-4 days. You can also freeze them for up to 3 months. I suggest reheating it in the oven or air fryer (at 350℉) until heated through to help maintain its crispiness.
Try These Ground Chicken Recipes Next!
- This Chicken Meatloaf keeps all the cozy meatloaf flavor, just a little lighter and super weeknight-friendly.
- I make these creamy Chicken Meatballs when I want something hearty, quick, and extra comforting!
- Our Chicken Burger recipe makes juicy, budget-friendly ground chicken burgers that are perfect for grilling (or a grill pan when the weathers bad!).


Can you make this recipe using ham? I ate ham croquettes in Miami years ago and loved them.
Hi Kelly! Absolutely! I’ve also had ham croquettes, and they are delicious! If yours had a cream sauce to bind the ham in Miami, they should be pretty similar. I know some recipes use potatoes to bind the meat, so keep that in mind. I hope that helps, and let me know how they turn out.
Looks delicious!
Thank you, they are! I hope you try them too!
thumbs up
Thank you! I’m glad you enjoyed them.
Could these be made in an air fryer?
Hi Ally! I haven’t tested this recipe in the air fryer, but I’m sure you could. I would recommend 375-400°F for 10-15 minutes. If you try it, please let me know how it turns out!