



I’m all about quick weeknight dinners, and this easy Teriyaki Chicken is one I think you’ll come back to over and over again. I use boneless, skinless chicken thighs because they stay tender and juicy as the soy sauce and brown sugar in the marinade reduce into a gorgeous light glaze. Even a 30-minute marinade gives the chicken plenty of salty, sweet, and savory flavor, but you can prep it up to 24 hours ahead if that makes dinner easier. Not to mention, the whole recipe makes five servings for about $1.41 each, which is MUCH cheaper than ordering takeout! And the leftovers are pretty good for meal prep, too. 😉
 Pin this recipe for later!
All recipes are rigorously tested in our Nashville Test Kitchen to ensure they are easy, affordable, and delicious.
“Oh my gosh, this is one of the best recipes I have ever tried!! It is so delicious! This will definitely be a regular go to meal from now on! It’s easy, and impressively good!”
mEL
Easy Teriyaki Chicken with No Specialty Ingredients
Teriyaki is a Japanese cooking method rather than the name of one specific sauce (teri refers to the glossy finish, and yaki means grilled or broiled). Traditional Japanese teriyaki generally uses a glaze made with soy sauce, mirin, sake, and sugar, which is brushed onto the food as it cooks. This recipe is closer to the American-style teriyaki many of us know from bottled sauces and takeout restaurants. So, while it’s not technically traditional, it’s made with 7 easy-to-find ingredients and most definitely budget-friendly!
Once the chicken has marinated in my homemade teriyaki sauce, everything else happens in one skillet. The marinade left on the chicken gently bubbles around the thighs while they cook, creating a glossy, super flavorful glaze infused with punchy garlic and ginger. As the moisture evaporates, the sugar becomes more concentrated and the glaze naturally thickens, so there’s no need for additional thickener, which keeps the whole process simple! In about 15 minutes, the chicken has lightly caramelized edges, the kitchen smells sweet, savory, and garlicky, and I’m MORE than ready for dinner!
Recipe Success Tips
- Boneless chicken thighs keep this recipe affordable. Chicken thighs are often cheaper than chicken breasts, but that’s not the only reason I like them here. Their extra fat keeps them juicy and makes them much more forgiving in the skillet. They’re also already thin enough to cook evenly, so there’s no pounding, slicing, or extra prep involved beyond the marinating time!
- Keep the sauce ratio as written. I tested a few sauce variations before landing on a mix of ¼ cup soy sauce, 3 Tbsp brown sugar, and 1 Tbsp water. I’ve found this combination gives me the right balance of salty and sweet, with enough water to help the chicken cook before the sugar reduces into a glaze. I don’t recommend adjusting these three ingredients because changing the ratio will affect the flavor balance and how the sauce reduces.
- Keep the skillet at medium and stay close. Brown sugar helps the glaze coat the chicken, but it can scorch over high heat. I don’t have any trouble when I keep the heat at medium, but pans and stoves vary, so watch closely toward the end. The glaze should gently bubble without smoking. If it develops very dark spots before the chicken is cooked through, lower the heat.
- Aim for an internal temperature of 175°F. I know chicken is safe to eat once the internal temperature reaches 165°F, but after cooking many (many) chicken thighs over the years, I’ve found they’re even more tender and juicy once they hit 175°F. That slightly higher temperature gives the fat more time to render throughout the meat. If you don’t have a meat thermometer, cut into the thickest thigh and make sure the center is opaque with no pink remaining.
- Want your chicken extra saucy? The marinade in this recipe makes enough to give the chicken a light coating. It isn’t supposed to leave lots of extra sauce for pouring. Any marinade left after removing the raw chicken should be discarded for food safety. If I want extra, I double the soy sauce, brown sugar, water, garlic, and ginger, then reserve half. Add the oil only to the marinade, not the serving sauce. For a thicker serving sauce, whisk ½ cup water and 1 Tbsp cornstarch into the reserved half (not the used marinade) and simmer until thickened.
Don’t Skip the Marinade!
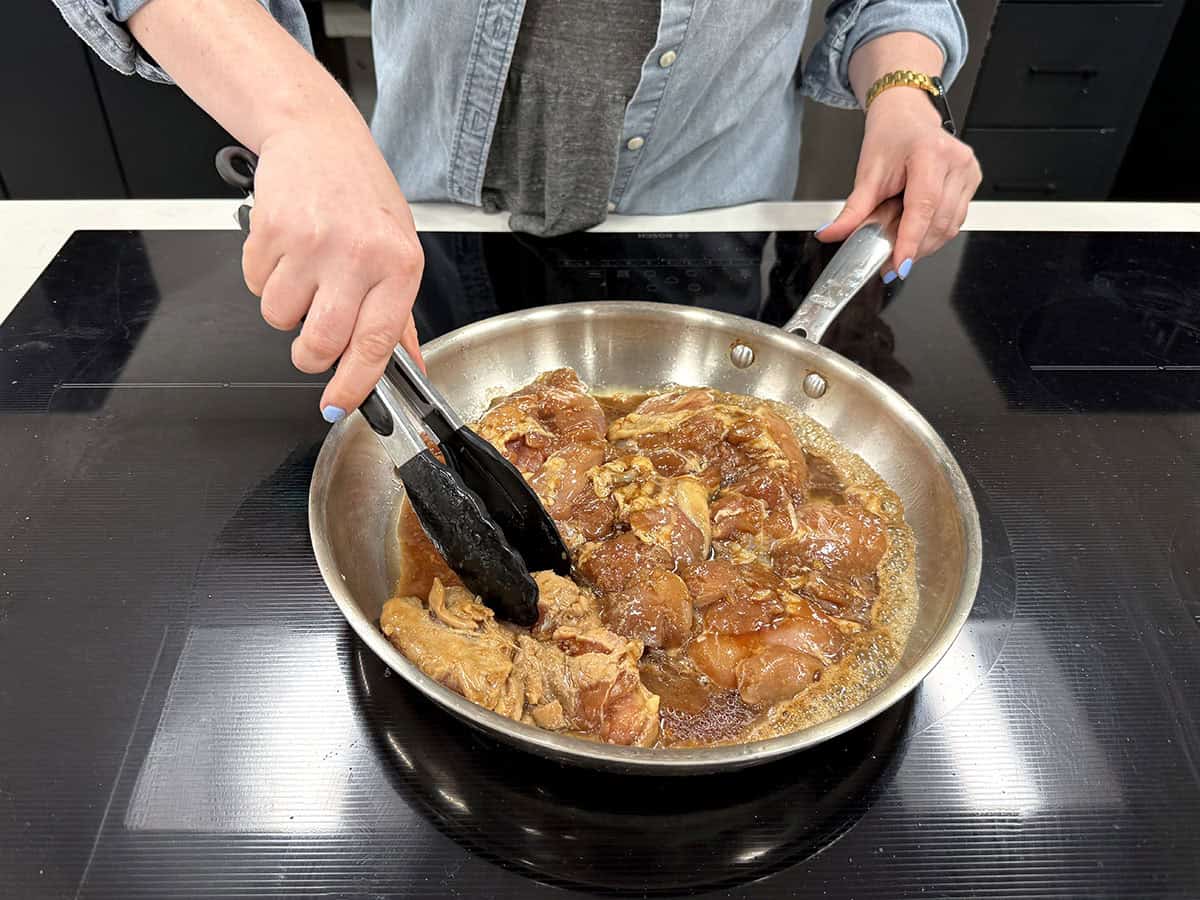
I’m all for anything that makes dinner taste better while I’m off doing literally anything else, and that’s exactly why I like to marinate this chicken ahead! You can marinate it for as little as 30 minutes or up to 24 hours, so it’s easy to prep before dinner, in the morning, or the night before. Just keep it covered in the refrigerator as it marinates. I don’t recommend going beyond 24 hours because the salty soy sauce can eventually make the chicken’s texture too soft.
I also tested freezing the raw chicken right in the marinade, and it worked VERY well! Add everything to a freezer-safe bag, press out as much air as possible, and freeze immediately for up to 2-3 months. Thaw it overnight in the refrigerator, and the chicken will marinate as it defrosts. Then all that’s left to do is cook it!
Serving Suggestions
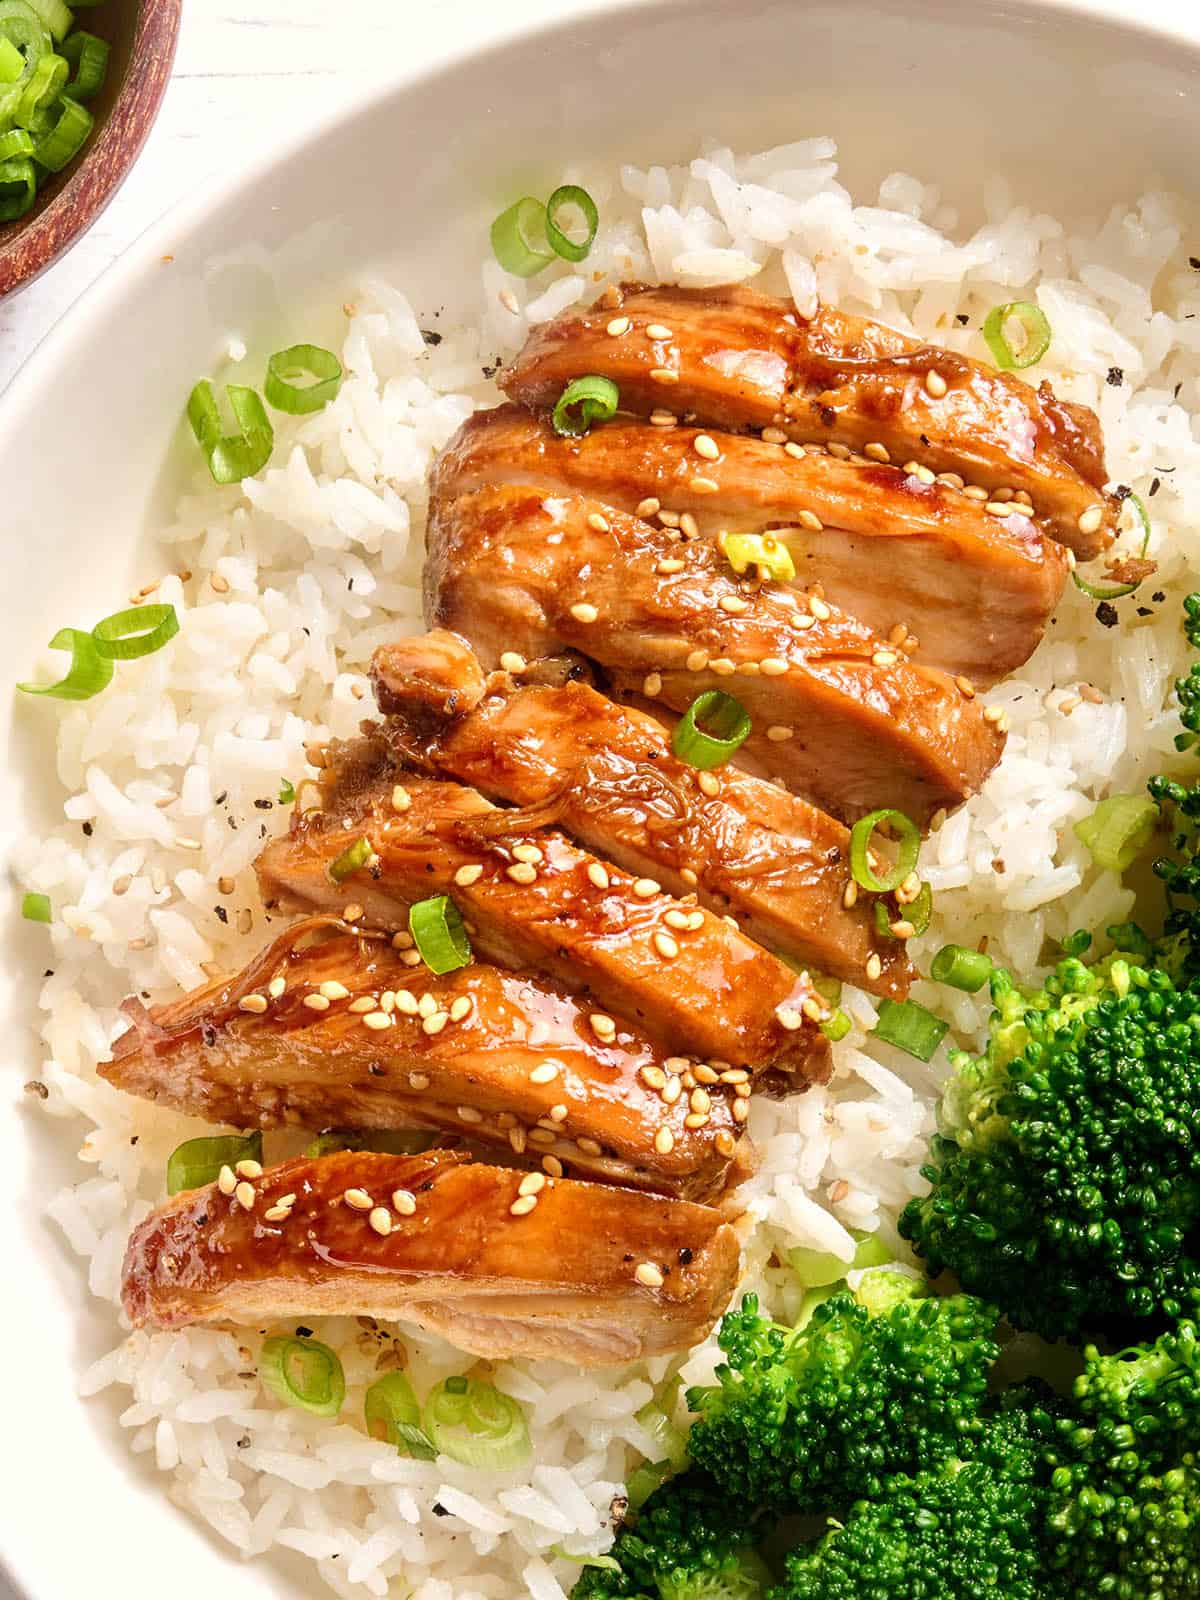
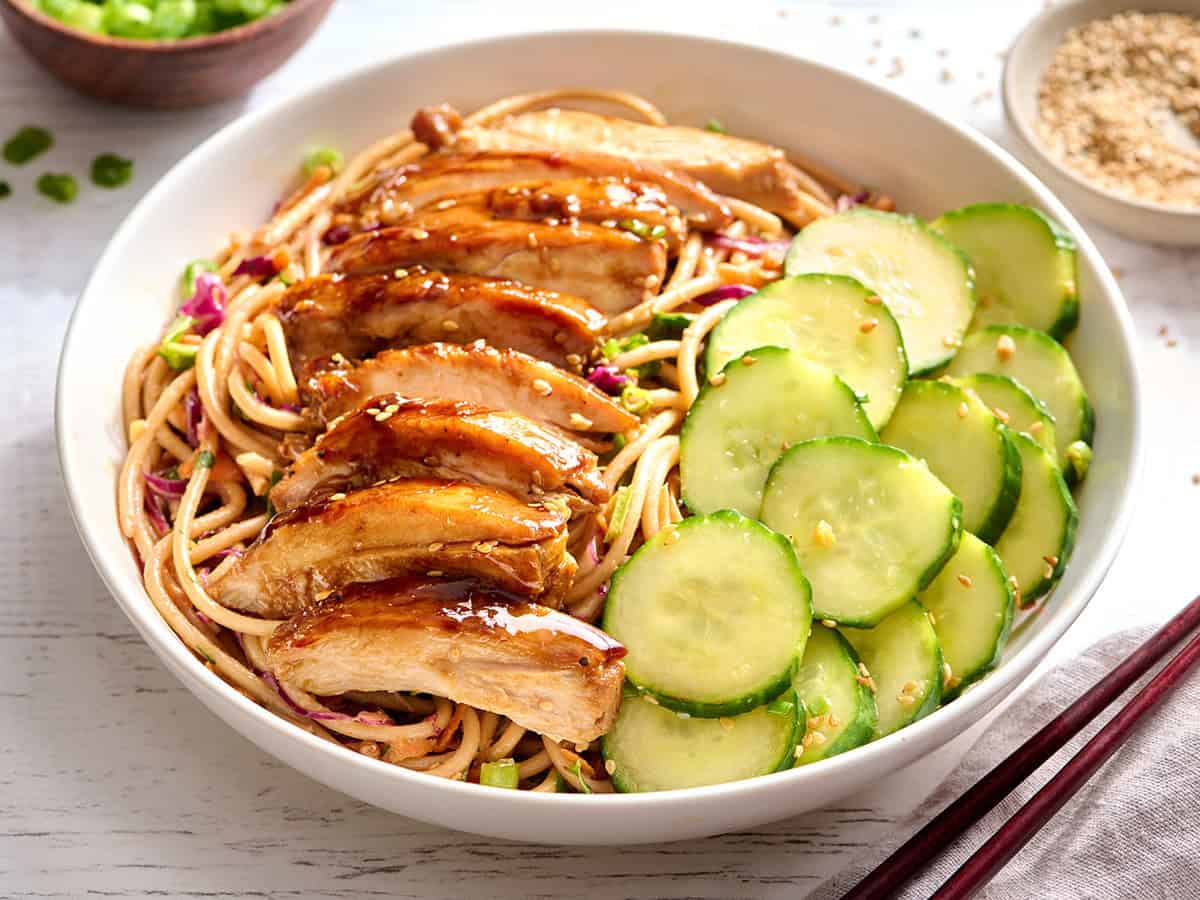
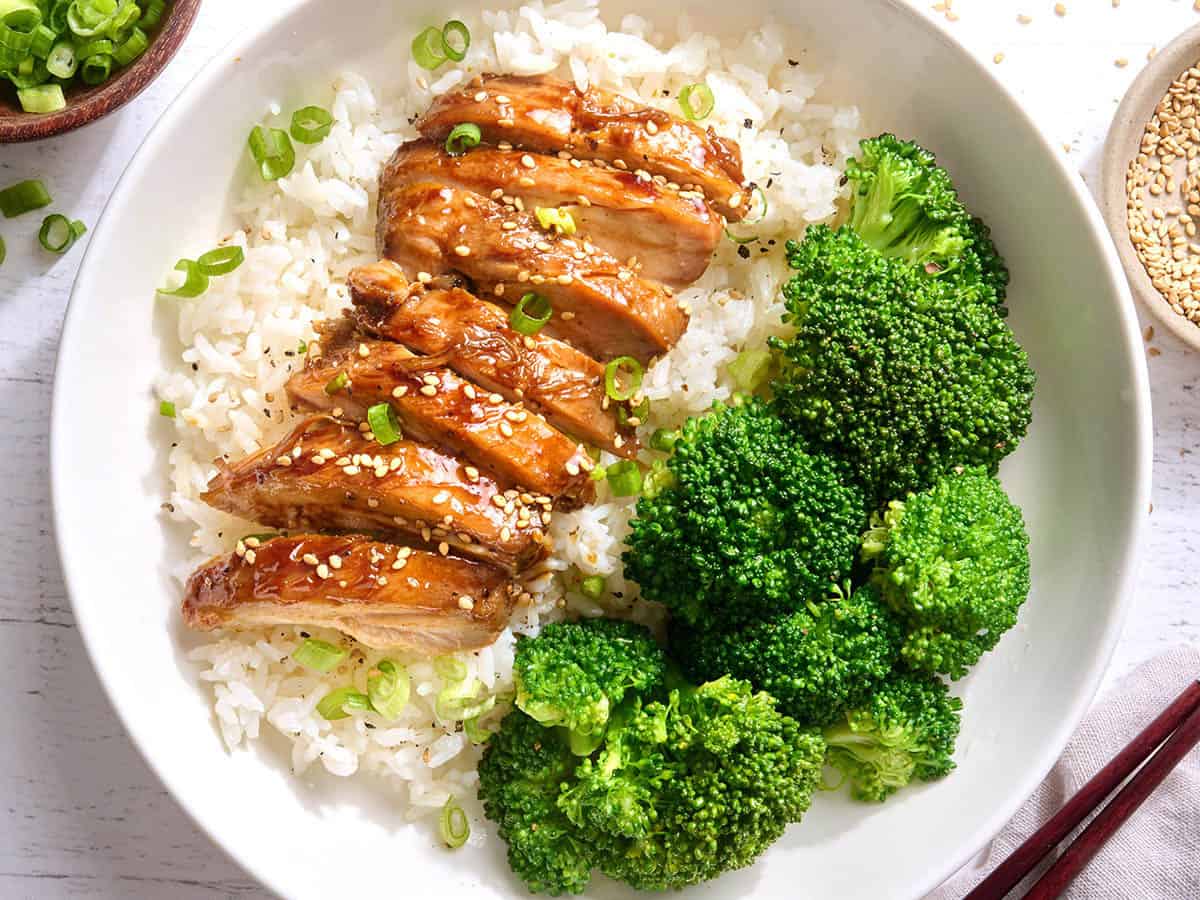
When I’m in a hurry, I just keep things simple with some long-grain white rice and steamed broccoli. Both are inexpensive and easy to prepare, and their mild flavors let the savory-sweet chicken take center stage. When plain rice won’t cut it, my vegetable fried rice turns this into a seriously flavorful takeout-style dinner. For something a little different, try it with cold peanut noodle salad. The creamy peanut dressing and crunchy vegetables are absolutely delicious with the warm chicken and make the meal feel extra satisfying. I also love to serve this teriyaki chicken with my Thai cucumber salad for a crisp and tangy side. Both of these cold sides taste even better after chilling, so I like to make them while the chicken marinates!
Meal Prep It!
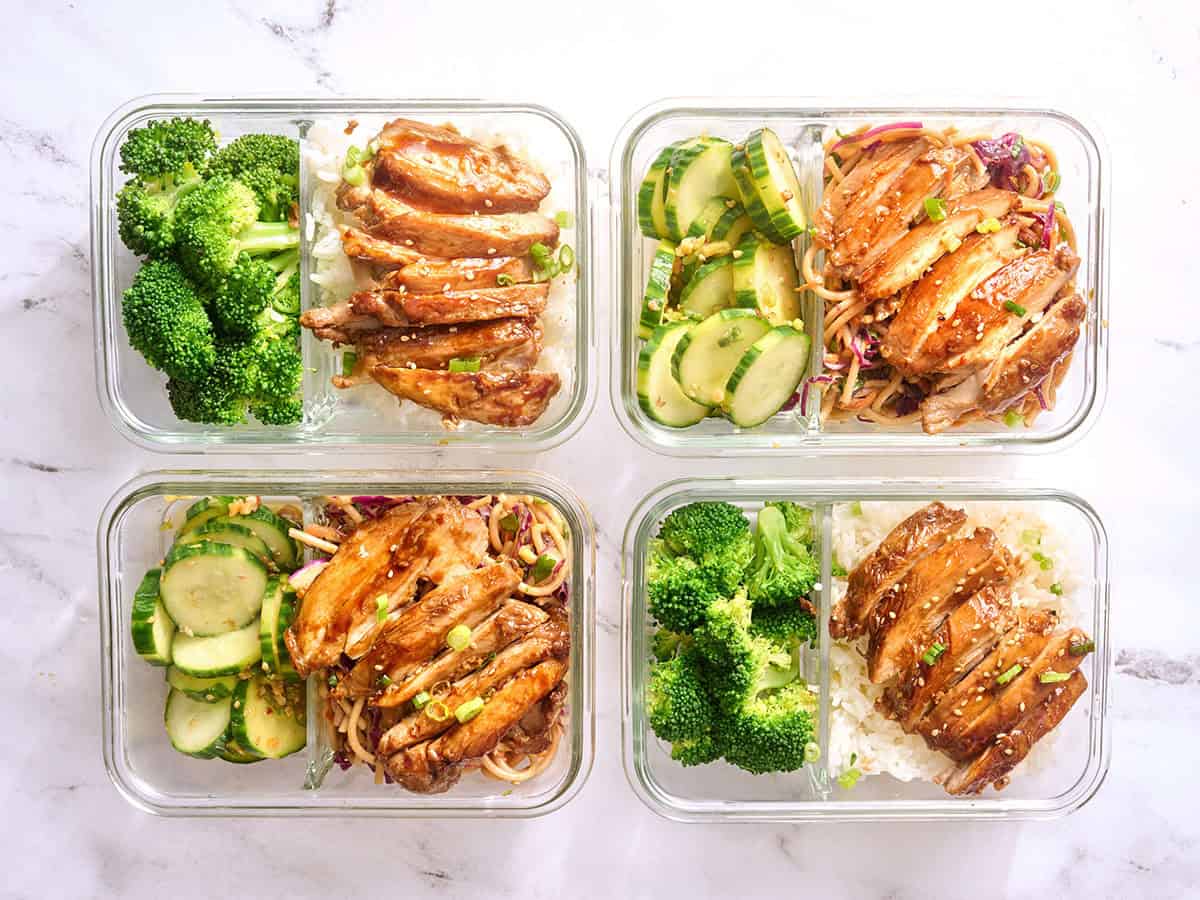
All of the serving suggestions I mentioned above are perfect for meal prepping with this teriyaki chicken, too. Rice and broccoli make a great reheatable bowl, while the two cold salads are meant to be served chilled, so their flavors only get better as they have time to settle in.
When I meal prep this recipe, I let the chicken cool before dividing it between airtight meal-prep containers and refrigerating it. It’s delicious reheated or served cold! If you plan to reheat it, place the chicken in its own compartment or alongside something you don’t mind warming at the same time (like rice and broccoli). Keep the cold sides separate so you can remove them before reheating. Store everything in the refrigerator until you’re ready to eat and enjoy within 3-4 days.
Easy Teriyaki Chicken
Cost $7.07 recipe / $1.41 serving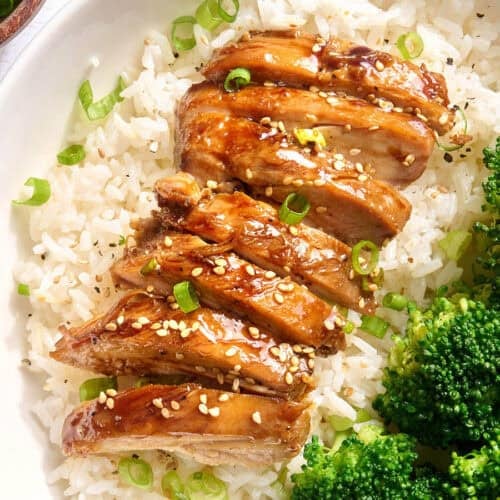
Ingredients
- ¼ cup soy sauce (2 oz., $0.22)
- 3 Tbsp brown sugar ($0.08)
- 1 Tbsp water ($0.00)
- 1 garlic clove (minced, $0.08)
- 1 tsp fresh ginger (grated, $0.10)
- 2 Tbsp cooking oil (divided, (1 oz.) $0.08*)
- 1.75 lbs. chicken thighs (boneless & skinless, $6.51**)
Video
Instructions
- Gather your ingredients.
- Prepare the marinade first. Stir together the soy sauce, brown sugar, water, garlic, ginger, and 1 Tbsp of the cooking oil in a bowl.***
- Place the chicken in a shallow bowl or dish, then pour the marinade over top. Turn the chicken a couple of times to make sure it's well coated. Let the chicken marinate for 30 minutes to one day (refrigerated), turning the chicken occasionally as it marinates.****
- When ready to cook the chicken, heat the remaining 1 Tbsp cooking oil in a large skillet over medium heat. Once hot, add the chicken, discarding the remaining used marinade.
- Cook the chicken for about 5-7 minutes on each side or until cooked through (175℉ internally) and the liquid in the skillet has reduced to a light coating of glaze on the chicken.
- Transfer the chicken to a cutting board and let it rest for about 5 minutes before slicing and serving.
See how we calculate recipe costs here.
Notes
Nutrition Information
 Have you tried this recipe?Mention @budgetbytes or tag #budgetbytes on Instagram!
How to Make Teriyaki Chicken Step-by-Step Videos
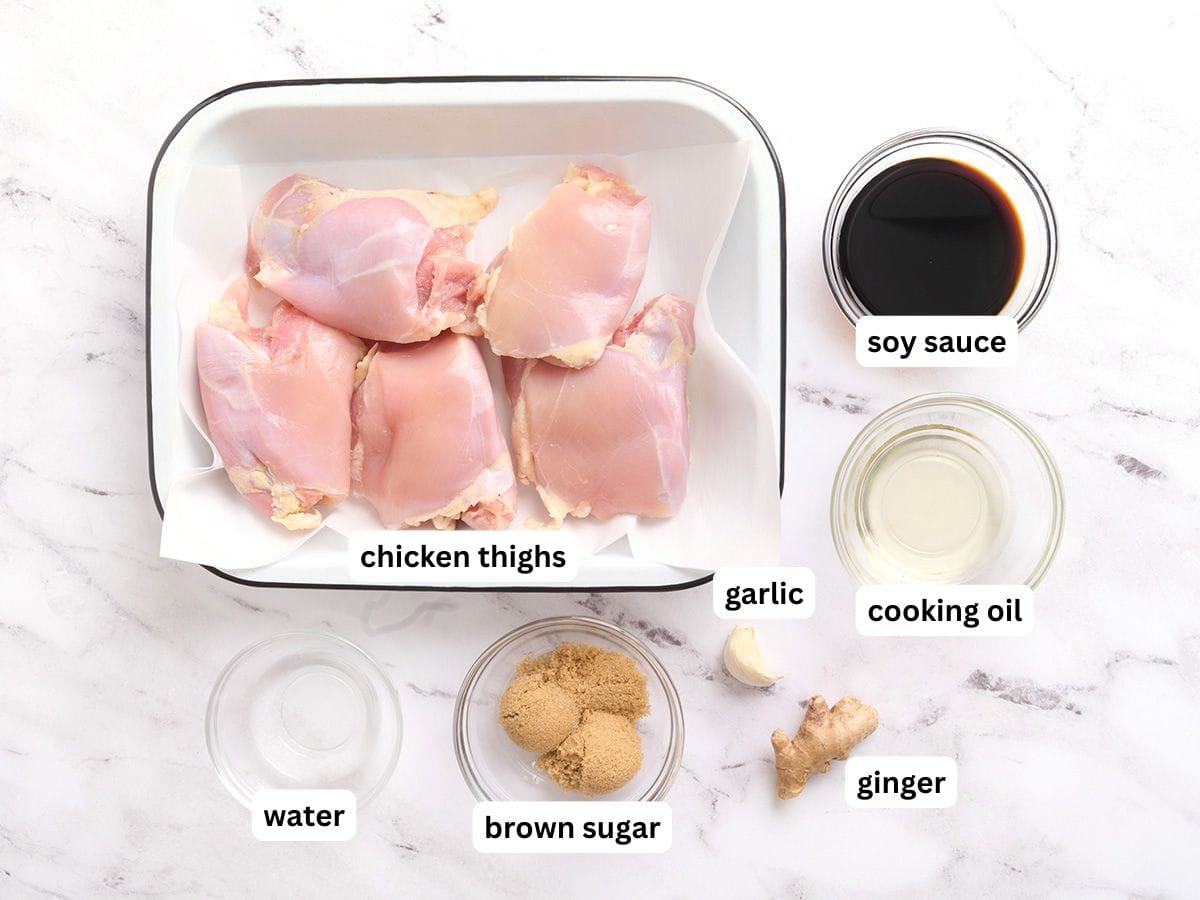
Gather all of your ingredients.
Make the marinade: Stir together ¼ cup soy sauce, 3 Tbsp brown sugar, 1 Tbsp water, 1 minced garlic clove, 1 tsp grated fresh ginger, and 1 Tbsp cooking oil. Keep stirring until the brown sugar is dissolved. The oil may separate slightly, and that’s okay.
Marinate the chicken in the refrigerator: Place 1.75 lbs. boneless, skinless chicken thighs in a shallow dish or zip-top bag, then pour the marinade over top. Turn the thighs until every piece is coated, then cover or seal and refrigerate for 30 minutes or up to 24 hours. Turn the chicken occasionally so it marinates evenly. Always marinate raw chicken in the refrigerator, NEVER at room temperature.
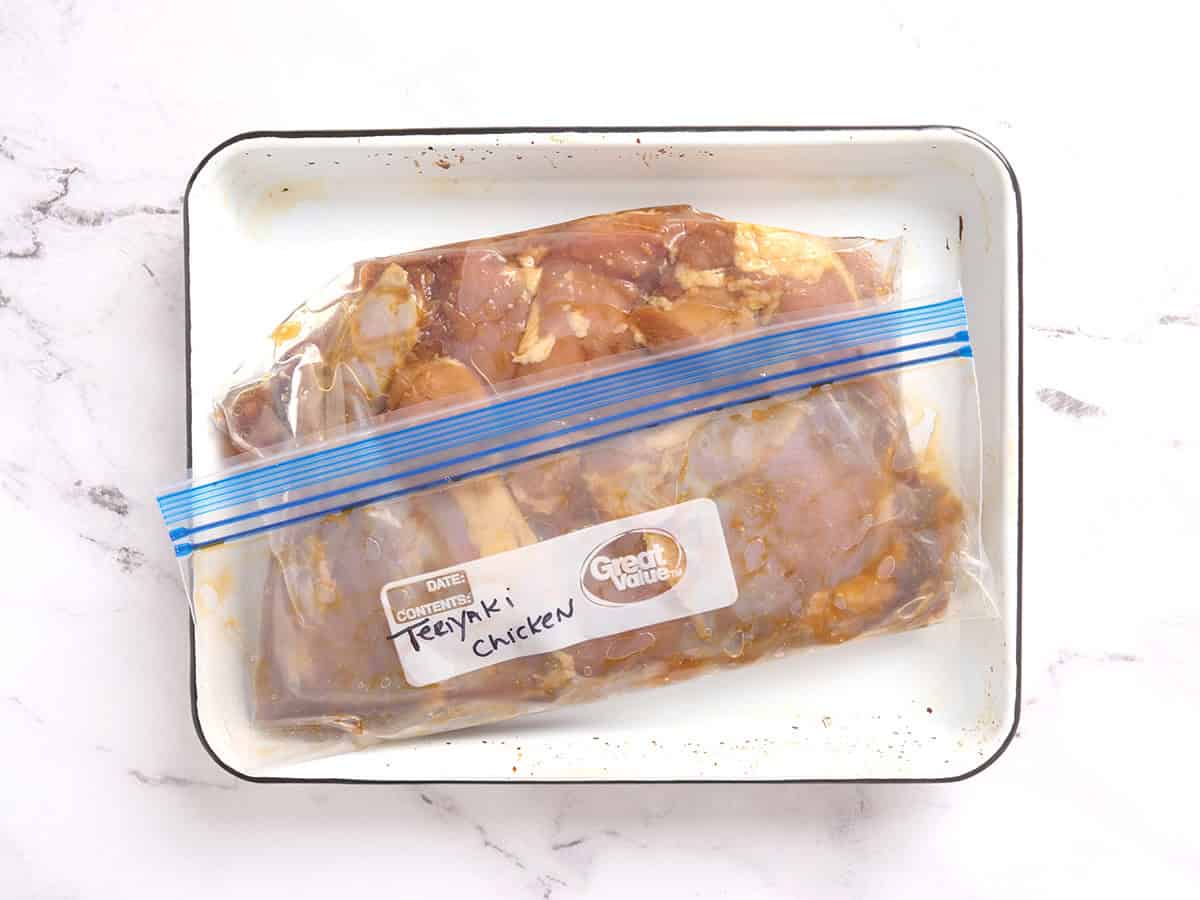
Planning ahead? Pop it in the freezer (optional): I tried this during testing and was really happy with the results. Seal the chicken and marinade in a freezer-safe bag, removing any excess air, then write the recipe name and date on the bag. Use it within 2-3 months for the best quality. Move it to the refrigerator the night before cooking, and the marinade will flavor the chicken as it thaws overnight.
Cook the chicken and reduce the glaze: Add the remaining 1 Tbsp cooking oil to a large skillet and heat over medium. Once the oil is shimmering but not smoking, lift the chicken from the marinade, let the excess drip back into the dish, and add the thighs to the skillet. You should hear a gentle sizzle. Discard the used marinade because it has been in contact with raw chicken.
Cook the thighs for 5-7 minutes on each side. The liquid in the skillet will look fairly loose at first, then gently bubble, reduce, and form a light glaze that clings to the chicken. Keep the heat at medium and keep an eye on it. If the glaze starts smoking or developing very dark spots before the chicken is done, reduce the heat.
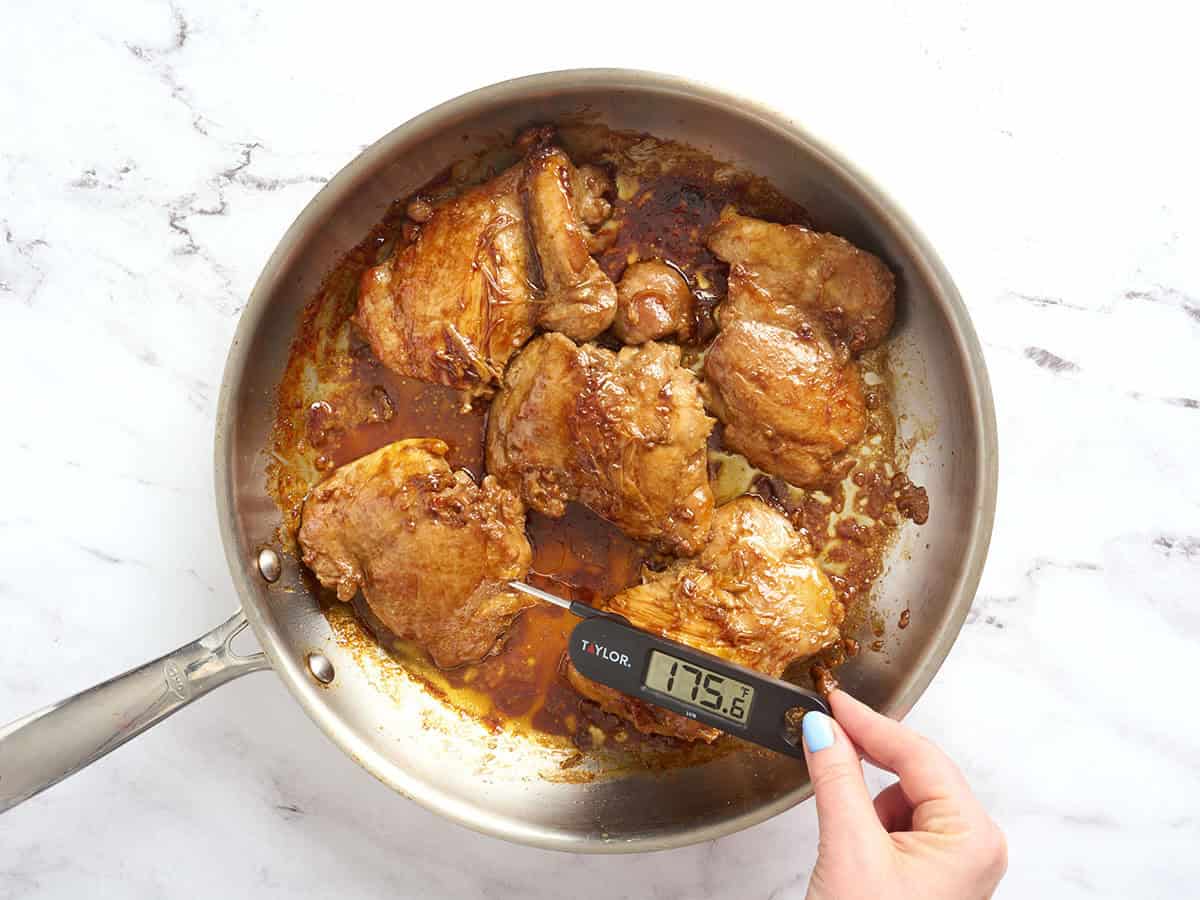
Cook the chicken until a meat thermometer inserted into the thickest part of the thighs registers 175°F. If you don’t have a thermometer, cut into the thickest thigh and check that the center is fully opaque with no raw or translucent areas.
Rest, slice, and serve: Transfer the teriyaki chicken to a clean cutting board and let it rest for 5 minutes before slicing. This gives the juices time to settle back into the meat, so more of them stay in the chicken instead of running onto the cutting board. Then slice and serve!
Storage Instructions
Let any leftovers cool, then transfer them to an airtight container and refrigerate for 3-4 days. For the best texture, I prefer to store the thighs whole or in larger pieces, then slice them after reheating. This gives the chicken less exposed surface area, so it doesn’t dry out as quickly.
Reheating
Reheat the chicken in a skillet over medium heat with a splash of water to loosen the glaze and keep the meat from drying out. You can also microwave it in short intervals until hot, covering it loosely to hold in some moisture. Whichever method you choose, leftovers should reach an internal temperature of 165°F before serving.
Thaw frozen teriyaki chicken overnight in the refrigerator before reheating for the best texture. If you need to reheat it from frozen, place it in a covered skillet over low heat with a splash of water and warm it gently until it reaches 165°F.
Freezing
Freeze the cooked chicken in an airtight container or freezer-safe bag for up to 3 months. You can freeze it whole, sliced, or divided into individual portions for easy meals later. Let it cool completely first, press out as much air as possible, and label the container with the date. For extra protection against freezer burn, I like to wrap the chicken tightly in plastic wrap or foil before placing it in the freezer bag.
Try These Teriyaki Recipes Next:
- My Homemade Teriyaki Sauce can be used as a marinade, thickened into a glossy sauce, or added straight to a hot stir-fry!
- When I want chicken, vegetables, and rice all cooked together, this One-Pot Teriyaki Chicken and Rice keeps dinner easy and the dirty dishes to a minimum.
- Try my Teriyaki Salmon for tender, flaky salmon covered in a sticky teriyaki glaze and finished with creamy sriracha mayo.
More Asian-Inspired Chicken Recipes




Our Teriyaki Chicken recipe was originally published 5/2/2022. It was retested and republished to be better than ever 8/19/26.


