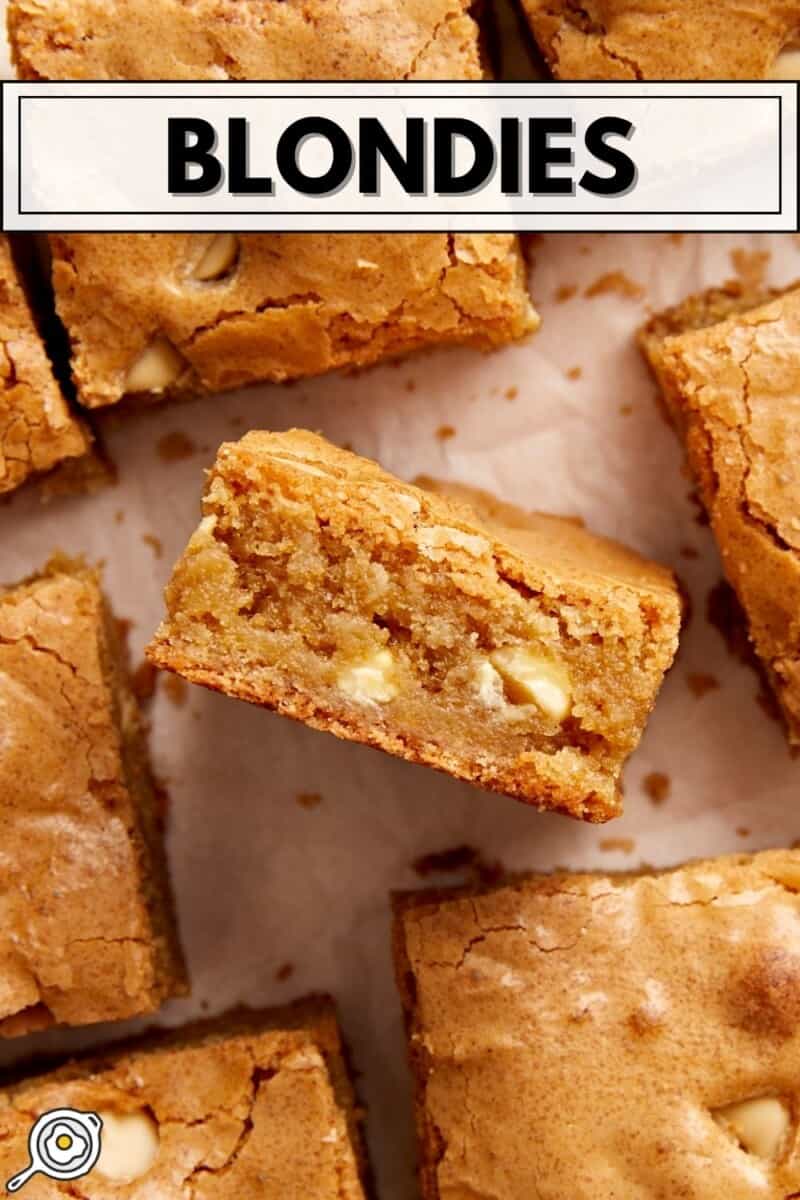

Every now and then, I get a taste for something sweet and decadent like homemade cookies, brownies, or carrot cake from my favorite restaurant. But buying pre-made desserts from a store or restaurant can be so expensive. Today, I have a much better option for you! Say hello to these rich, chewy, and buttery Blondies! They’re every bit as delicious as they look, and they’re so easy to make. No mixer needed. So if you’re in the mood for baking, these Blondies are sure to be a hit and probably your new favorite dessert!
All recipes are rigorously tested in our Nashville Test Kitchen to ensure they are easy, affordable, and delicious.
“I made these last night, and the only thing I changed was using caramel chips as well as white chocolate chips. It was super easy, and the end result is just delicious. Browning the butter takes a couple extra minutes, but it is SO worth it.”
Nicole P.
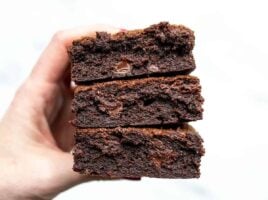
Fudgy Homemade Blondies
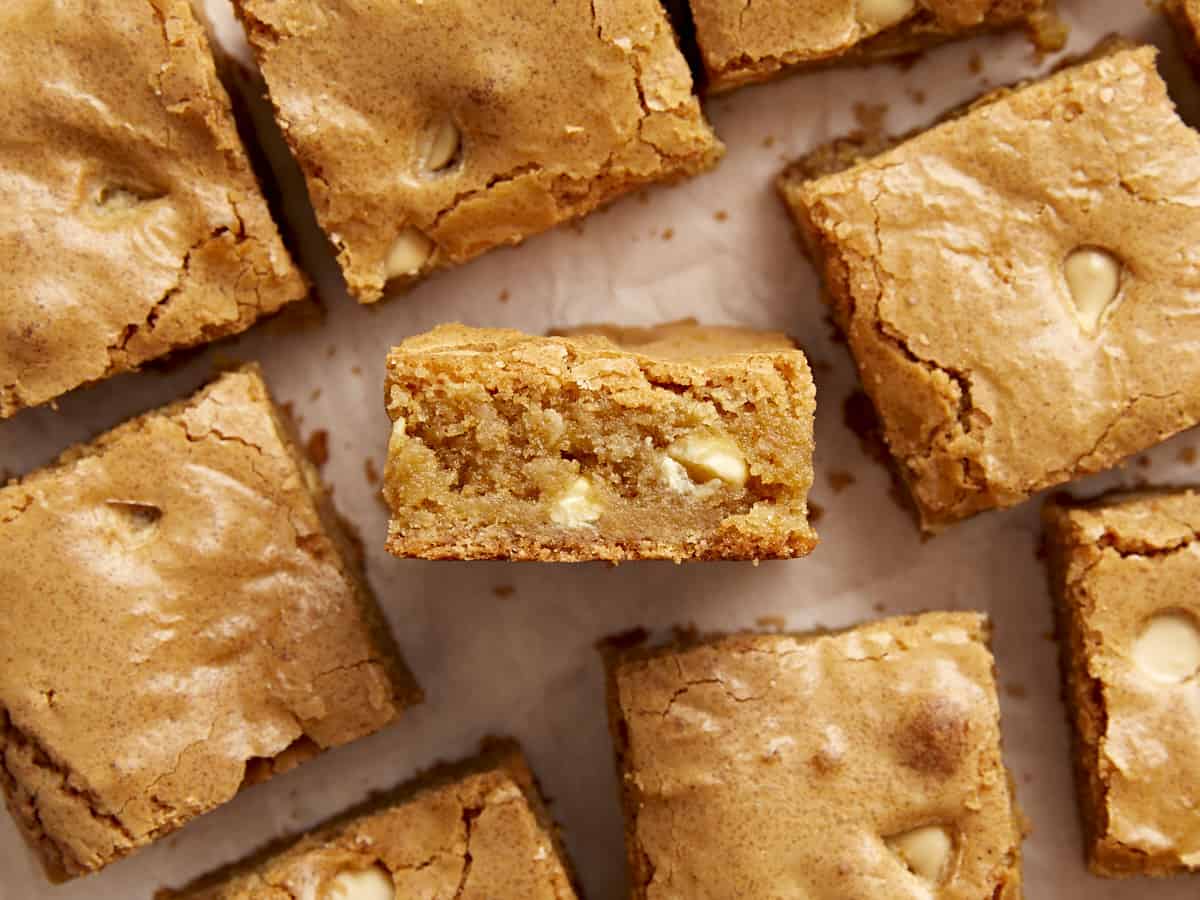
I like to call these sweet little treats the cousin to our favorite Homemade Brownies. Blondies are similar to brownies except they are made without the chocolate flavor of cocoa powder. Instead, they get their rich flavor from a good amount of brown sugar and vanilla extract. And to make this recipe even more special, I used brown butter, which enhances the flavor and altogether gives them a slight caramel, butterscotch taste.
Blondies
Cost $5.12 recipe / $0.42 serving
Ingredients
- ¾ cup salted butter (12 Tbsp, $1.60)
- 1 cup brown sugar ($0.48*)
- ½ cup granulated sugar ($0.16*)
- 2 large eggs ($0.74)
- 2 tsp vanilla extract ($1.30)
- 1½ cup all-purpose flour ($0.27)
- ½ tsp baking powder ($0.04)
- ¼ tsp salt ($0.02)
- ¼ cup white chocolate chips ($0.51**)
Instructions
- Preheat the oven to 350°F. Cut the butter into several tablespoon-sized chunks and add it to a small light-colored skillet. Heat the butter over medium heat, stirring constantly, until the butter solids turn deep brown and develop a nutty aroma (it will first become foamy, then the solids will sink to the bottom and turn brown).
- While the butter is browning, add the brown sugar and granulated white sugar to a large mixing bowl.
- Once the butter has browned, remove it from the heat immediately to prevent burning, and carefully pour it into the mixing bowl with the sugars. Whisk the brown butter and both sugars together until smooth.
- Add the eggs and vanilla extract to the bowl and whisk until smooth.
- In a separate bowl, stir together the all-purpose flour, baking powder, and salt until well combined. Add the flour mixture to the bowl with the wet ingredients. Use a rubber spatula to stir the flour into the batter until evenly combined.
- Finally add the white chocolate chips to the batter and fold them in until just combined.
- Line an 8×8 baking dish with parchment paper. Add the blondie batter to the baking dish and spread it out evenly. Feel free to add a few more white chocolate chips on top of the batter.
- Bake the blondies in the preheated oven for 35 minutes or until a toothpick inserted comes out clean.
- Remove the blondies from the oven and let them cool for 10-15 minutes before lifting the parchment paper out of the baking dish. Slice into 12 bars and serve.
See how we calculate recipe costs here.
Notes
Nutrition Information
How to Make Blondies Step-by-Step Photos
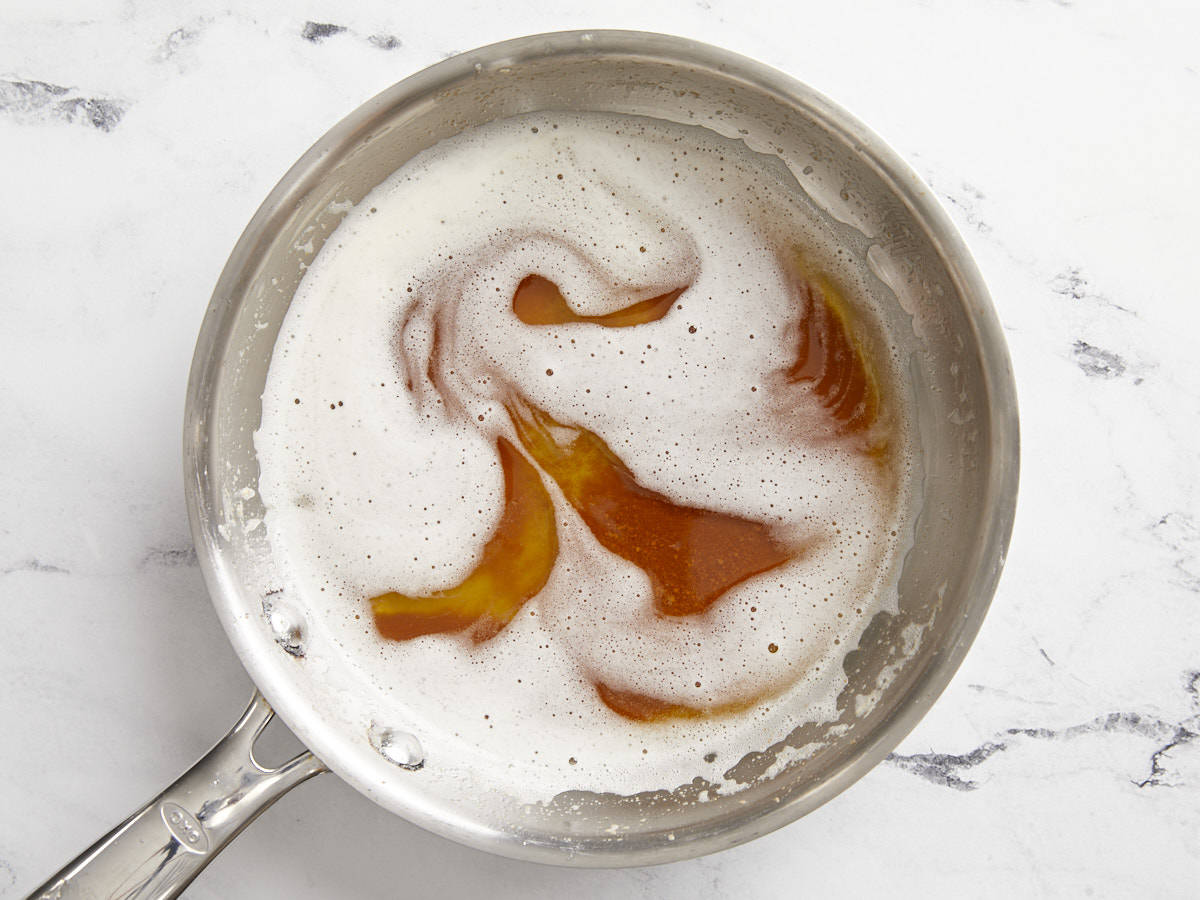
Make the brown butter: Start by preheating your oven to 350°F. Cut 12 Tbsp of butter into several tablespoon-sized chunks and add it to a small light-colored skillet. Heat the butter over medium heat, stirring constantly, until the butter solids turn deep brown and develop a nutty aroma (it will first become foamy, then the solids will sink to the bottom and turn brown).
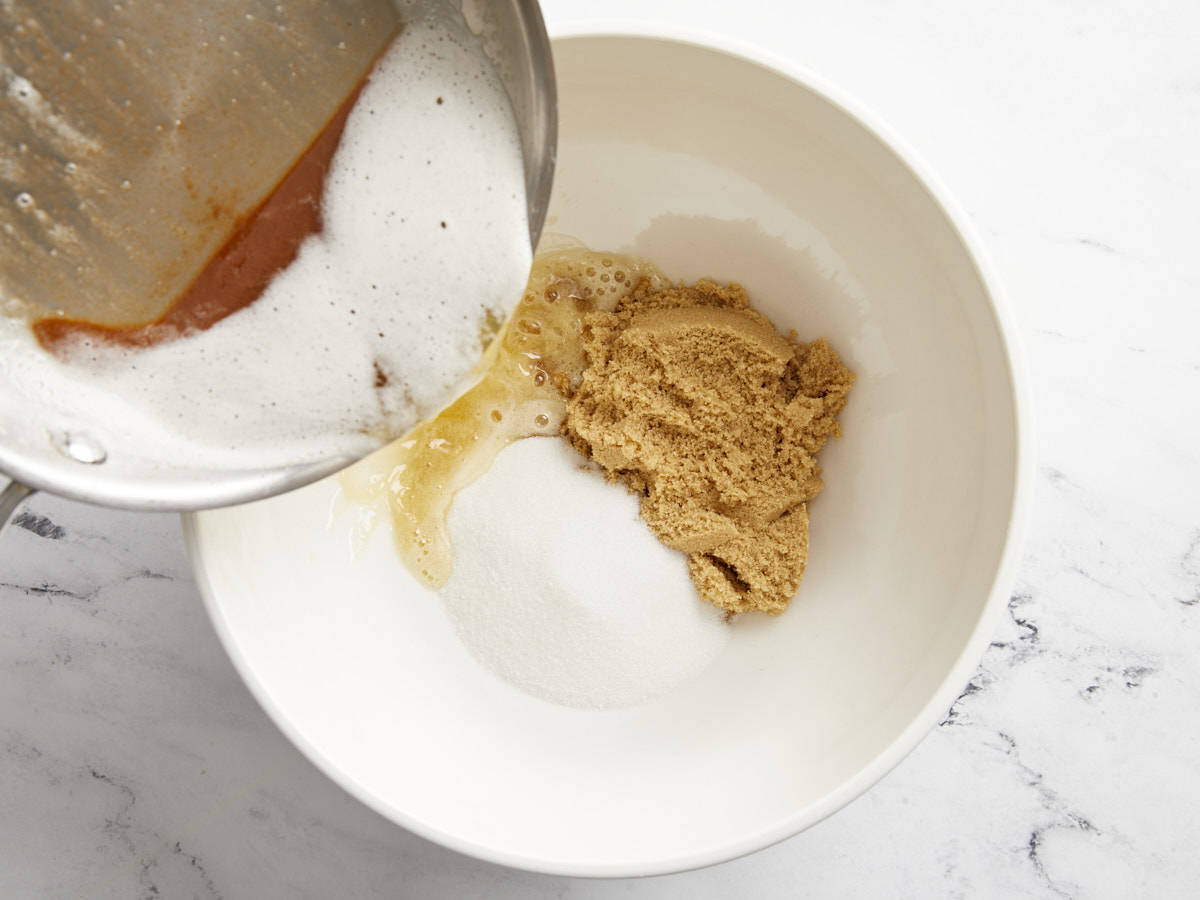
Mix the butter and sugars: While the butter is browning, add 1 cup brown sugar and ½ cup granulated white sugar to a large mixing bowl. When the brown butter is ready, remove it from the heat immediately to prevent burning, and carefully pour it into the mixing bowl with the sugars. Whisk the brown butter and both sugars together until smooth.
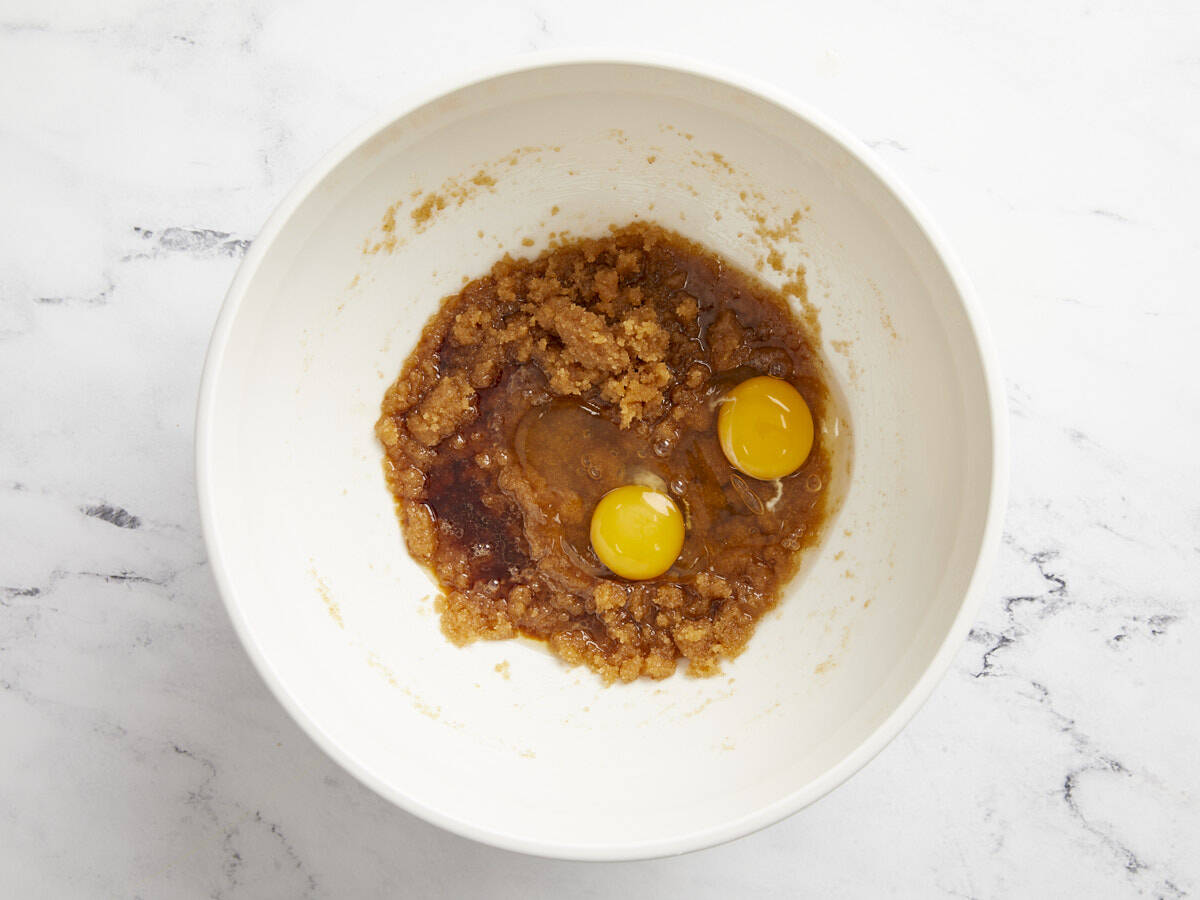
Make the batter: Add 2 large eggs and 2 tsp vanilla extract to the butter-sugar mixture and whisk until smooth.
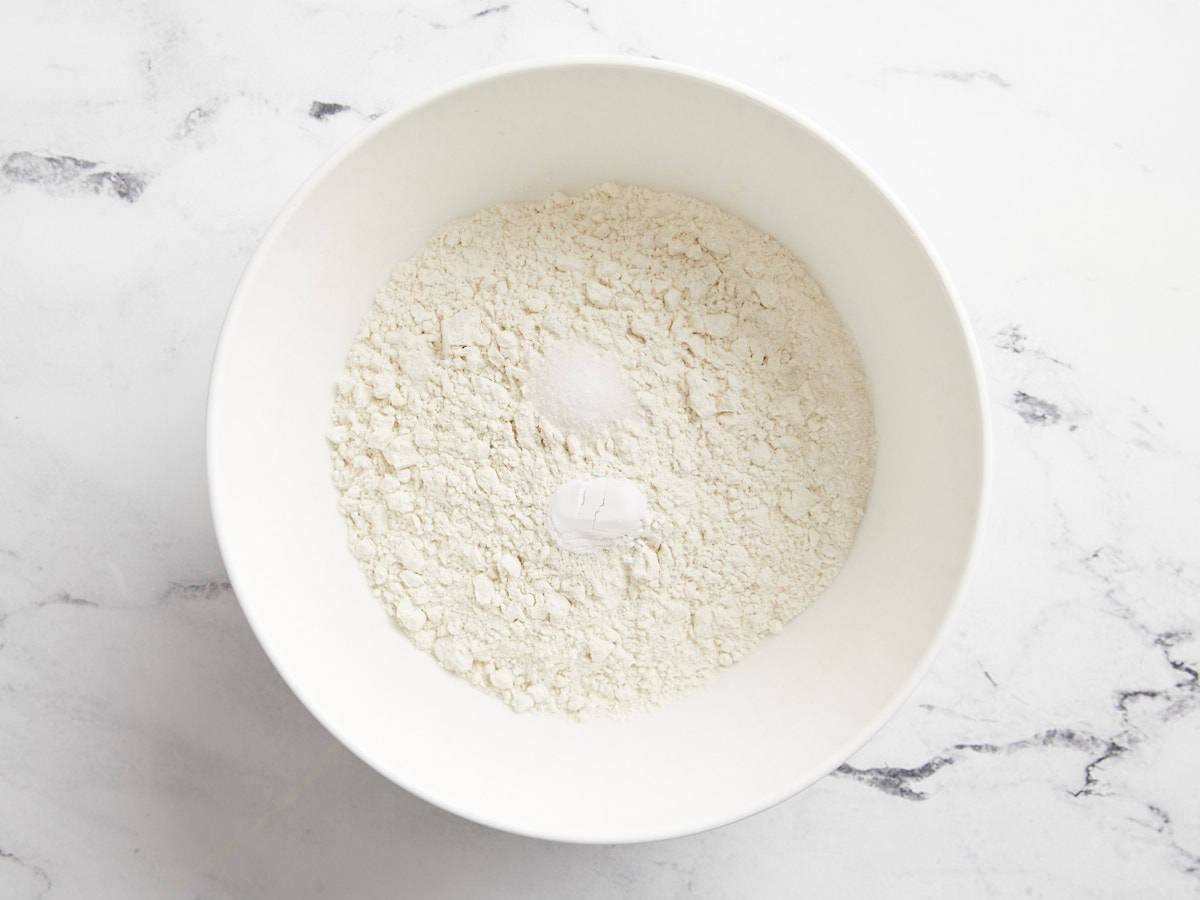
In a separate bowl, stir together 1½ cups all-purpose flour, ½ tsp baking powder, and ¼ tsp salt until well combined.

Add the flour mixture to the bowl with the wet ingredients. Use a rubber spatula to stir the flour into the batter until evenly combined.
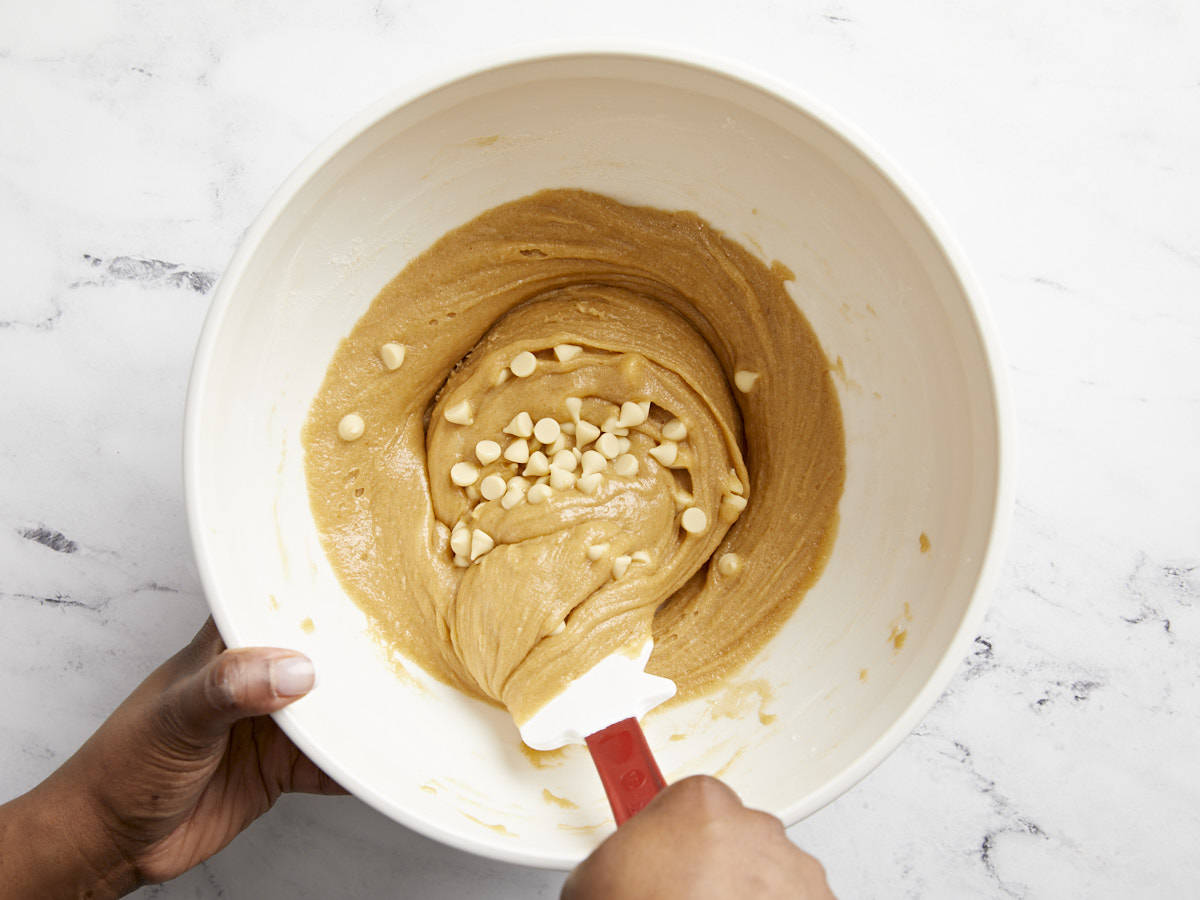
Finally, add ¼ cup white chocolate chips to the batter and fold until just combined.
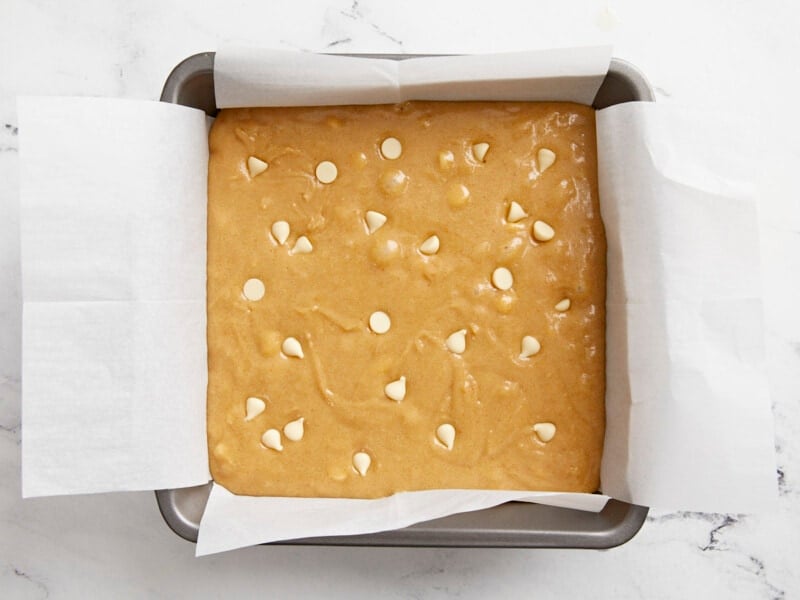
Add the batter to a baking dish: Line an 8×8 baking dish with parchment paper. Add the blondie batter to the baking dish and spread it out evenly. Feel free to add a few more white chocolate chips on top of the batter.
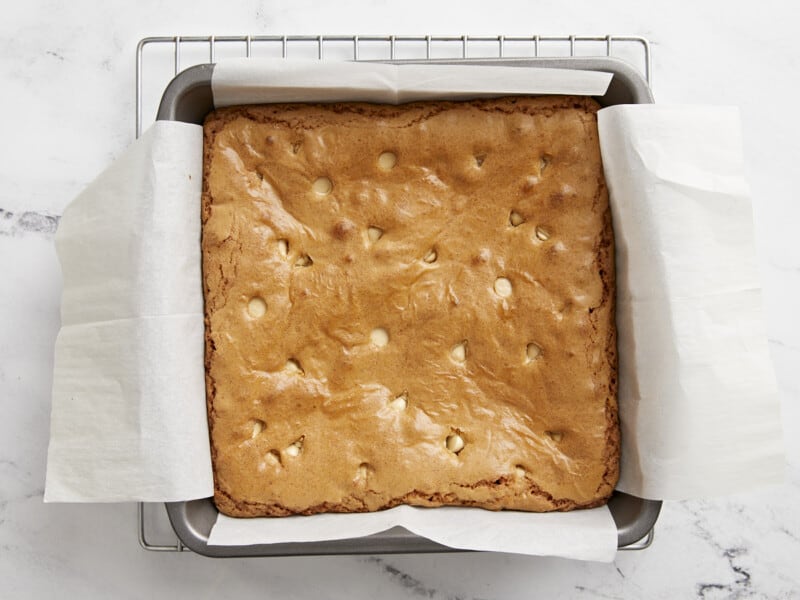
Bake in the oven: Bake the blondies in the preheated oven for 35 minutes or until a toothpick inserted comes out clean.
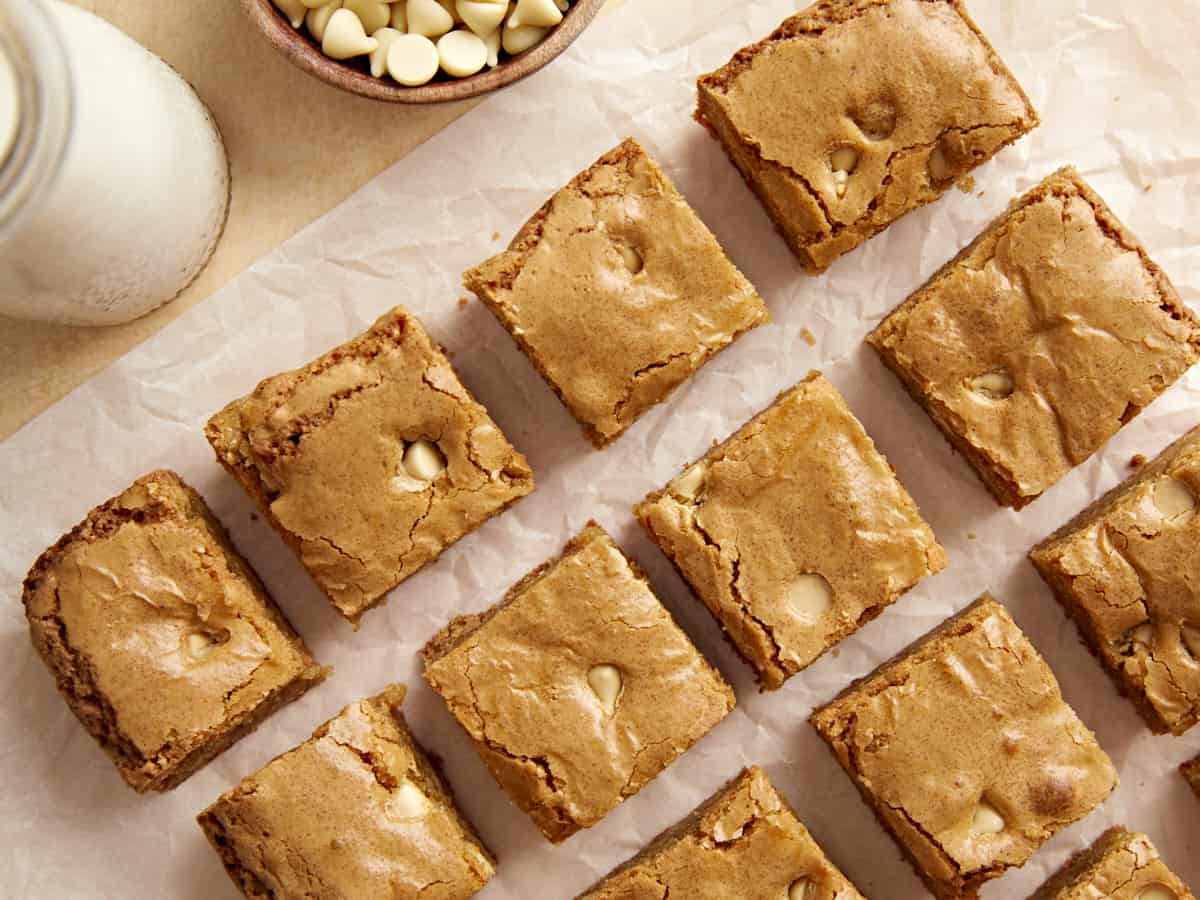
Cool and slice: Remove the blondies from the oven and let them cool for 10-15 minutes before lifting the parchment paper out of the baking dish. Slice into 12 bars and enjoy!
Blondie Variations
You can easily swap out the white chocolate chips in this recipe for other candies or nuts based on your own personal preference. Here are a few ideas for you:
- Butterscotch chips
- Dark or Semi-sweet chocolate chips
- Peanut butter chips
- M&Ms – use festive colored M&Ms for special holidays like pastel colors for Easter, red & pink for Valentine’s Day, or green & red for Christmas!
- Chopped walnuts or pecans
- Dried cherries or dried cranberries
- Add cherry pie filling, almonds, and almond extract to make cherry blondies
Serving Suggestions
These blondies are delicious any time of year, but they make an especially sweet treat for a special occasion like Valentine’s Day! Serve them slightly warm with a drizzle of caramel sauce and a scoop of vanilla ice cream for a dessert that feels extra special. A dollop of whipped cream would also be lush. I’d even add a few fresh berries if I’ve got some to use up in the fridge. Of course, they’re just as wonderful enjoyed on their own with a cup of coffee or tea…no holiday required!
Storage Instructions
Once cooled completely, store your homemade blondies in an airtight container at room temperature for up to 3 days or in the fridge for about 5 days. For longer storage, wrap them tightly in plastic wrap and place in a freezer-safe bag or container, and store in the freezer for up to 3 months. When you’re ready to enjoy them again, let them thaw at room temperature or give them a quick 10–15 second zap in the microwave.
Marsha, thank you for the recipe! These are a home run. Browning the butter is a MUST!
I made these last night, and the only thing I changed was using caramel chips as well as white chocolate chips. It was super easy, and the end result is just delicious. Browning the butter takes a couple extra minutes, but it is SO worth it.
These are DELICIOUS! I’ve made them 4 times already and every time they barely last 24 hours before my whole family devours them. The brown butter really takes it to the next level.
I used unsalted butter and added an extra 1/4 tsp of salt. I baked mine in an 8×8 glass pan, lowered the temp to 325F and cooked them for 45 mins and they were perfect. I will absolutely be making these the next time I need to bring a dessert to a get together!
Mine needed about 45 minutes or so in the oven. Even with the extra time, they were still plenty gooey and soft. They were a big hit at an event. Will be making again.
Super delicious recipe! I love blondies, and have fond memories of eating them in years past. I’m lactose intolerant, so I did a bit of researching how to do brown butter, since my vegan butter substitute, Earth Balance, does not brown on its own (it will get brownish, but it won’t get aromatic and nutty like real butter). This may sound strange, but I read you can add a bit of soy sauce (I added about a teaspoon) at the end of the butter melting process, and it adds the extra depth and color. I have to say that the flavor tasted weird in the butter, but once it all baked up, it tasted absolutely delicious. That said, I did not get the texture right. I could tell just in the mixing process that my batter was too stiff, and I’m not sure if that was from cooking the butter too long, overmixing, or what. It did not affect the finished product dramatically at all, but a little denser than I could see the pictures here were. Let me know if anyone else tries it – I’d love to hear how it went!
These were delicious and easy! They were gobbled up in HOURS!
Wow! These are amazing!! I put in chocolate chips since I had them on hand. I think they would be great with macadamia nuts as well.
Thank you for another delicious recipe!
Greetings from Chile, my country.
The recipe for blondies is very good.
As a contribution:
For people intolerant to gluten, you can change wheat flour for oat flour.
Grinding the flakes is easy, with a blender or even with your hands.
Oats are gluten-free and we invite celiacs to try this recipe, following these same simple steps.
It is very good with oatmeal!
This was a good way to use up some of the remaining pantry items I got for holiday baking! The taste was perfect but I was really worried that my Blondie’s were still raw, yet the toothpick came out clean. What I thought was a sign that they were undercooked was actually proof that I hadn’t really creamed the wet ingredients together thoroughly, so my butter sort of separated from everything. Wah-wah. But I’ll try these again now that I know how to get them perfect the second time!
Super yummy and chewy. I did end up needing to bake them for about 20 minutes more than what the recipe says. So tasty though!!
I learned to make these growing up in the 60s, when they were a major favorite with all of us. We called them “Butterscotch Brownies”, using butterscotch chips, and sometimes nuts.
Followed instructions and middle was raw. Should I have let it cool for an hour instead of just 10-15 mins? Another recipe said: “The cookie bars are done when the edges are set and golden brown and a toothpick or skewer inserted into the center comes out mostly clean. Let the cookie bars cool in the pan for about an hour before removing and cutting.”
If your cookies were still raw in the middle after 15 minutes then they would still be raw after sitting an hour. Yes, the longer they cool, the more they’ll firm up and be easier to cut, but they’re not going to continue cooking that much. It sounds like perhaps your oven may not be calibrated correctly and they were baking at less than 350. Did you test them with a toothpick? Unfortunately it’s very common for there to be many oven variations which is why we say 33-35 minutes OR until a toothpick inserted comes out clean. One oven could take 33 minutes, one might take 40. I hope that helps! I like to recommend getting an in-oven thermometer to check the temp and always check the with a toothpick to see if batter comes off. I’d hate for your hard work to go to waste! :)
I just tried this recipe and mine came out the same way. Baked at 350 for 34 minutes- the top is golden and crunchy, middle is raw. Put back in oven for 10 minutes with foil over the top, still raw in the middle. Put back in for 15, no improvement. I even had them baking in an 8 x 10 dish. I am going to eat the gooey mess anyway because the batter is SO tasty, but kinda bummed the texture is not right.
I love this! I added Maladon salt flakes to the top! Delicious!