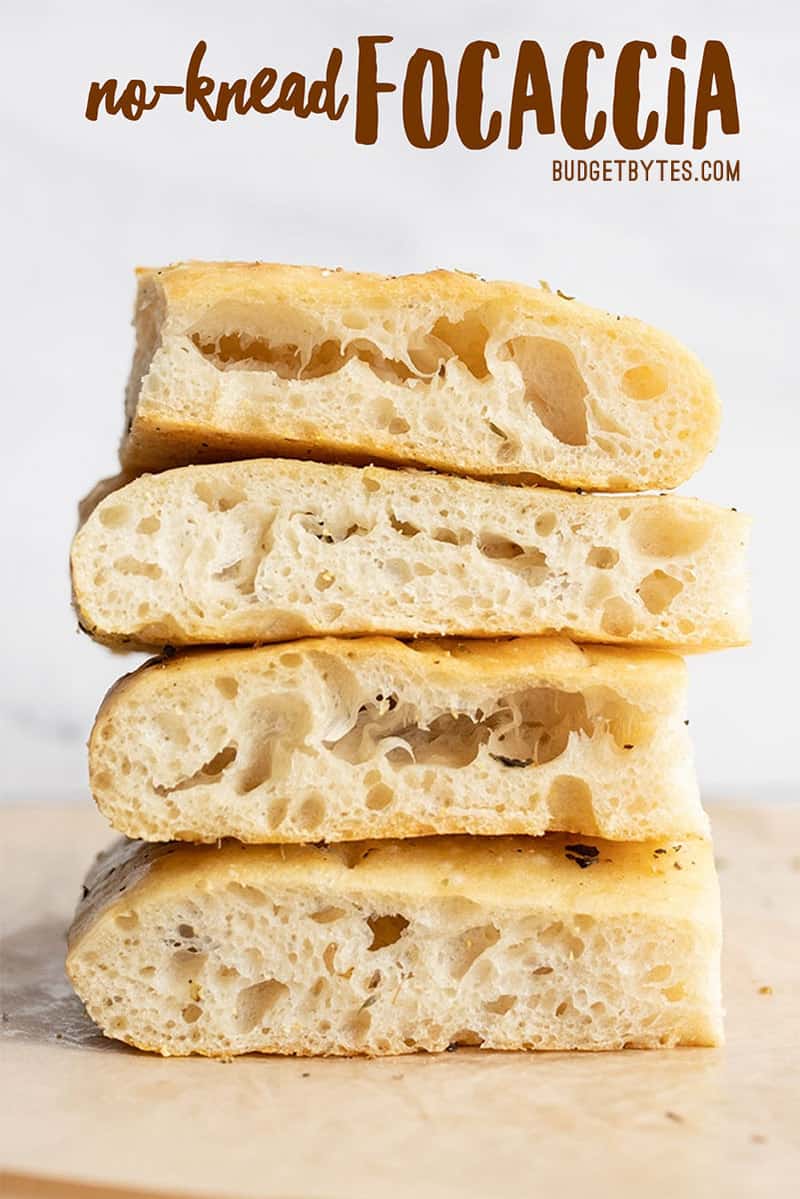
Once you try this focaccia bread recipe, you’ll never go back to plain bread! This hearty No-Knead Focaccia bread has tons of airy bubbles and is coated in olive oil and herbs, making every bite full of delicious flavor. And the best part? This easy no knead technique only takes about 5 minutes of hands-on work to make an amazing loaf. This delicious bread pretty much makes itself!

All recipes are rigorously tested in our Nashville Test Kitchen to ensure they are easy, affordable, and delicious.
Simple and Budget-Friendly Recipe for Focaccia
This super simple no knead focaccia bread recipe only uses a few simple ingredients. Traditionally, focaccia is made with a high-gluten flour that gives it extra strength and a deliciously chewy texture. We crafted this recipe using all-purpose flour to reduce the need to purchase special ingredients. You can use high-gluten flour if you prefer, but the water-to-flour ratio may change slightly.
“My family loved this easy-to-make bread. It was a hit, and we will be making it again soon. Thank you for posting it! :)”
Heidi
No Knead Focaccia Bread
Cost $1.31 recipe / $0.11 serving
Ingredients
- 4 cups all-purpose flour ($0.61)
- 1/4 tsp instant yeast ($0.02)
- 1 1/2 tsp salt ($0.03)
- 2 cups water ($0.00)
- 2 Tbsp olive oil (divided, $0.32)
- 2 Tbsp cornmeal ($0.03)
- 1 Tbsp Italian seasoning ($0.30)
Instructions
- The night before, combine the flour, salt and yeast in a bowl. Stir until everything is evenly combined. Add the water and stir until it forms one cohesive, sticky, shaggy ball of dough with no dry flour left on the bottom of the bowl. If there is still dry flour in bowl, add a little water (1-2 Tbsp) until the dough comes together (scroll down to the step by step photos for examples). Loosely cover the bowl and let sit at room temperature for 12-18 hours.
- The next day the dough will be wet, bubbly, and very fluffy. Dust the top of the dough with some flour, then scrape the dough from the sides of the bowl. Turn the dough over on itself a few times until it forms a ball in the center of the bowl.
- Line a baking sheet with foil then drizzle with 1 Tbsp olive oil. Spread the oil to coat the surface of the foil, then sprinkle cornmeal on top of the oil.
- Transfer the dough to the baking sheet. Stretch and pat the dough out into a large rectangle. You may need to dust your hands with flour throughout this process to keep the dough from sticking.
- Drizzle olive oil over the surface of the dough and use a soft brush to spread it evenly over the surface. Sprinkle the Italian seasoning (or any type of herbs) over top. Let the dough rise for another hour.
- Preheat the oven to 425ºF. Using your fingers, press dimples into the risen dough. Bake the focaccia for 20-25 minutes in the preheated oven or until the surface is golden brown. After removing from the oven, allow the focaccia to cool before slicing and serving.
See how we calculate recipe costs here.
Nutrition Information
The No Knead Bread Technique
Regular bread baking requires the dough to be kneaded a long time to make the gluten strands line up and form a sort of matrix that gives the dough strength and texture. With no-knead bread, the dough is allowed to ferment overnight. During fermentation enzymes break down the gluten in a process called autolysis, which makes it easier for them to untangle, line up, and form the matrix that usually takes a lot of kneading to form.
An added bonus is that overnight fermentation adds a lot of flavor to the bread. AND, since the yeast has so much time to grow and multiply, you only need to use ¼ tsp yeast, compared to about 2 tsp for a normal loaf of bread! Win-win!

How to Make No Knead Focaccia Bread – Step By Step Photos

Start with 4 cups all-purpose flour, ¼ tsp instant yeast, and 1.5 tsp salt. Stir them together until everything is well combined.

Add 2 cups water to the flour mixture. This part will require a little flexibility on your part. You may need to add slightly less or slightly more water depending on the ambient humidity in your home and fluctuations with measuring the flour. I’ll show you what to look for in the next photos.

Stir the water into the flour until it forms a ball of sticky dough and there is no more dry flour left on the bottom of the bowl. In the photo above, the dough is too dry. You can see dry flour on the bottom of the bowl and the dough ball is not cohesive. If this is your dough, add a tablespoon or two more water.

Your dough should look like this. Sticky, but not slimy or shiny, and no dry flour on the bottom of the bowl. This style of dough is much more wet than traditional bread dough. Cover the bowl loosely and allow it to sit at room temperature for 12-18 hours.

After 12-18 hours the dough will look very bubbly and large, like this. Am I weird for thinking that’s gorgeous??

Sprinkle a little flour over the dough to keep your hands from sticking and pull the dough from the sides of the bowl. Turn the dough over onto itself a few times until it forms a sort of ball. Keep your hands well floured as you do this.

This is what the dough looks like after I folded it onto itself a few times. The gluten matrix is well developed. You can tell by how smooth it is and the air bubbles trapped right under the surface.

Line a baking sheet with foil, then drizzle 1 Tbsp olive oil over the surface. Use your hands to spread the oil to evenly coat the surface of the foil, then sprinkle about 2 Tbsp cornmeal over the oil.

Transfer the ball of dough to the prepared baking sheet and press and stretch it out until it fills the entire baking sheet. Drizzle one more tablespoon of olive oil over the surface of the dough, then sprinkle 1 Tbsp Italian seasoning over the surface (you can use a mix of basil, oregano, and red pepper if you don’t have Italian seasoning).

Let the dough rise for one hour (or a little more if your ambient room temperature is on the cool side). When you get close to the end of the rise time, begin preheating your oven to 425ºF. Use your fingers to make dimples all over the dough.

Once the focaccia has risen and the oven is fully preheated, transfer the baking sheet to the oven and bake the focaccia bread for 20-25 minutes, or until it is nicely golden brown on top.

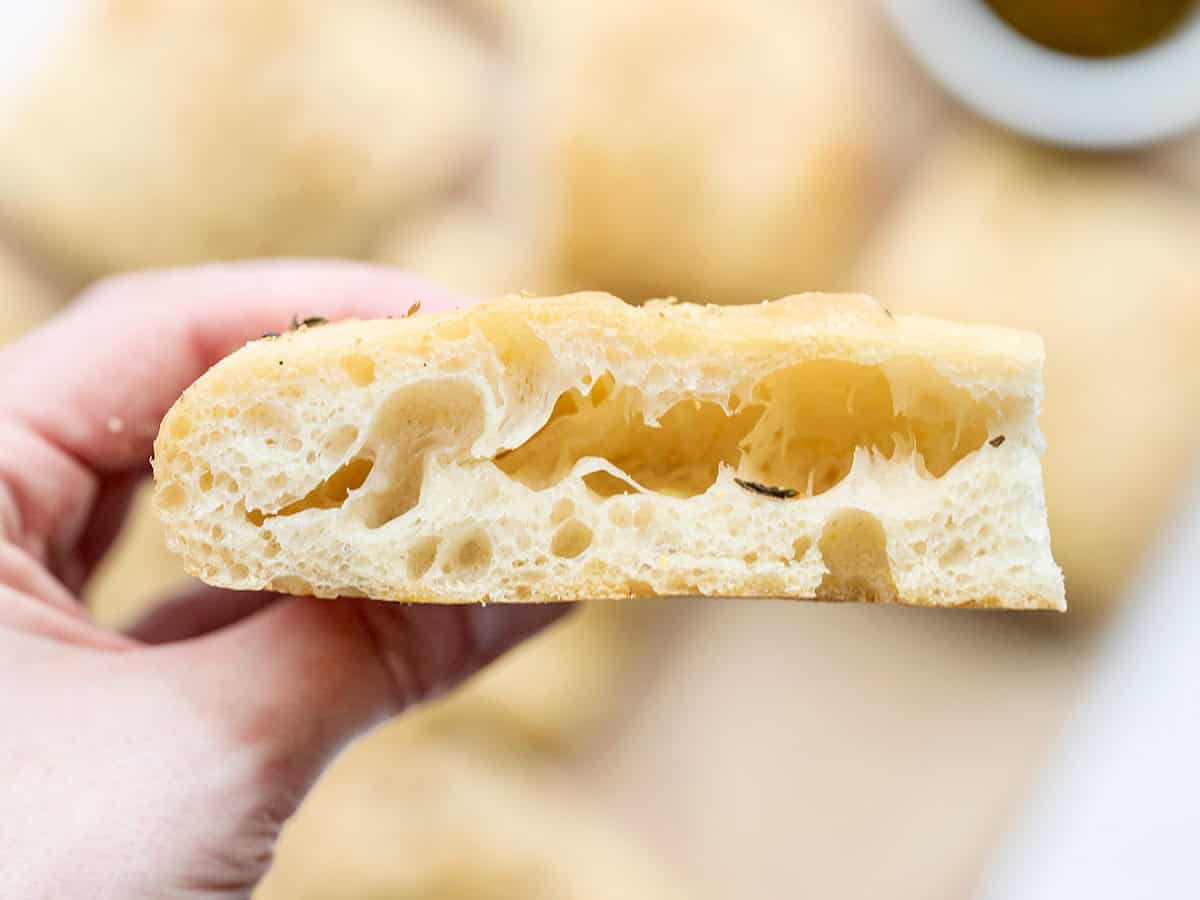
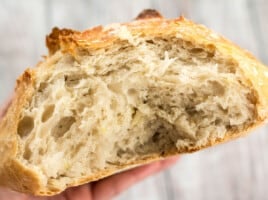
Look at those gorgeous bubbles!

Let the focaccia bread cool before slicing. You can slice it into 12 squares, or into strips, which are nice for dipping and dunking into soups and stews.
Can I Use Whole Wheat Flour?
Yes, you can substitute some of the all-purpose flour for whole wheat flour. Using all whole-wheat flour generally creates a very heavy and dense bread, so I highly suggest using only some, up to 50%, whole wheat flour. You may need to use slightly more water, as whole wheat flour absorbs more moisture than all-purpose flour.
What Do You Serve With No Knead Focaccia?
Focaccia is such a versatile bread! It makes a great side dish with just about any meal, but its hearty texture makes it great for dipping, dunking, and sopping up sauces, stews, and chicken noodle soup. It’s also delicious with something tomatoey, like my 15 bean soup or one pot veggie pasta. Or if I’m craving something creamy, our Marry Me lentils are too good and too easy to pass up, and go amazingly with this focaccia!
I love using this bread for sandwiches too, especially pressed sandwiches like paninis. You can also use this bread to make pizzas or flatbreads! Simply top it with your favorite cheese, meat, or vegetables and bake again until the cheese is melted and bubbly. If you’re just a bread fanatic like me, slice it into sticks, dip it in some homemade marinara sauce, and call it a day!
How to Store
After baking, make sure to allow the focaccia bread to cool completely to room temperature before storing to prevent condensation. Once cooled, you can keep the bread at room temperature in an air-tight container for about two days. If you can’t consume the entire loaf within two days, consider freezing a portion of it for longer storage.
To freeze the focaccia bread, simply let it cool completely until it is room temperature, cut it into slices (whichever size or shape you prefer), then place it in a gallon-sized freezer bag. The frozen bread thaws quickly at room temperature.

I used active dry yeast, increased to 1/2 teaspoon, also added 2 teaspoons of sugar to feed yeast during fermentation, I increased time of fermentation to 24 hrs, came out fantastic, easy recipe
Thank you so much for a wonderful recipe! I decided to try your focaccia recipe since my usual one is so complicated. This was so easy, and so good. I made it for my daughter’s birthday and got many rave reviews! This is now my go-to focaccia recipe, and I know I’ll make it more often because it’s simple and delicious.
I made this and it was delicious and easy! My dinner guests gobbled it up! Thank you!
This is an easy Family Favorite
This recipe never fails! Super-easy, can customize it to other flavours and is just perfect
I think I might have put too much water and tried to salvage it by adding more flour but after baking it came out flatter. Determined to try again cause it still tastes alright.
I’ve literally never even attempted to make bread but this looked so straightforward I thought “What the hell?” – might also have something to do with binging Great British Bakeoff lately 😅 It turned out so well! The only thing that went a bit sideways is the top of the dough dried out a bit while it was rising – will use a different cover technique next time. It tastes fantastic!
Can I cold proof this? How long do you think that would take? The 12-18 hour timeline lands at a horrible time and I can’t seem to do it for the life of me.
You probably can, but I’d need to do some testing to find out the optimal proof time at refrigerated temperatures and you might want to increase the yeast as well.
We did this as a cinnamon bread for breakfast. I added two tablespoons of sugar and maybe a teaspoon of cinnamon to the dough, used butter on the pan and the bread itself instead of oil, and when it had about ten minutes left in the oven I took it out and spread a little more butter on and sprinkled with cinnamon and sugar. It was a hit, kinda tasted like a baked-not-fried elephant ear, and SO easy. Gonna try to cinnamon sugar swirl the dough next time!
OMG, this is GENIUS! Thank you for sharing with everyone!
Nancy and I love the focassia bread. Can it be made with pizza sauce and toppings?
We just published this recipe last week, for Sheet Pan Pizza, using this recipe: https://www.budgetbytes.com/sheet-pan-pizza/
~Marion :)
My family loved this easy-to-make bread. It was a hit, and we will be making it again soon. Thank you for posting it! :)
Thank you for the recipe! If I don’t have access to instant yeast, would the same amount of active yeast be a reasonable substitute if proofed first?
You can definitely use it! You will just need a little bit more active dry yeast than instant. Heat up the same amount of water called for in the recipe — so it’s warm but not hot (around 110*F if you have a kitchen thermometer) — and then stir in 1 packet (approx. 2 1/4 tsp) of active dry yeast to disolve the outer coating protecting the yeast. If desired, you can also add a tsp of sugar or honey to “feed” it. Once the yeast starts to bloom (in 5-10 minutes), the mixture can be added to the flour and salt. The dough can ferment in the fridge overnight or at room temperature for 2-3 hours before transferring to the sheet pan for the second rise. ~Marion :)
What size baking pan do you use?
Hi, Carol! The enamelware sheet pan listed under EQUIPMENT on the recipe card is 16″ x 12.5″. (Just so you know, any equipment picture in this section of our recipes can be clicked on to reveal more product information!) Since this is a bit of an odd size, I wanted to make sure to tell you, you can use any sheet pan or metal baking dish that’s relatively this size (like a standard 1/2 sheet tray, which is 18″ x 13″). It will slightly affect the height of the bread, but the cooking time should remain relatively consistent. — Marion :)
Whipped this together before work, and came home to put it in the oven. Delicious! I added parmesan cheese to the top. Served it with Zuppa Toscana made with sweet potatoes instead of white. Yum!
But when was I supposed to add the cornmeal
STEP 3: Line a baking sheet with foil, then drizzle with 1 Tbsp olive oil. Spread the oil to coat the surface of the foil, then sprinkle cornmeal on top of the oil. XOXO -Monti