

I’ve always loved fermented foods, and these Easy Fermented Vegetables are simple, vegan, budget-friendly perfection. The longer they sit, the better they get! I love that I can use whatever odds and ends are in my veggie drawer and turn them into something totally crave-worthy (and good for my gut, too!). They’re a delicious, tangy, crunchy addition to any meal and make everything from rice bowls to sandwiches way more exciting. However, while I’ve made this fermented vegetable recipe as easy as possible, the process is super important, so let’s dive in.
All recipes are rigorously tested in our Nashville Test Kitchen to ensure they are easy, affordable, and delicious.
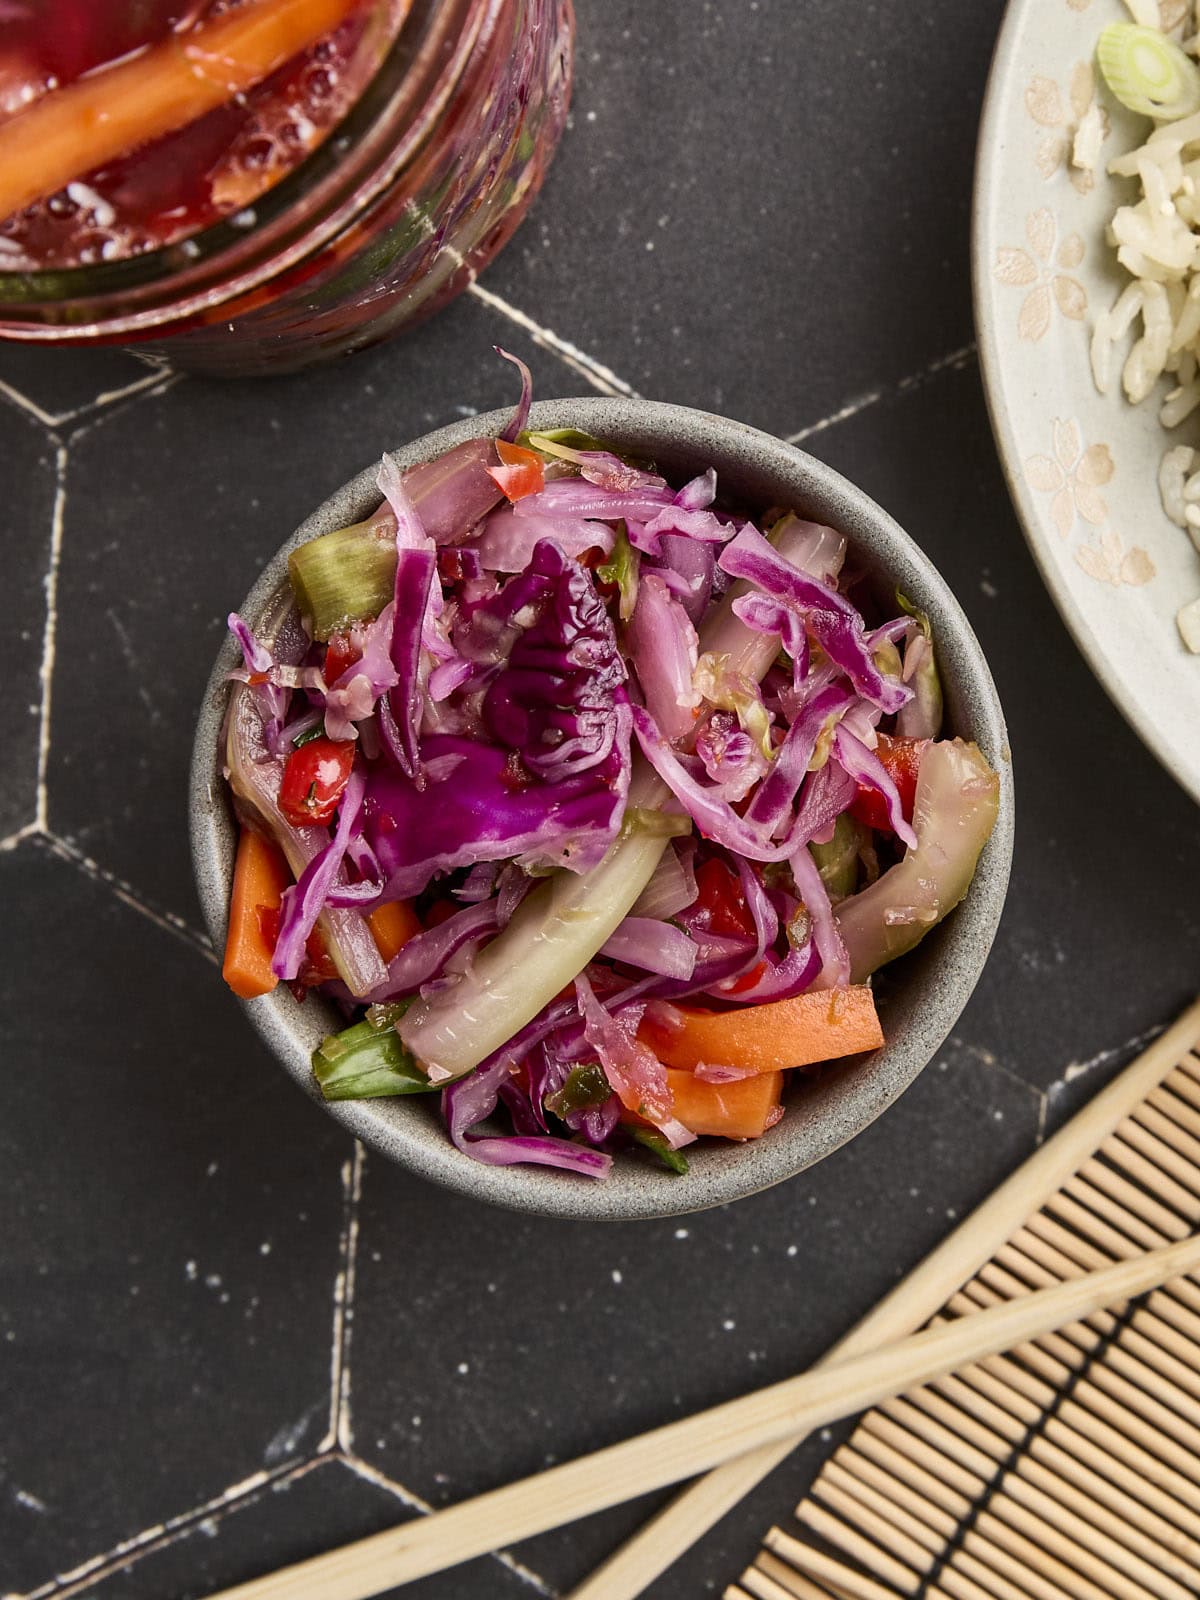
Easy Recipe for Fermented Vegetables
Fermented vegetables aren’t your average pickles (sorry, pickled red onions, I still love you!) Instead of vinegar, the magic happens through lacto-fermentation, where good bacteria (the healthy kind) naturally preserve the veggies and add the most delicious sour-savory flavor.
I used to spend way too much money on tiny jars of fermented veggies at the farmer’s market until I realized how easy and cheap it is to make them at home. This version gets a kick from fresh jalapeño, garlic, and ginger, plus a little sweetness from agave to balance it all out. Now, there’s always a jar in my fridge, and I add them to everything. 😋
Budget-Saving Tip
Don’t toss those forgotten veggies! This recipe is one of my favorite low-cost ways to stretch fresh produce a little further and reduce food waste. You can use just about any hardy vegetable you have on hand; I like to do a seasonal version as well, using raw pumpkin or butternut squash in the fall. Veggies like cucumbers and zucchini can be used, but because of their super high water content, they turn too mushy for my liking. Cabbage truly helps the texture, no matter what else you add, so pick out a nice fresh head of cabbage!
Easy Fermented Vegetables
Cost $6.41 recipe /$0.17 serving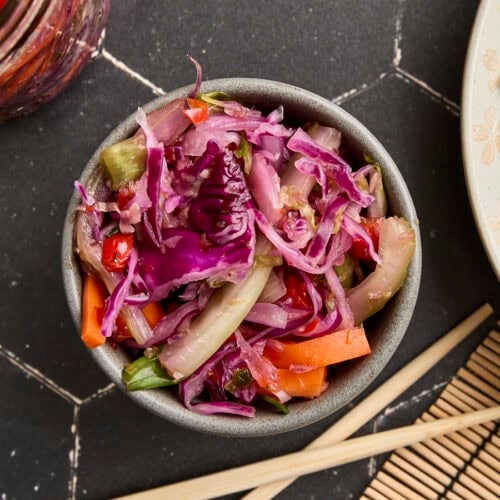
Ingredients
- 1 Tbsp agave ($0.14*)
- 1 jalapeño (seeded, $0.41)
- 1 red bell pepper (seeded and divided, $1.48)
- ½ red onion (divided, $0.54)
- 2 inch piece fresh ginger (peeled, $0.24)
- 2 large cloves garlic ($0.06)
- ½ green cabbage (mine was about 1 ¾ lbs, $1.66)
- ¼ red cabbage (mine was about ¾ lb, $0.86)
- 4 green onions ($0.48)
- 2 ribs celery ($0.30)
- 2 carrots ($0.16)
- 1 Tbsp sea salt ($0.08)
Instructions
- Begin by sanitizing your workspace and running three 12 oz canning jars through your dishwasher on high heat to sanitize them. Alternatively, you can also sanitize your jars by submerging them in boiling water and then allowing them to air dry.
- Meanwhile, in a food processor, combine agave syrup, 1 jalapeño (seeded), ½ red bell pepper (seeded), ¼ red onion, peeled ginger, and garlic cloves.
- Pulse vegetables and agave in a food processor until all vegetables have been broken down into a paste-like consistency, with any visible vegetables all being the same size, minced. Set aside.
- Prep all the vegetables: roughly chop or slice both cabbages, roughly chop the green onion (discarding only the very tip of the root), dice celery, julienne carrots, remaining ½ red bell pepper, and remaining ¼ red onion. This step is a great time to practice your knife skills or skip laboring over cutting everything and just chop it up coarsely. This recipe is very forgiving, and it’s fun to have a lot of different shapes that will contribute to the texture once it is fermented later.
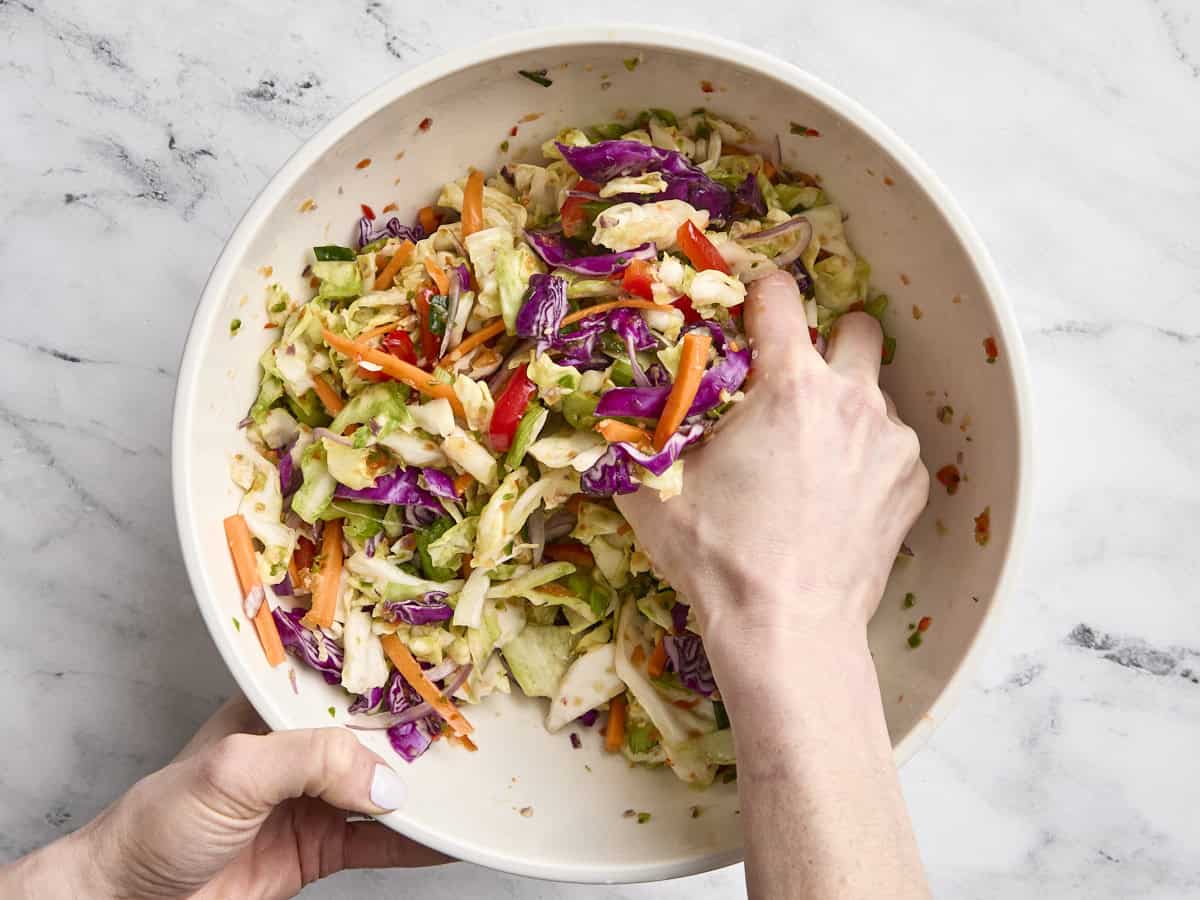
- In a large mixing bowl, combine all prepared veggies and salt. With clean hands, massage the salt into the prepared vegetables until they are all very soft. (It’s arm day, y’all! Use those muscles, and don’t stop!)
- After at least 10 minutes of massaging the vegetables and salt, add the prepared, processed vegetable and agave mixture. Continue to massage the vegetables and the spicy-sweet processed mixture together for another 5-10 minutes, or until a significant amount of water is released from the veggies, and you can see it pooling at the bottom of our bowl.
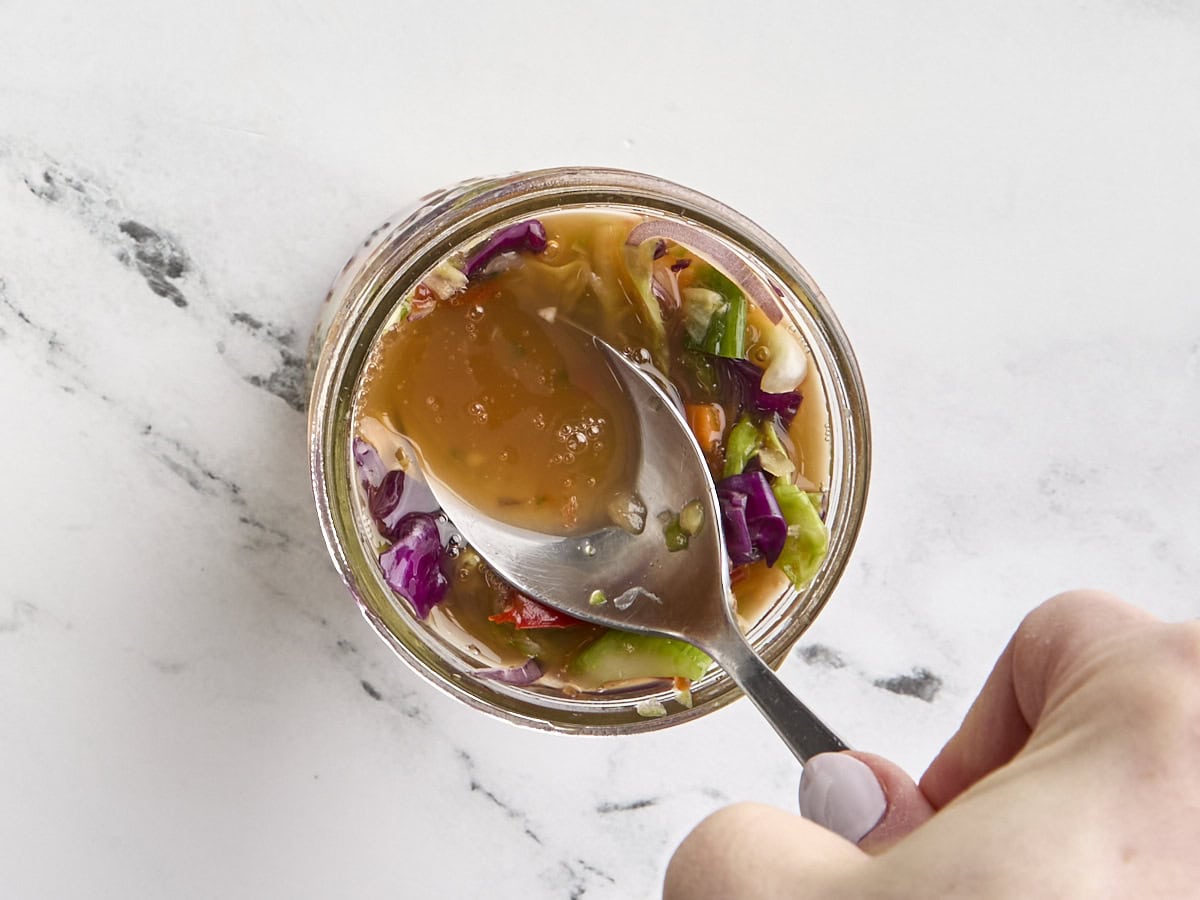
- With clean hands, spoon your mixture into jars and push it down firmly with the spoon once full. You should see a significant amount of liquid brine rising to the top, covering your vegetables whenever you push it down with the spoon (or clean fingers!) Don’t waste the brine; top off the jars as much as you can to cover the veggies.
- Place lids on jars loosely and wipe down the jars. Transfer the jars to a dark place in your kitchen for 24 hours. I like to place my jars in a spare Tupperware container and keep them under the sink, so they are contained and in a warm(ish) place to help with the early fermentation process.
- After 24 hours, carefully “burp” each jar by simply removing the lid to allow some of the naturally occurring gasses to escape. If your kitchen is particularly warm, you may want to burp your jars after just 12 hours to avoid a small (potent!) explosion. :)
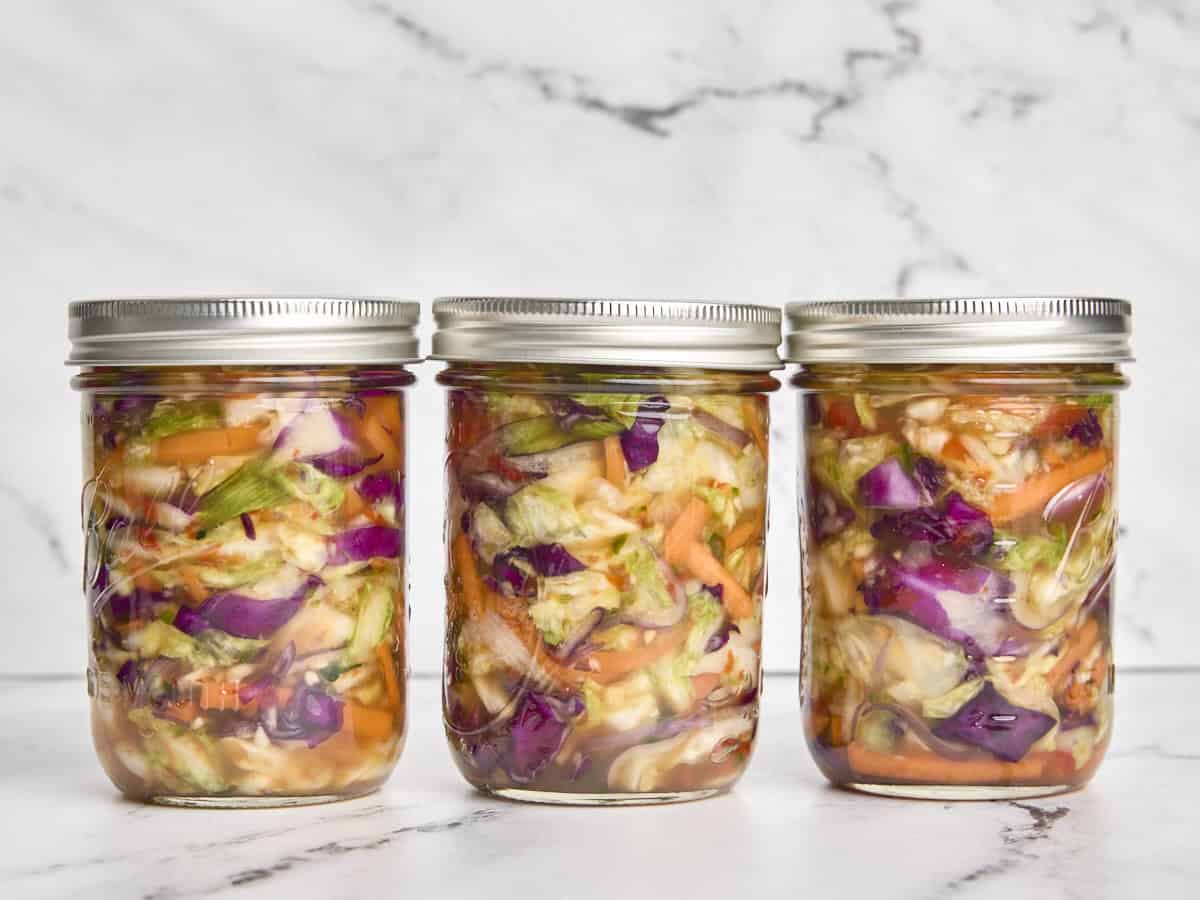
- After the initial 24-hour fermentation period, burp your jars every 8-12 hours until you see consistent, active bubbles every time you open the lid. Once you see a lot of bubbling on a regular basis, you can screw the lid on tight and transfer the jars to your refrigerator. It’s done!
See how we calculate recipe costs here.
Notes
Nutrition Information
how to make Fermented Vegetables step-by-step photos
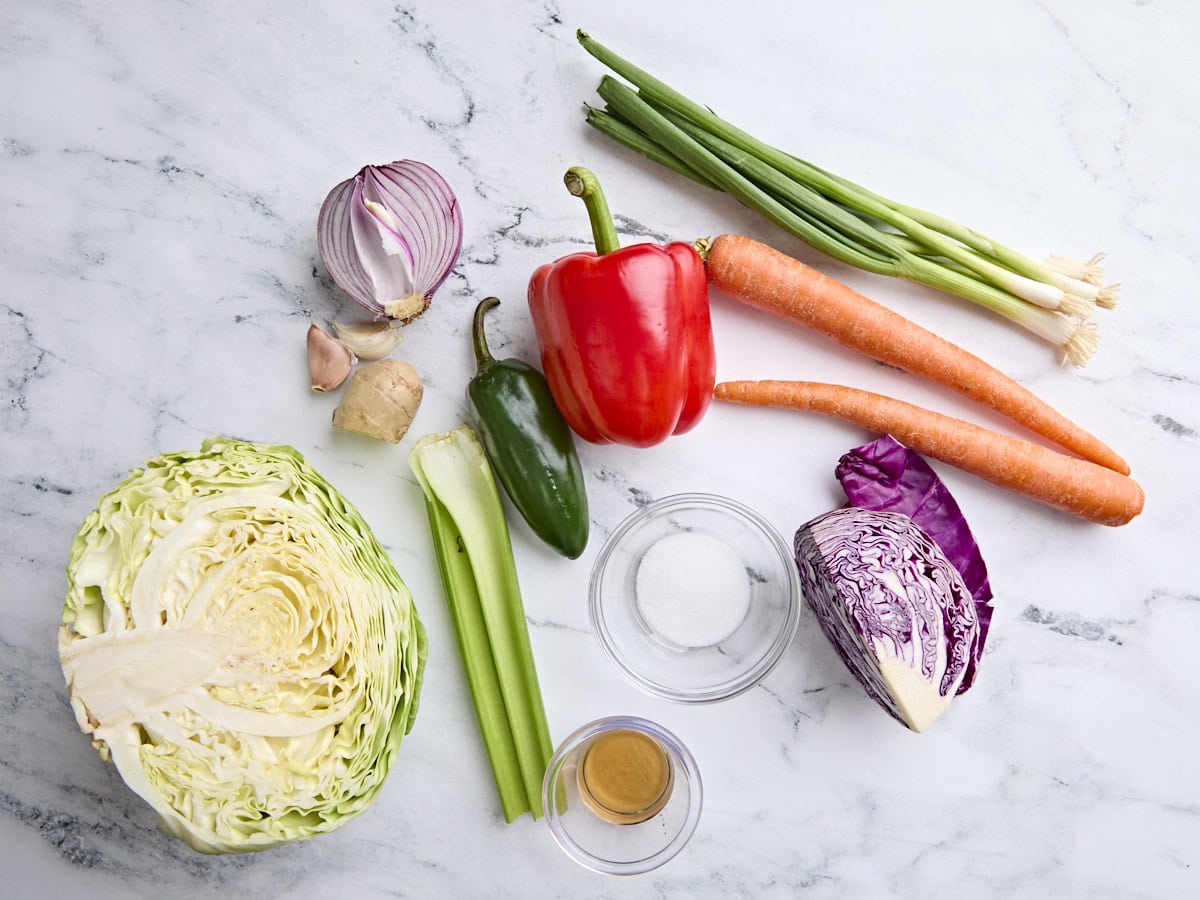
Gather all of your ingredients. Before starting, completely sanitize your workspace and run three 12 oz canning jars through your dishwasher on high heat to sanitize them. Or, you can alternatively sanitize your jars by submerging them in boiling water and then allowing them to air dry. I’ve also shared more on this below the step-by-step photos for reference.
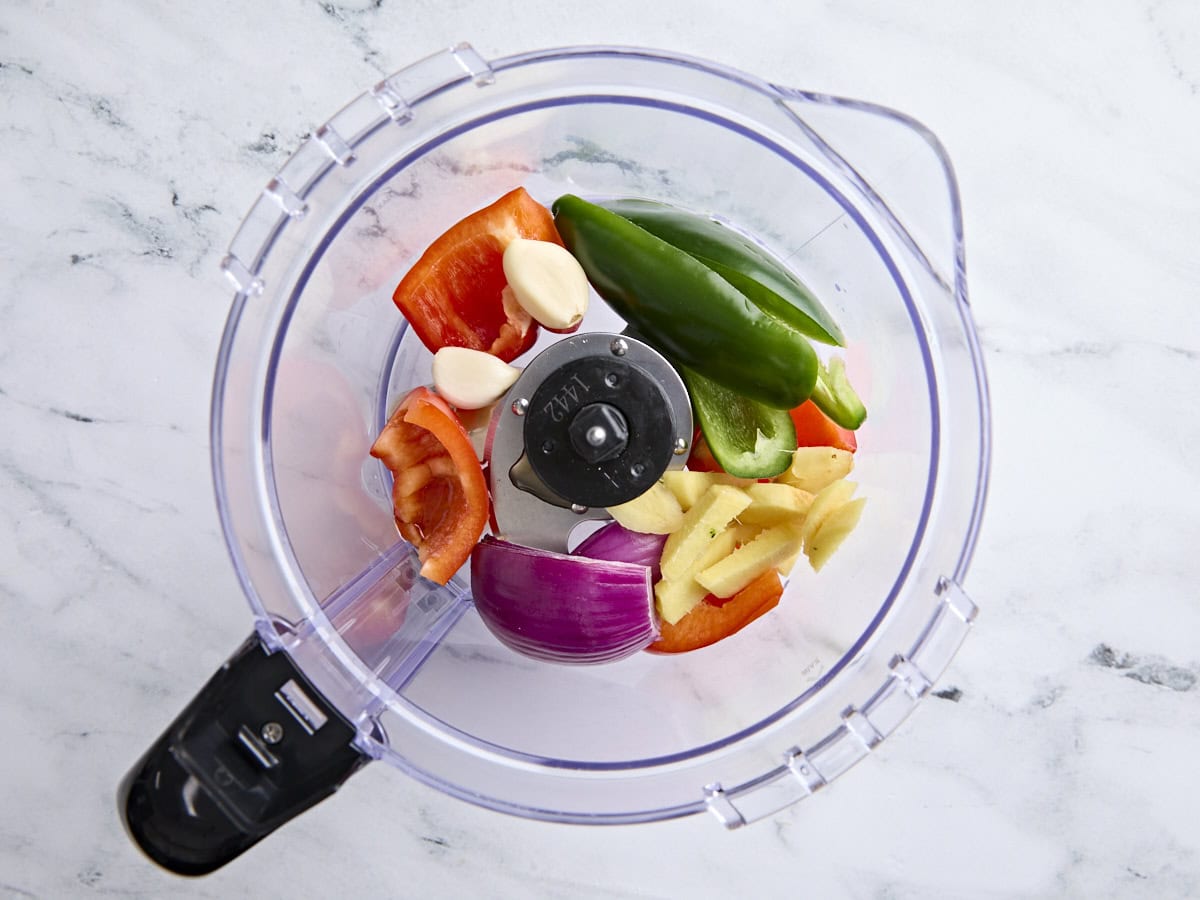
Prep the veggies: While you wait for your jars to sanitize, you can get started on the vegetables. Add 1 Tbsp agave syrup, 1 jalapeno (seeded), ½ red bell pepper (seeded), ¼ red onion, 2 inch peeled fresh ginger, and 2 large garlic cloves to a food processor.
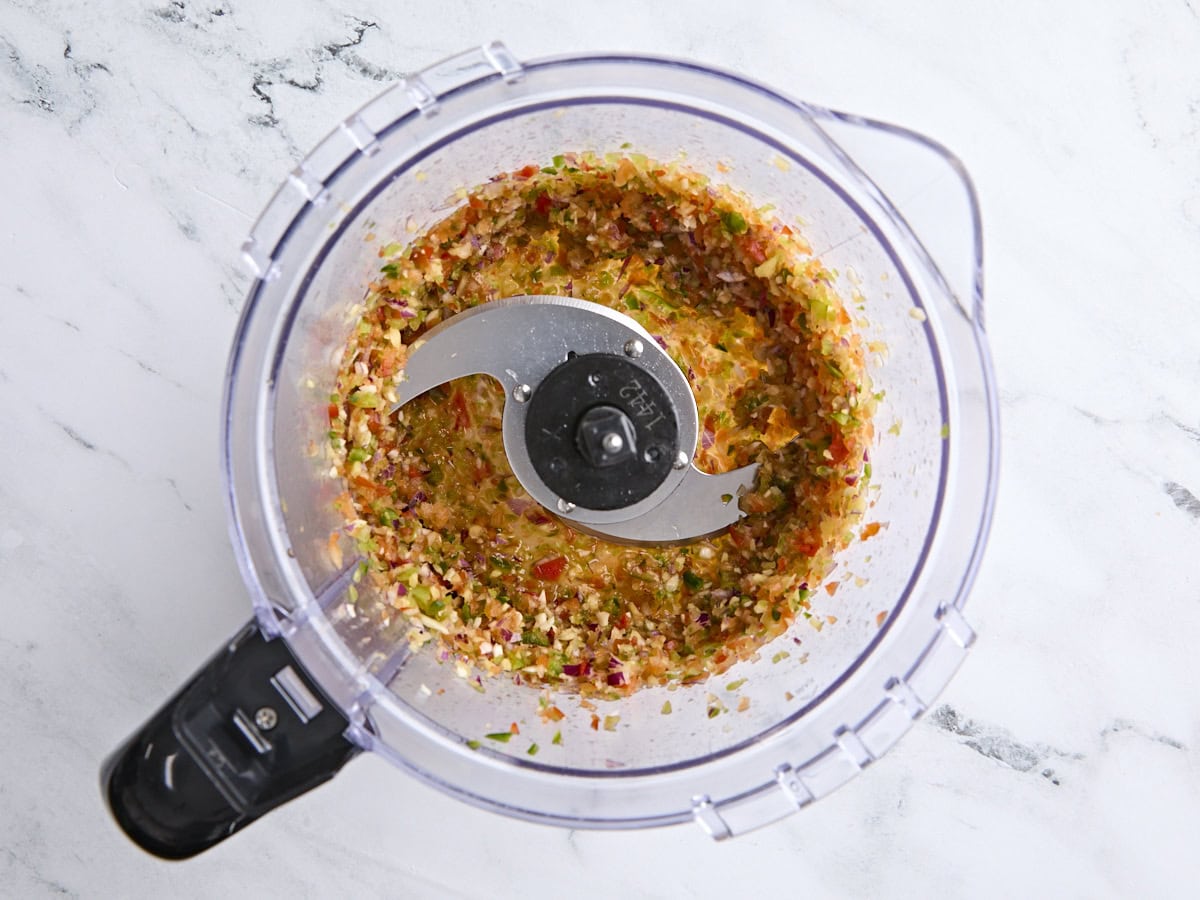
Pulse them in the food processor until all the veggies break down into a paste-like consistency. Any visible veggies should roughly be all the same size, minced. Set this mixture to one side for now.
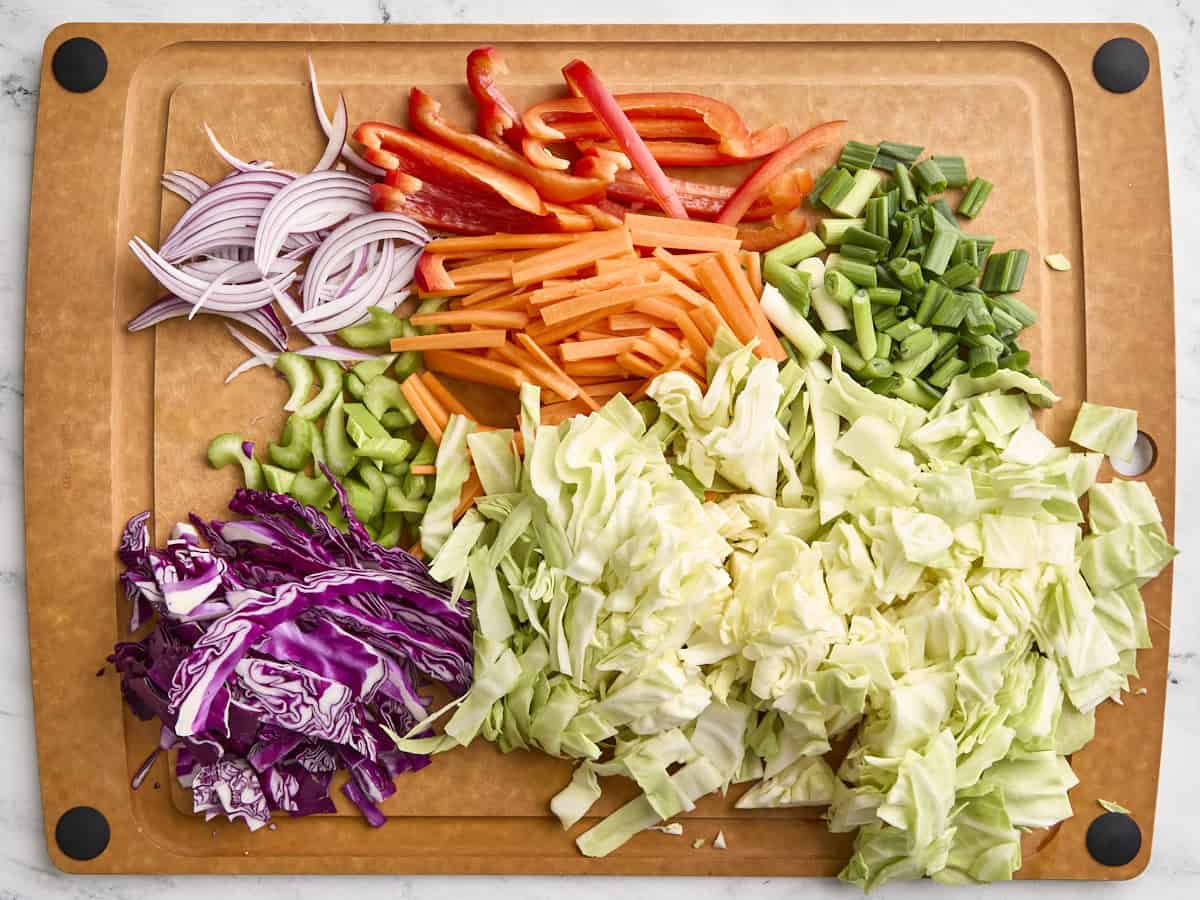
Now roughly chop or slice ½ green cabbage and ¼ red cabbage, roughly chop 4 green onions (discarding only the very tip of the root), dice 2 ribs celery, julienne (thinly slice) 2 carrots, remaining ½ red bell pepper, and remaining ¼ red onion. You can also chop up everything coarsely if desired (this recipe is very forgiving!)
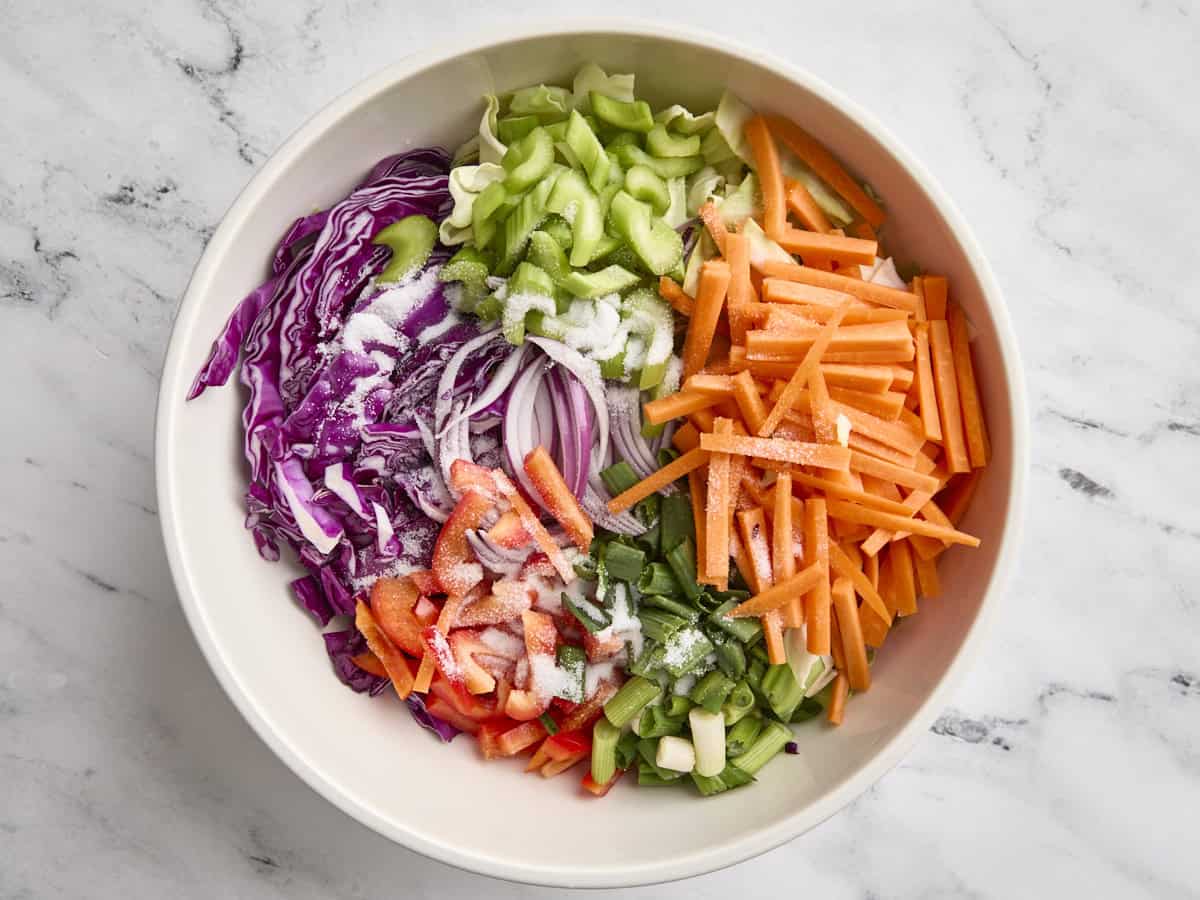
Massage the vegetables: Add the prepped vegetables to a large mixing bowl and sprinkle with 1 Tbsp salt. With clean hands, massage the salt into the vegetables until they are all very soft (about 10 minutes).
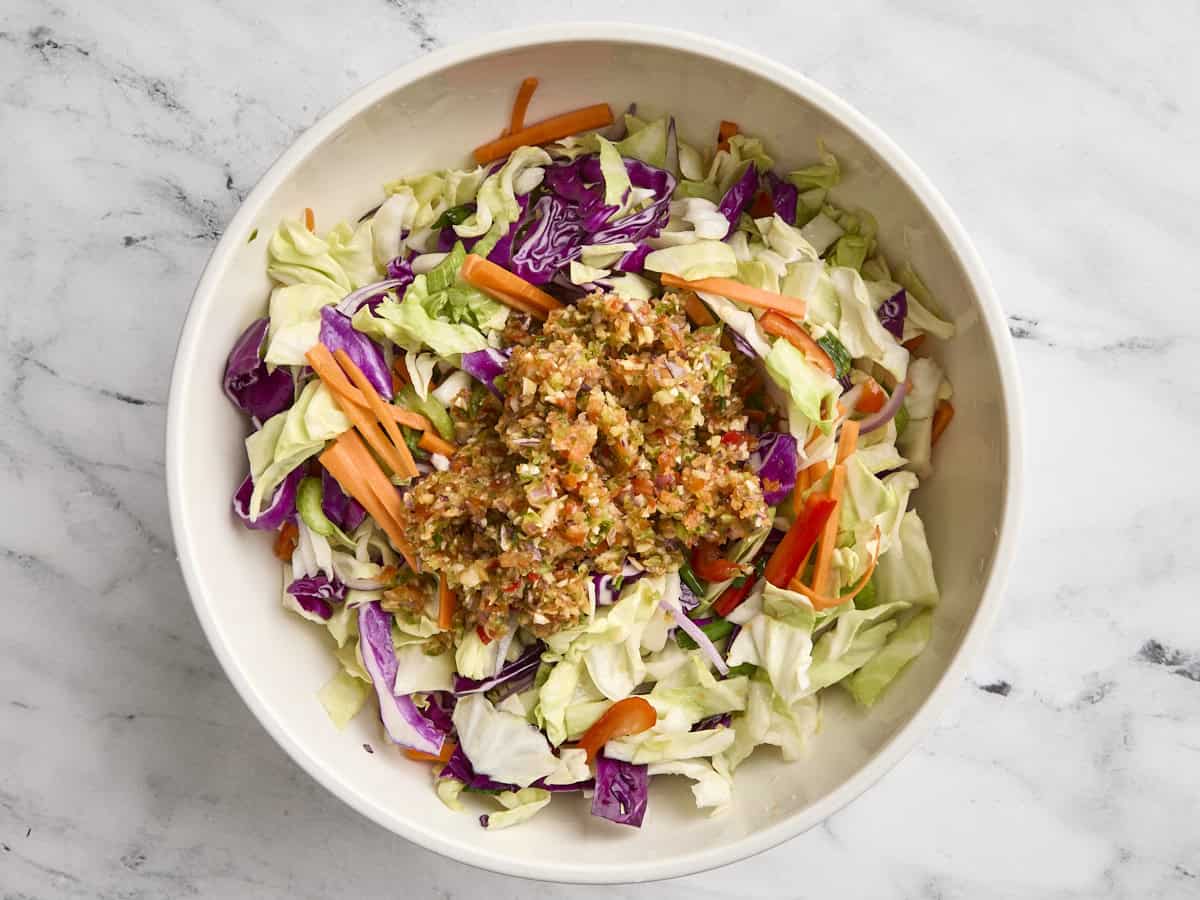
After at least 10 minutes of massaging, add the processed vegetables and agave mixture from your food processor to the bowl.
Massage the vegetables with the spicy-sweet processed mixture for a further 5-10 minutes or until a significant amount of water has been released from the veggies.
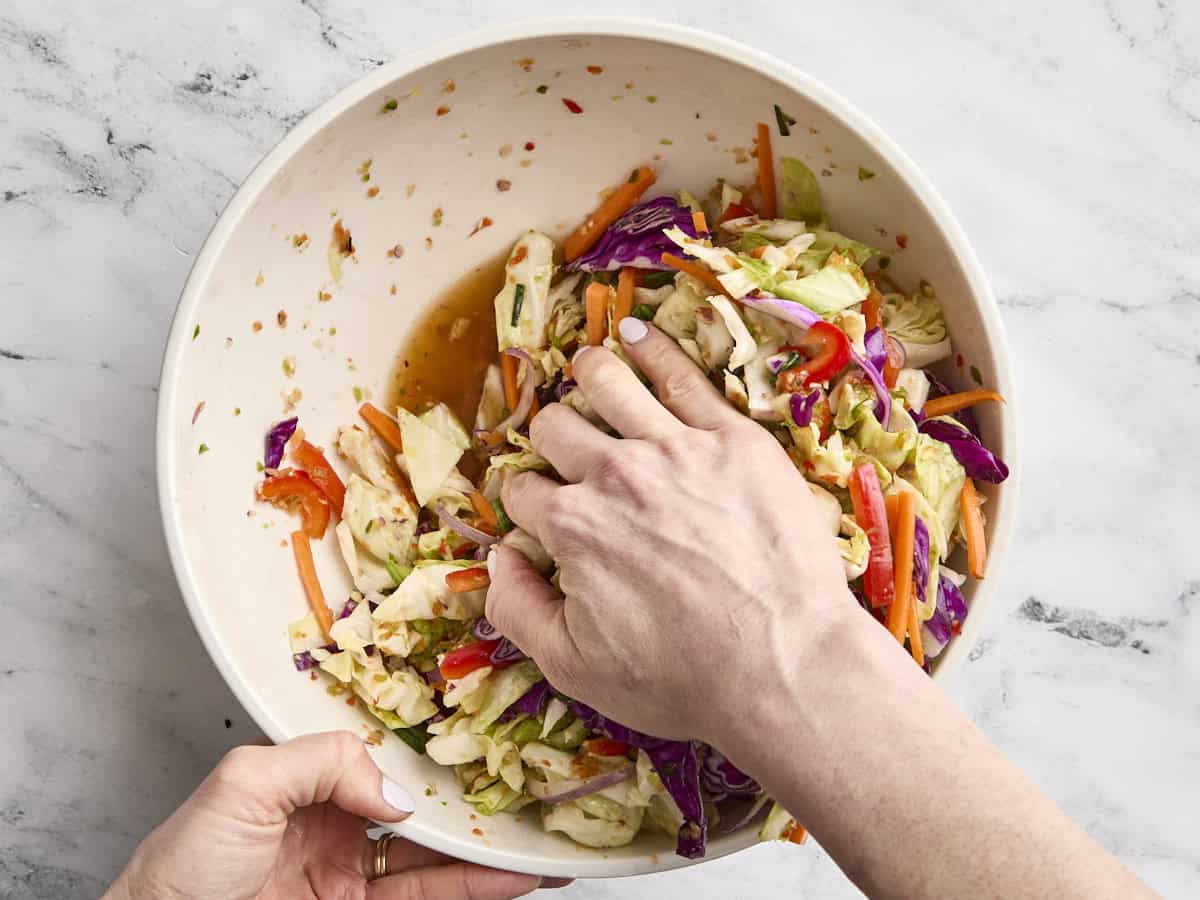
You should see it pooling at the bottom of your bowl, as shown in the photo above.
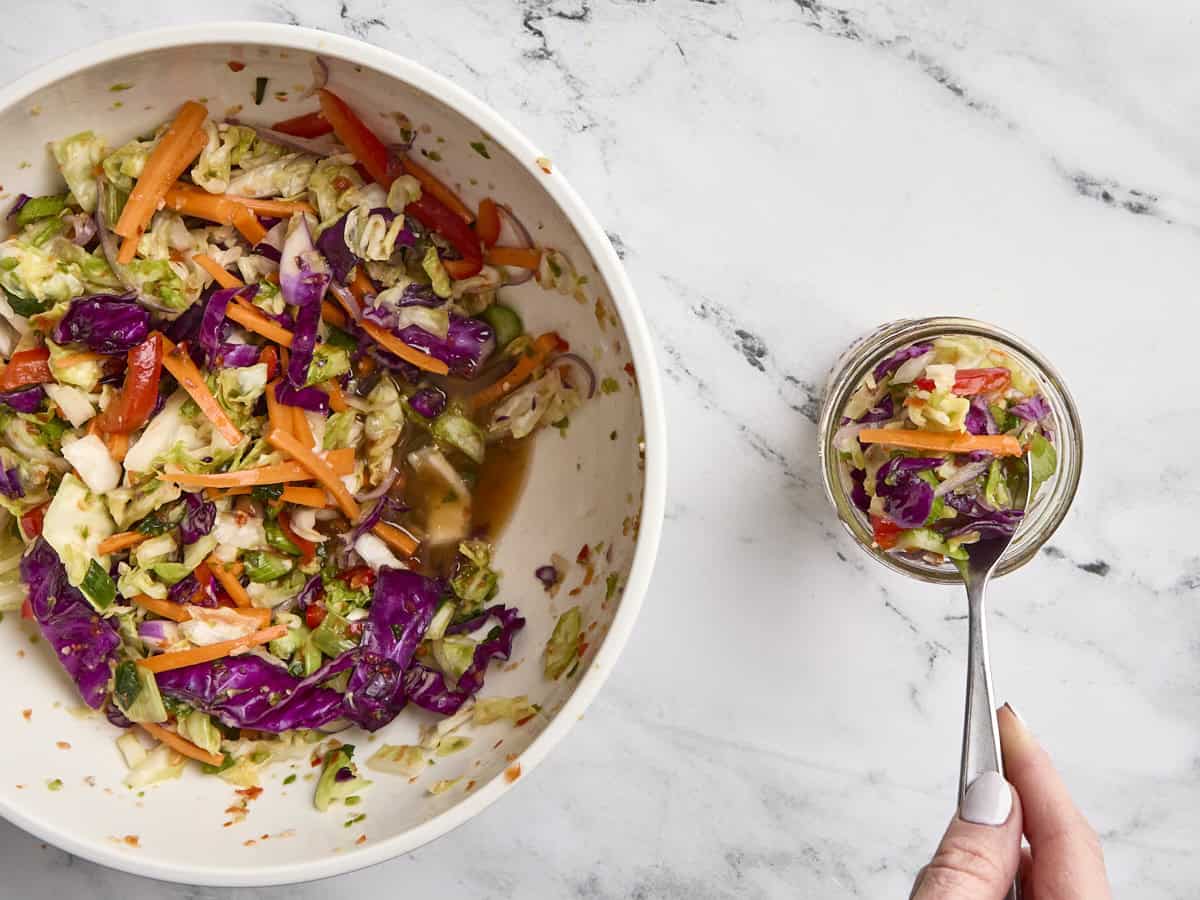
Add to jars: Again, with clean hands, use a spoon to add your veggie mix to the sterilized jars.
Push the mixture down firmly with your spoon once full (a significant amount of liquid brine should rise to the top, covering the prepped veggies as you push down).
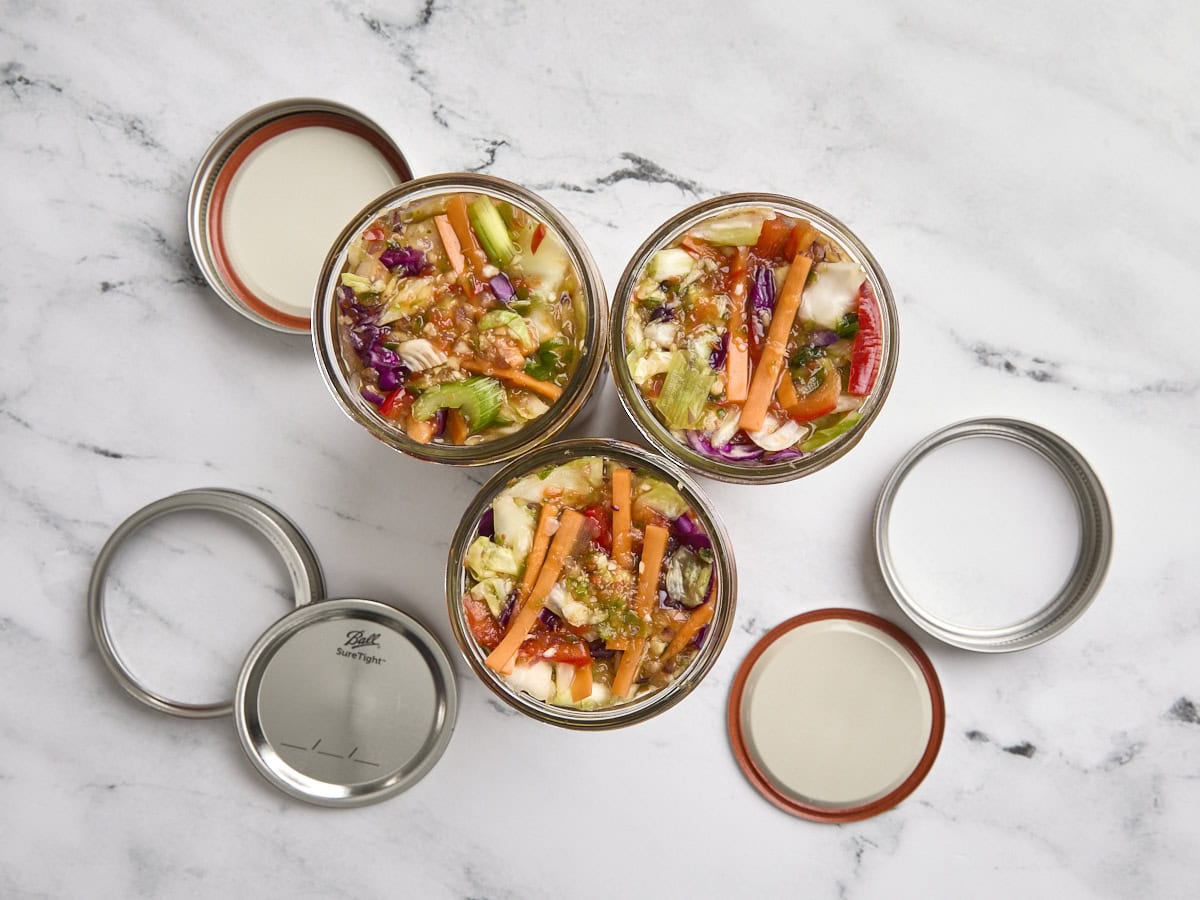
Don’t waste any of the brine from the bottom of the mixing bowl! Try to top off each jar with as much as you can. You ideally want all the veggies to be submerged in the brine for fermentation.
Ferment: Place the lids on the jars loosely and wipe down the sides of the jars. Now, place the jars in a dark place in your kitchen for 24 hours. (I like to place my jars in a spare Tupperware container and keep them under the sink so they are contained and in a warm(ish) place to help with the early fermentation process.)
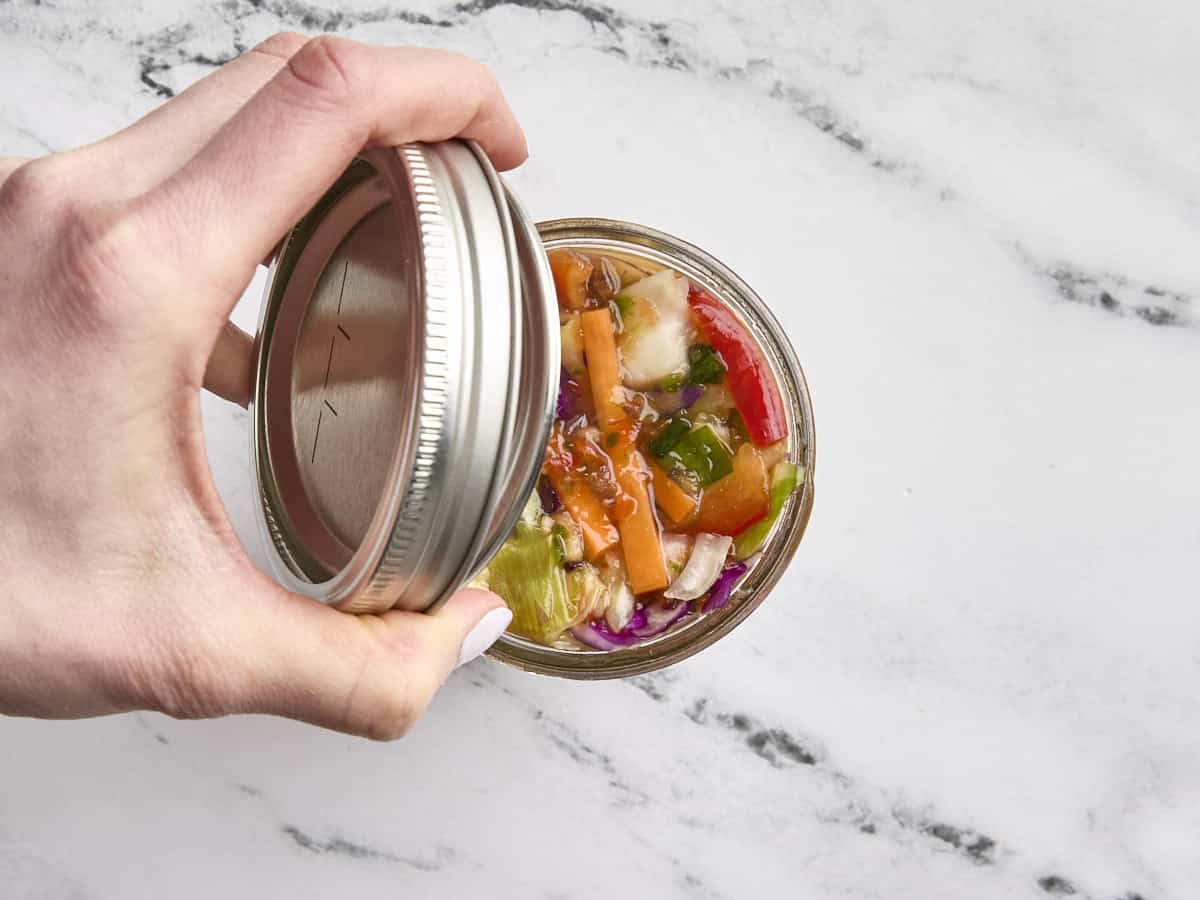
Once it’s been 24 hours, carefully ”burp” each jar by removing the lid. This allows some of the naturally occurring gases from the fermentation process to escape the jars. If your kitchen is quite warm, you may want to ”burp” your jars after 12 hours, not 24, to release the gases and avoid any small explosions!
After the initial 24-hour fermentation period, you want to burp your jars every 8-12 hours until you see consistent and active bubbles whenever you open the lid. As soon as you see lots of bubbling on a regular basis, screw the lid on tight and transfer the jars into your refrigerator. Now it’s ready to be eaten!

What is lacto-fermentation?
I mentioned lacto-fermentation earlier, but I just wanted to touch on what that actually means. It’s a natural preservation process where good bacteria (lactobacillus) feed on the sugars in the veggies and produce lactic acid. That acid gives these fermented veggies a tangy flavor and helps keep them safe to eat. This is the same process used when making sauerkraut and dill pickles. But before that can happen, we need to salt the veggies.
Salting helps draw out moisture, slows the growth of harmful bacteria, and creates a brine that sets the stage for fermentation. So, yes, all that massaging the veggies isn’t just a good workout—it’s vital for the lacto-fermentation process!
Important Recipe Success Tips!
- CLEAN CLEAN CLEAN! Whether you’re experimenting with this recipe, sauerkraut, pickling, brewing beer, or making kombucha, you want to make sure you’re always working with clean materials when it comes to fermentation. We’re trying to promote healthy bacteria, not the bad kind!
- Sanitize your jars. Following on from the previous point, you must sanitize your jars before starting this recipe. Run them through the dishwasher on high heat, submerge them in boiling water, and let them air dry, or give them a bath in a food-grade hydrogen peroxide and water mix (follow the label for the correct ratio and instructions).
- Keep it submerged. You can use the rough ends of your cabbage and red onion or the butts of carrots to help keep the prepared vegetables submerged in the brine during the fermentation process. Just put the lid on top after you add the rough vegetable ends. Before you get to the refrigerator step, discard those pieces of veggies that didn’t go beneath the brine. If you skip this tip, you must remove any fermented vegetables that didn’t sit underneath the brine before eating. (Sometimes this happens if you are short on brine.) Everything underneath will be fermented just right and safe to eat!
- Don’t tighten the lid during fermentation. Make sure to leave the lid loose while your vegetables ferment. Tightening the lid too early can lead to pressure buildup (and possibly a veggie explosion…not fun!)
- Use a sea salt with no additives. Stick to plain sea salt with no additives. Additives can interfere with fermentation, and I want you to give those good bacteria the best chance to thrive!
Serving Suggestions
I love piling these lacto-fermented vegetables on scrambled eggs…it adds just the right kick to a simple breakfast. For lunch or dinner, I’d toss them into a vegetable fried rice or add them to an easy bowl meal (my loaded cauliflower bowls are perfect for this!). You can also spoon it over grain bowls, stuff it into cottage cheese wraps and sandwiches, or add it to any salad for an extra punch of flavor.
How to Store
This recipe can last for several months in an airtight jar in the fridge. Be sure to use clean fingers or utensils whenever you grab some, as introducing new bacteria can shorten its life span or throw off the flavor. Also, make sure the top layer is always submerged under the brine to keep everything fresh and safe. If anything starts to look or smell off, it’s best to toss it and start a new batch.


Could you use maple syrup instead of agave syrup?
Maple syrup should be okay but I would not do honey!
Correct! Honey is naturally antimicrobial and antibacterial and will not promote microbial growth (fermentation!)
Took just over 48 hours to ferment. Worth the effort, had with eggs this morning.