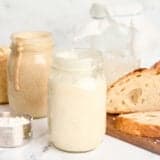
Sourdough Starter
Learn how to make an active Sourdough Starter from scratch using all-purpose flour and water! Discover EVERYTHING you need to know in this easy guide.
Servings: 1 batch
Calories:
Equipment
- Kitchen Scale or Measuring Cups
- 1 Large Glass Mason Jar
- Cheesecloth or a Coffee Filter
- Elastic Band
Ingredients
- 75 g water (or ½ cup water)* $0.00
- 75 g all-purpose flour (or ½ cup flour) $0.07
Instructions
Directions for Day 1
- Sanitize a large mason jar and zero it out (or “tare”) on a kitchen scale set to measure grams.**
- Add 75g of all purpose flour to the jar. For me, this was ½ cup of flour.
- Zero out the scale again by pressing the “tare” button, and add 75g of water. If you don’t have a kitchen scale, just use a 1:1 ratio of water to flour throughout the entire process. So, if you add ½ cup of flour, add ½ cup of water.
- Stir the flour and water together with a clean spoon and cover the jar with a piece of cheesecloth, a coffee filter, or a clean, dry paper towel.*** Secure the cloth with an elastic or butcher twine. You want to make sure you give it a good stir—oxygen is necessary when making sourdough starter!
- Let it sit on the counter for 24 hours in a 75-80 degree warm spot. I like to make a little line on the glass jar with a permanent marker so I can see how much my starter grows as it develops over the course of the week.
Directions for Day 2
- Give your starter a stir with a clean spoon. Remember, oxygen is good for the process! Let it sit for Day 2 undisturbed in the 75-80 degree warm spot while it develops a bit more. You may see bubbles on day 2, or you may not. Trust the process!
Directions for Day 3 to (potentially) Day 14
- It’s feeding time! Remove half of the sourdough starter from the jar. This is your discard! Use a spoon and scoop it out…eyeball what’s “half”, or use your scale. Remember to factor in the weight of the empty jar if you’re using a scale to get the exact number.
- To the jar, add 75g of all-purpose flour and 75g of water. Mix with a clean spoon until completely smooth. It will look like thick pancake or muffin batter.
- Cover with a coffee filter, paper towel, or cheese cloth with an elastic band and let it sit on the countertop for 12-24 hours.
- Repeat these steps over and over until it has doubled in size (at least 250-300g), has consistent bubbles, smells pleasantly yeasty, and appears to be the texture of marshmallow fluff!
- Name your starter! It’s the “mother” of every loaf of bread you’ll make from here on out…Plus, it’s bad luck if you don’t! (Mine are named Agnes and Rita after my grandmothers!)
See how we calculate recipe costs here.
Notes
*You can use filtered, bottled, or tap water. If your tap water is heavily treated with chlorine, you can fill a bottle with tap water and let it sit uncovered for 24 hours to allow the chlorine to evaporate out before using, if desired. Heavily treated tap water can sometimes prolong the fermentation process.
**Take note of the weight of your empty glass jar. It'll come in handy on Day 3 and beyond when it comes time to discard and feed. If you aren't using a scale, don't worry about this note.
***I recommend a coffee filter or cheesecloth to avoid any paper towel "fuzz" getting into your starter, but a clean, dry paper towel will work in a pinch!